


")
No Demo Reno Bathroom
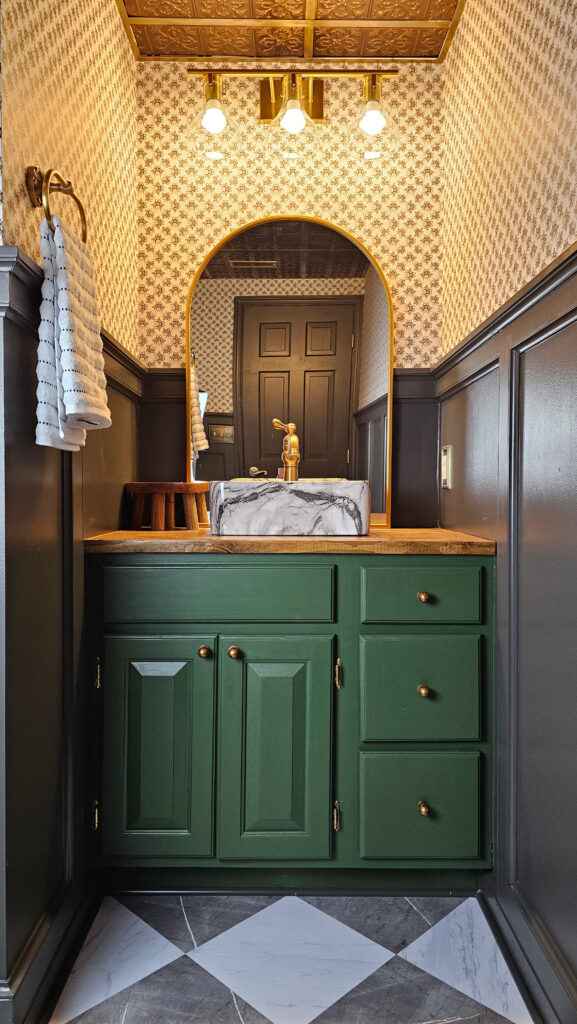
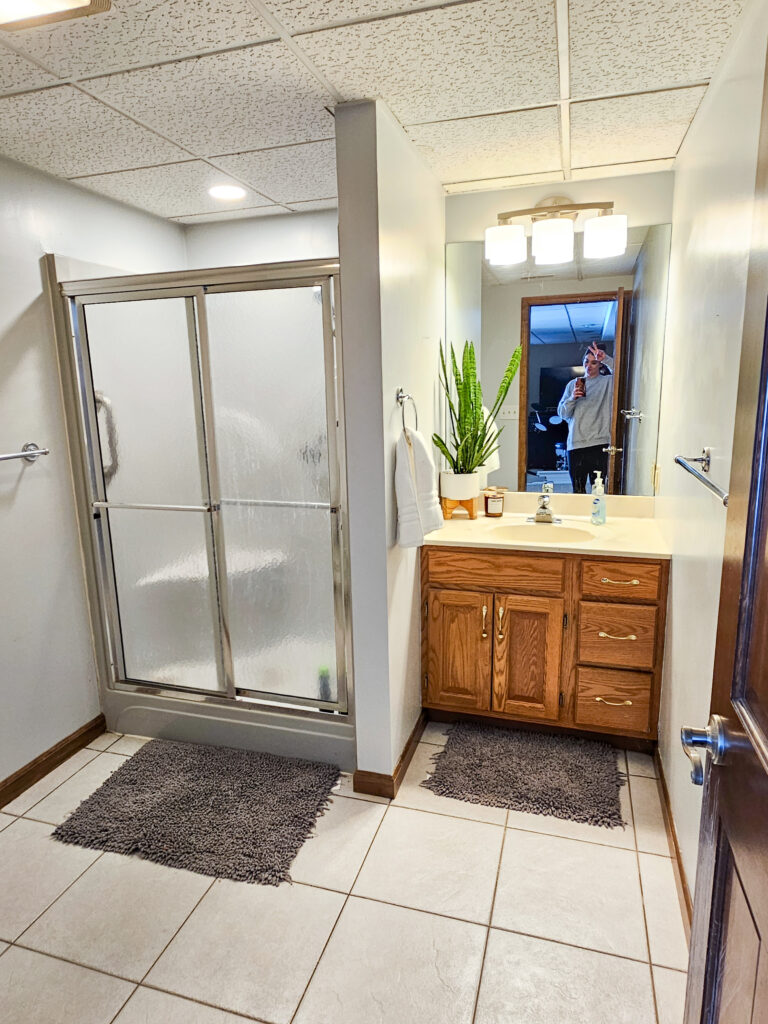
When we purchased our home, we were so excited to have a finished basement! This isn’t something we had in our previous home and for 3 years we have pictured it as someday being the ultimate hangout spot! Finally, this year I was able to get started. Most of the budget I wanted to allocate out to the rest of the basement, not the bathroom. So, I opted for a “No Demo Reno” to hopefully cut costs! I have broken it all down at the bottom of this post. Let me walk you through some of the budget friendly updates I made! Each project has its own blog post linked below with full shoppable supply lists so be sure to check them out!
*I may earn a small commission on any linked items in this article*
Board & Batten Wall
Adding in a simple design on your walls can be a great way to easily transform a space. Most of this trim work can be done with a saw and nail gun so you don’t need a ton of tools to do this. I started by deciding what design I wanted. I first added in the board and battens, then added cove molding in the middle of my boxes for added dimension. On the top of the boards, I turned a board on its side so there is a small ledge all the way around the bathroom. I also have a video over on Instagram on how I did this Board & Batten Wall just click here!
Blog Post: Board & Batten Wall
Blog Post: How to Cut Cove Molding – the easy way!
Cost Breakdown:
- 1x3x8 Boards – 15 boards at $4.48 each = $67.20
- Cove Molding – 12 pieces at $4.28 each – $51.36
- Caulk, Filler, Nails, misc. – $25
- Paint – $30
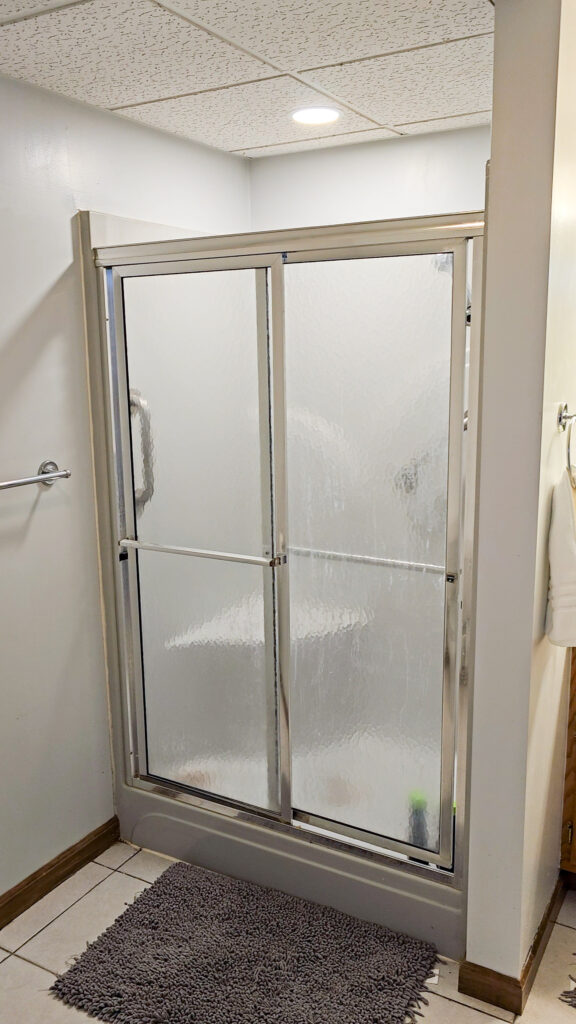
Shower Update
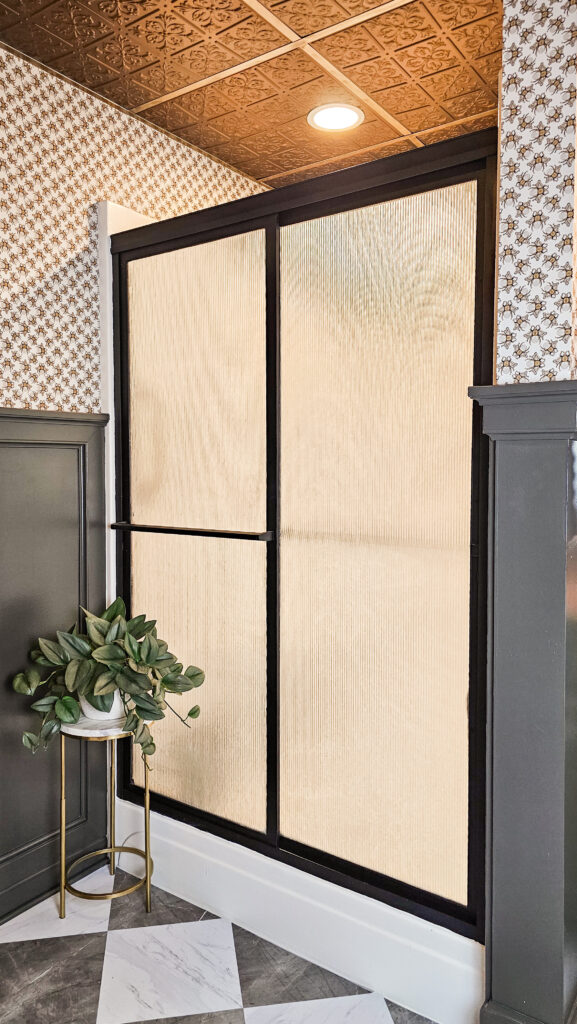
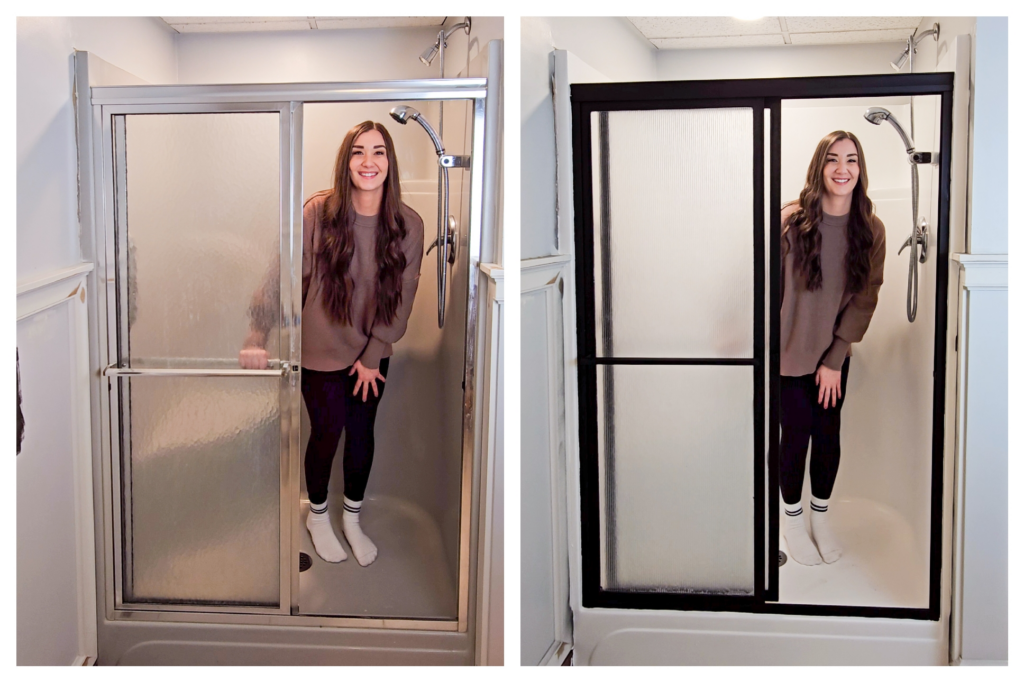
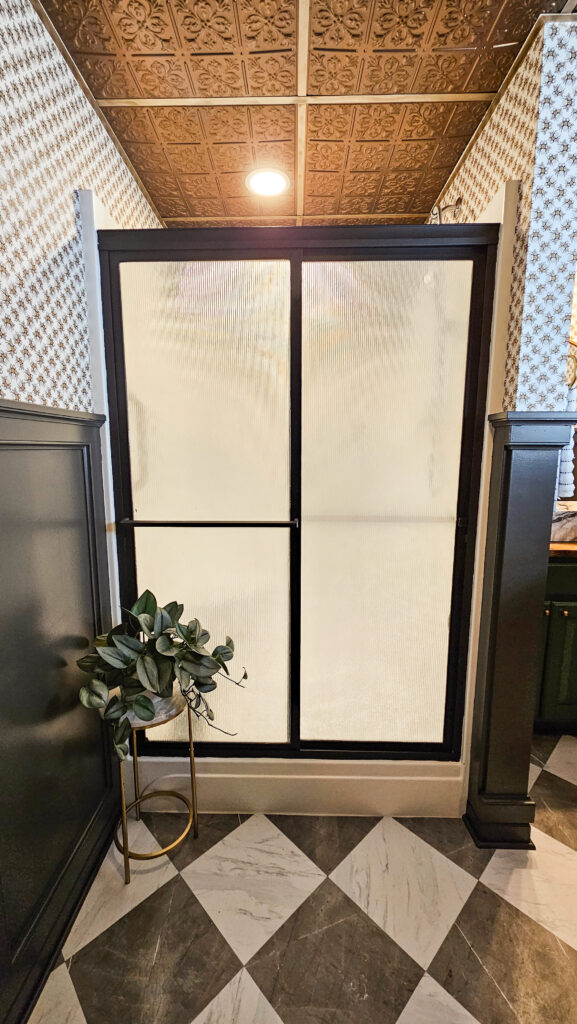
For the shower, I would have loved to try my hand at tiling. But that can get expensive! Instead, I purchased Tub & Tile paint and took this gray shower to white in just a day! This was super easy to do and instantly brightened up this shower. I also wanted to update the glass shower doors as well. I didn’t want to take them off entirely because they are great at keeping the water inside the shower when I wash the dogs down here. Instead, I painted the frames of them black and then added this Faux Reeded Glass cling to give it a more modern look.
Blog Post: How to Paint a Shower or Tub
Video: How to Paint Your Shower: Click Here!
Blog Post: How to Paint Shower Doors
Video: How to Paint Your Shower Doors: Click Here!
Cost Breakdown:
- Shower Paint Kit – 2 kits at $35 each = $70
- Primer Spray Paint for doors – 2 cans at $13.50 each = $27
- Enamel Black Spray Paint for doors – 2 cans at $10 each = $20
- Faux Cling Glass – 2 rolls at $16.99 each = $42
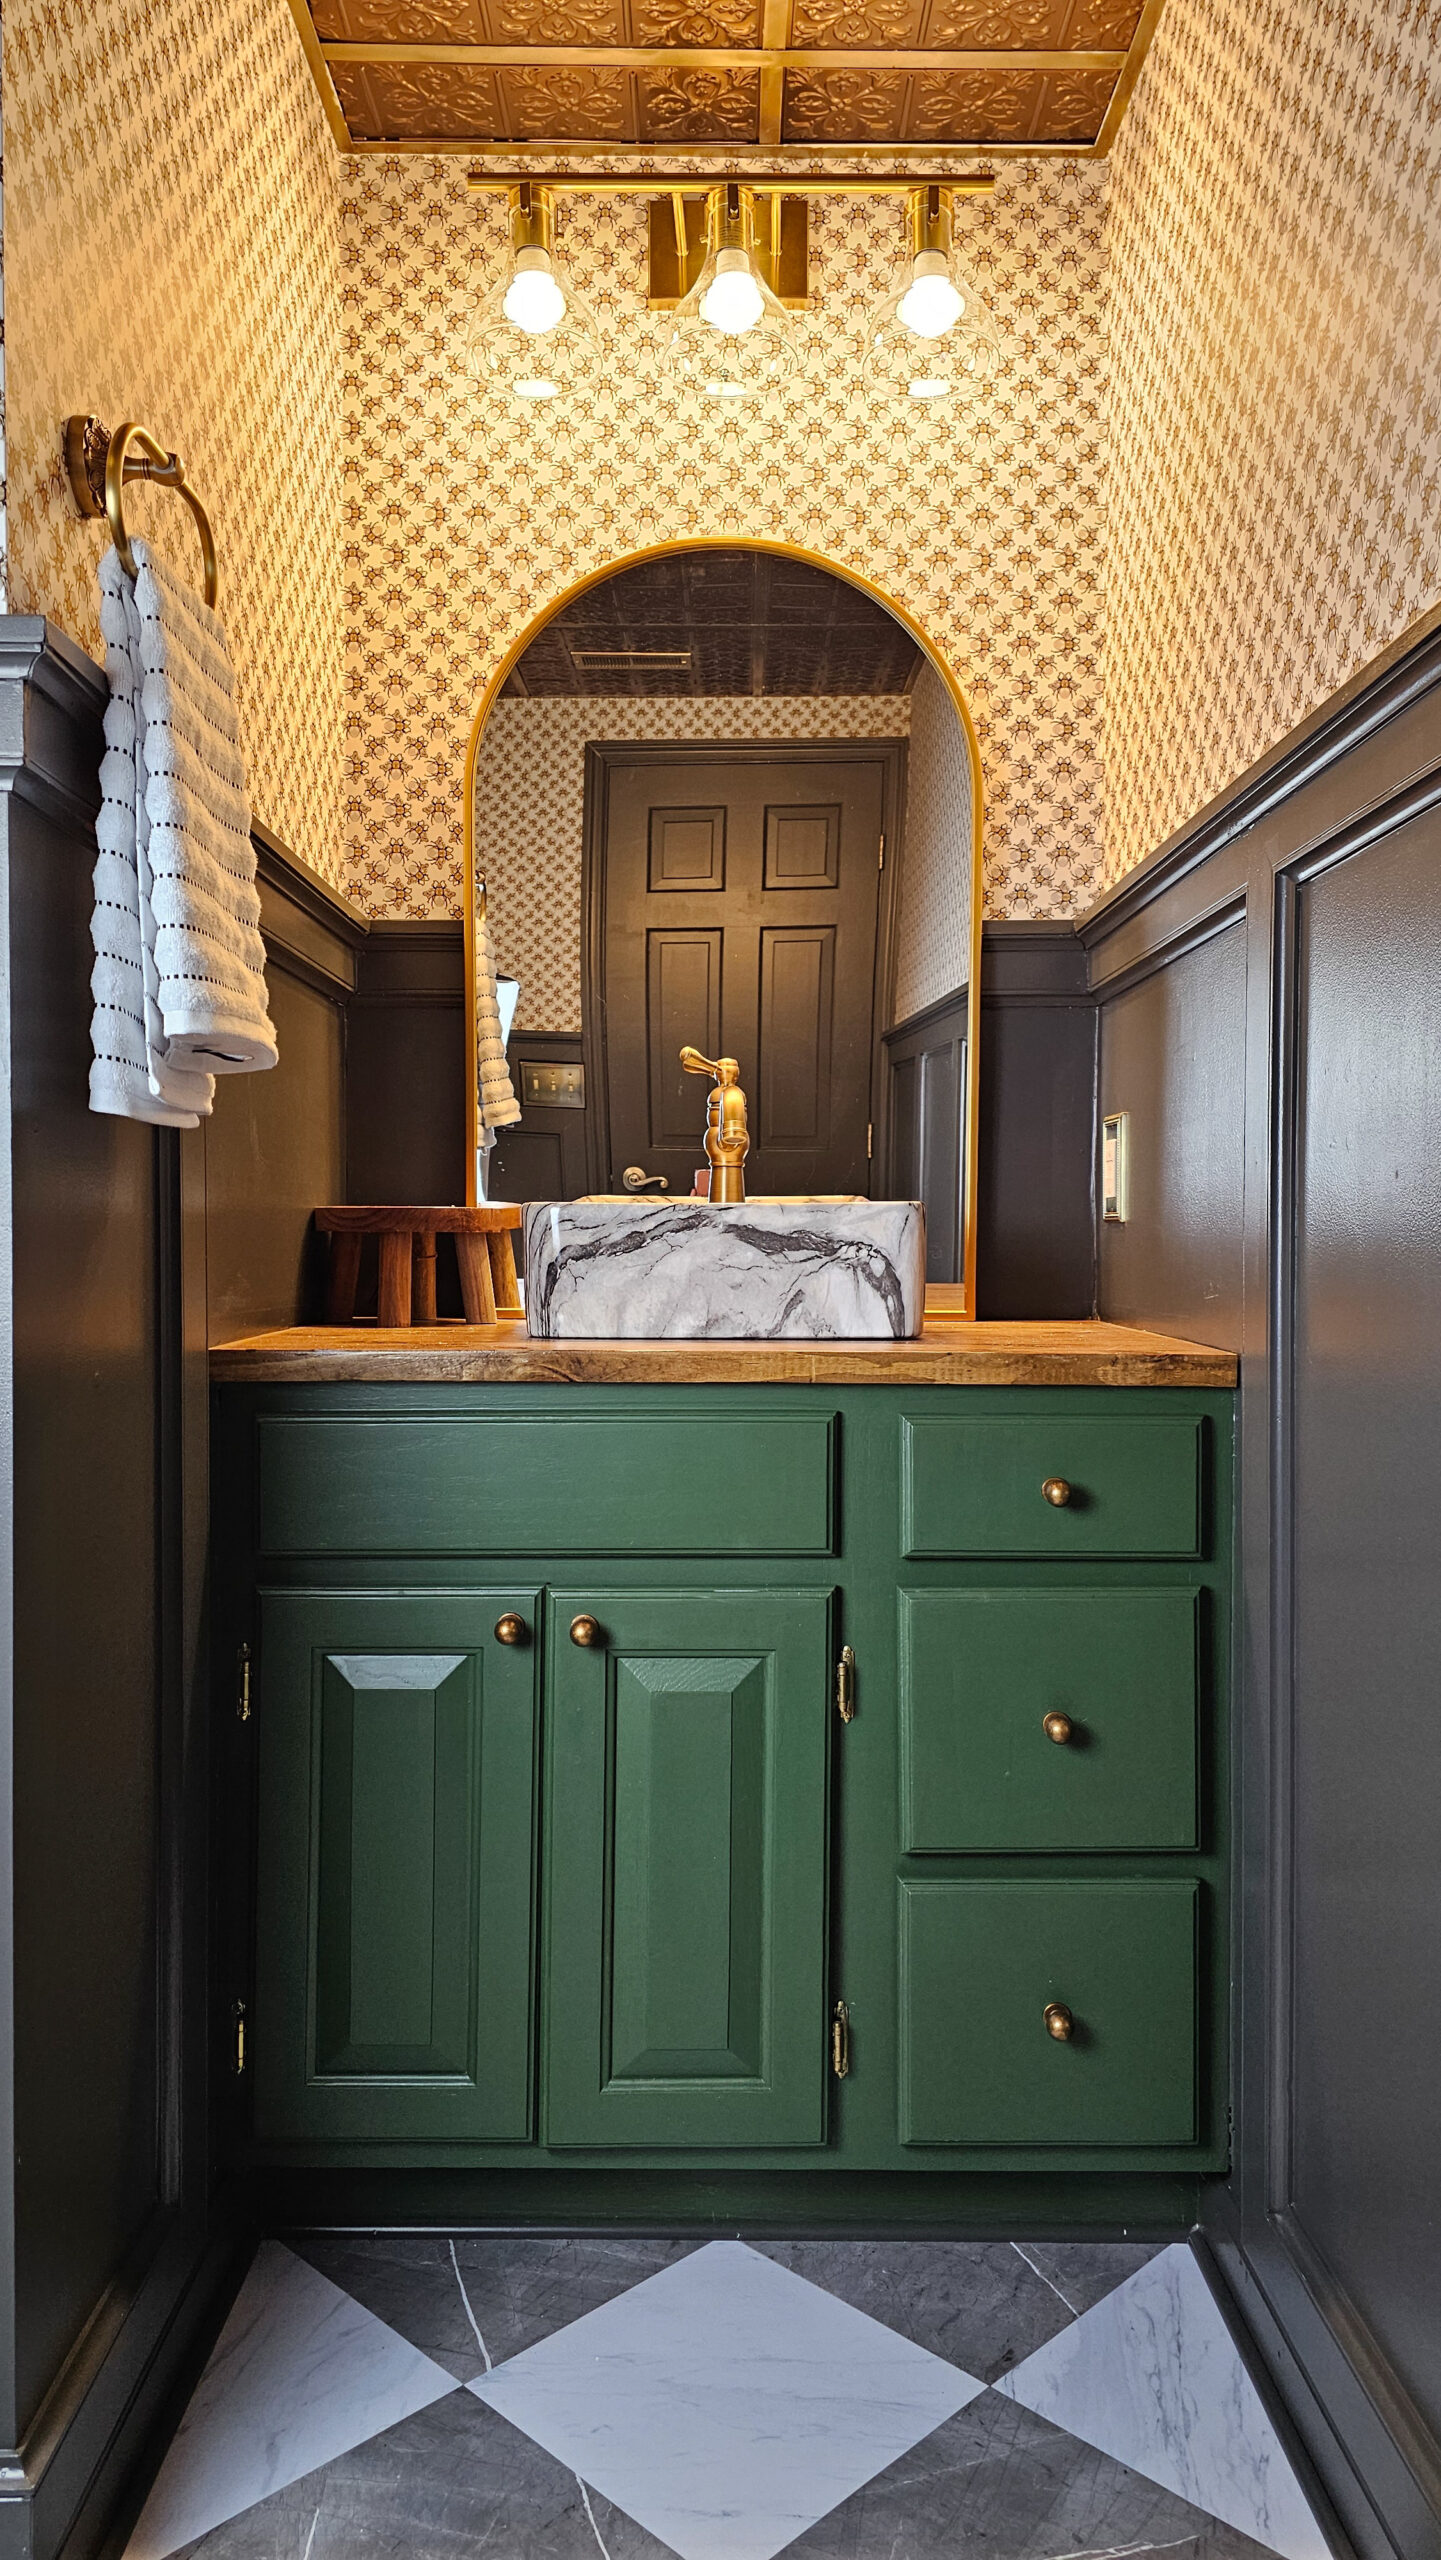
Wallpaper
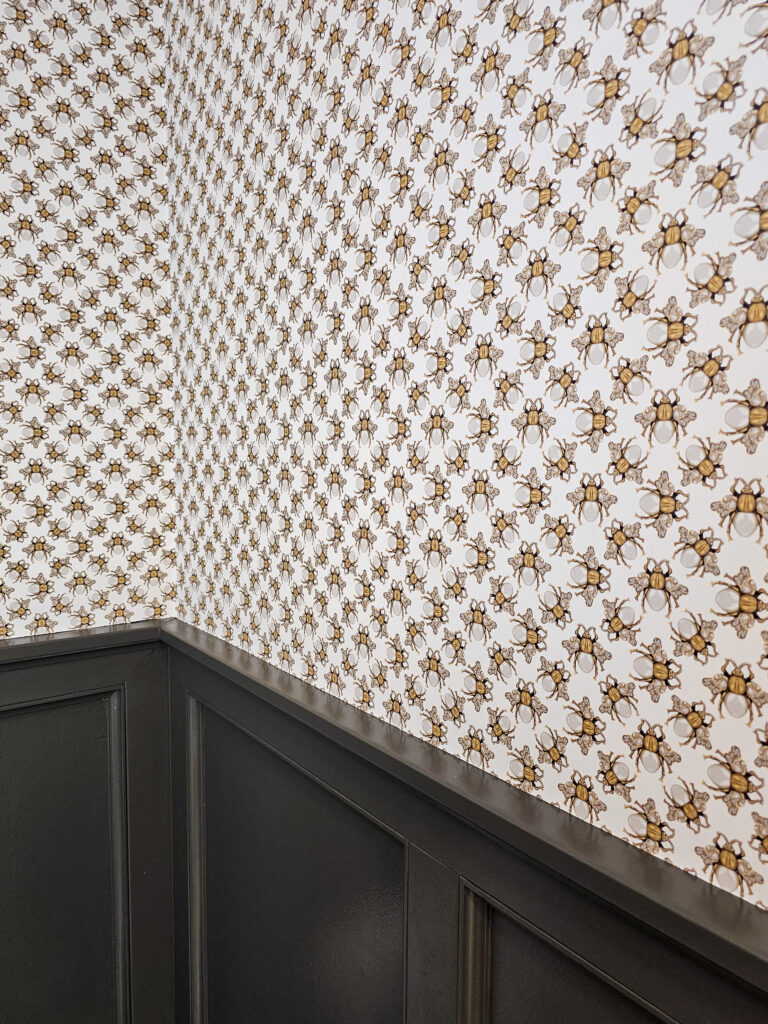
This was a little bit of a splurge item for the space. Wallpaper can add so much to a space and truly isn’t that hard! I used traditional wallpaper, which I feel is much easier for beginners. It allows you to move your panels easily around to ensure they are perfect. I wouldn’t recommend Peel & Stick wallpaper on rooms with more than one wall, it can be hard to wrap it around corners. One tool I’d highly recommend for wallpaper installs is a laser leveler. It’s easy to move around and keeps your panels on track! But this fun wallpaper added a funky detail to this space! I think it’s beetles… but I am not sure!
Blog Post: Wallpaper Tips for a Beginner
Video: Wallpaper Install in Bathroom

Cost Breakdown:
- Wallpaper – 2 rolls at $132 each = $264
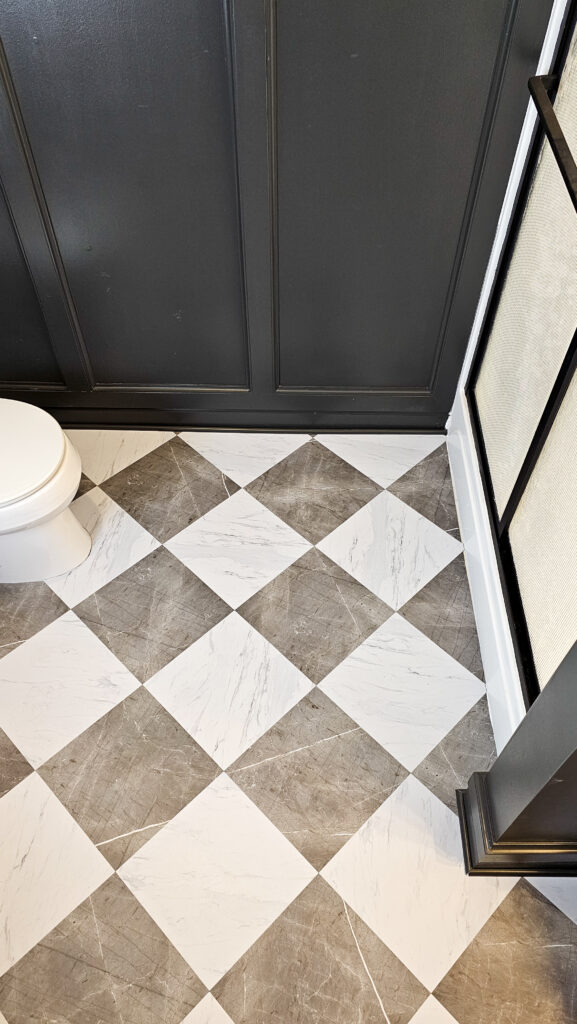
Peel & Stick Floor Tiles
I’d be lying if I didn’t say this was my favorite project in this space. I originally had wanted to paint the floors, but after 3 months of work, I just couldn’t bring myself to do it. I knew it would be time consuming and I was ready to get this project done. So, I opted for these peel & stick tiles, and they look SO REAL!
Blog Post: Peel & Stick Tile Installation
Video: How to Install Peel & Stick Tiles
Cost Breakdown:
- Peel & Stick Tile – 6 boxes at $20 each = $120
- Primer – $15
- Quarter Round – 5 pieces at $5.99 = $29.95
Vanity & Countertop Update
Again, I would have loved to rip this out! The only demo I did in here though was taking out this countertop, which I only did because the sink had to go. Seashells just didn’t fit my theme. I took out the old countertop and replaced it with a wood slab that I stained a deep rich color. On top of the wood, I installed this marble looking vessel sink and gold faucet! Even with these 3 items, it was still cheaper than a whole new countertop!
For the bottom of the vanity, I just painted the cabinet itself green and replaced the old handles with brass knobs. Before painting, I filled in the old hardware holes with Bondo so I can just drill holes for new ones.
Video: Vanity Update
Video: How to Install Vessel Sink
Video: How to Install Faucet
Cost Breakdown:
- Countertop – $75
- Wood Slab – $55
- Stain & Poly – $20
- Vessel Sink – $139
- Faucet – $56
- Vanity Knobs – $20
- Vanity Paint (1 quart) – $15
- Vanity Light Fixture – $65
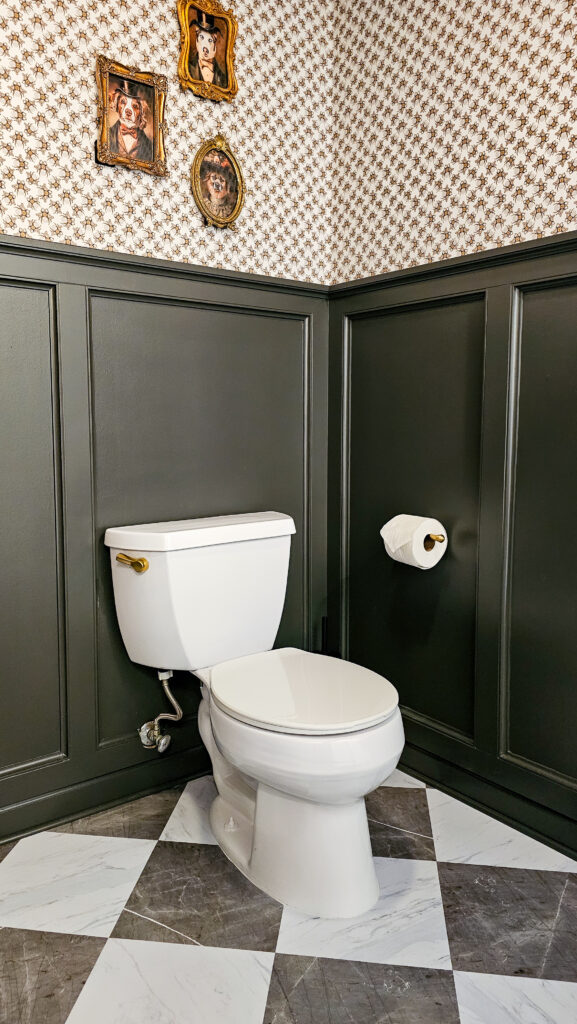
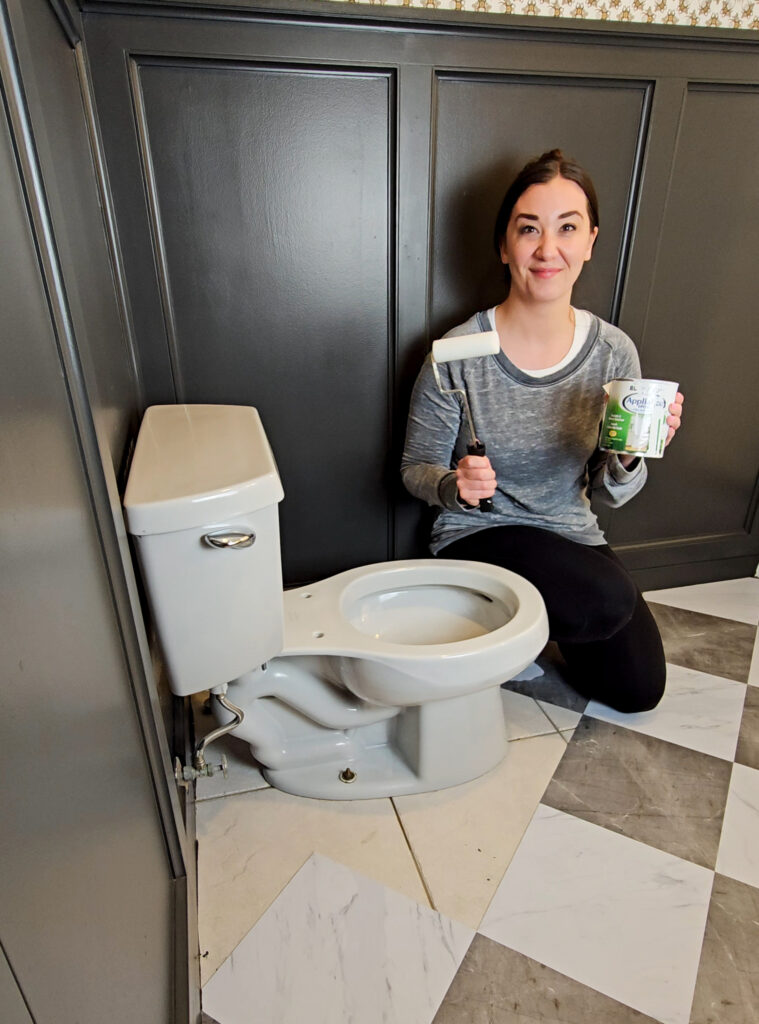
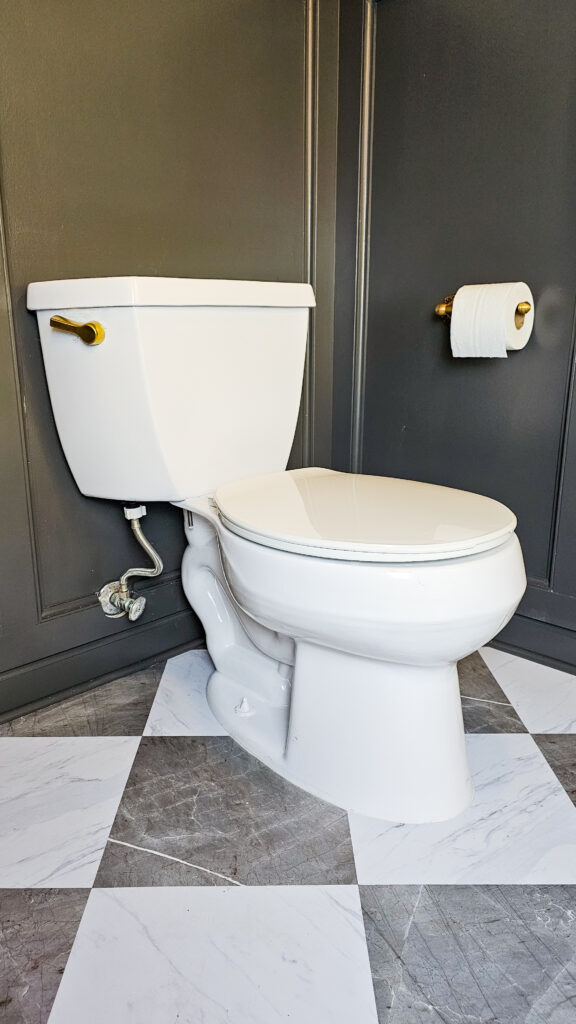
Toilet
This was probably my most controversial project in this space, but I painted my toilet! Now here me out…. This toilet was gray and it no longer matched my shower. It wasn’t super noticeable to probably anyone but me. I was fully prepared to just replace the toilet, but I saw this as an opportunity to paint it and see how it holds up! So far it’s good! I even replaced the lever with a new gold one to make the entire toilet look brand new!
Blog Post: How I Painted A Toilet
Video: How to Paint Your Toilet
Cost Breakdown:
- Paint – $25 – I actually used leftover paint so this was free for me!
- Gold Toilet Lever – $10
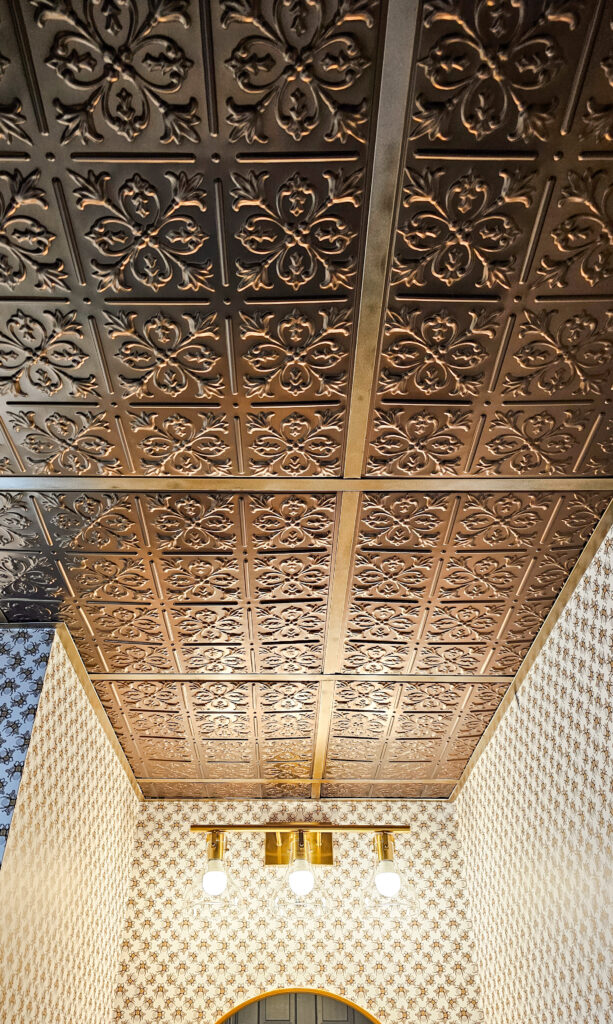
Ceiling Tiles
Dropdown ceilings are a staple in basements because they are easier than drywall and allow you access to all the piping and ducts in your basement. So as much as I would have loved to drywall this ceiling, that not only would be a much longer project, but would require cutting into the ceiling if we ever needed to access something. Instead, I replaced them with these beautiful tiles from Ceilume. They also make grid covers but didn’t have one to match this color, so instead I got spray paint that was close to the same color and painted all my grids to match.
Blog Post: Replacing a Drop-Down Ceiling
Video: How to Replace Your Drop-Down Ceiling
Cost Breakdown:
- Ceiling Tiles – $15.75 per tile, 20 tiles = $315
- Ceiling Spray Paint – 2 cans at $10 = $20
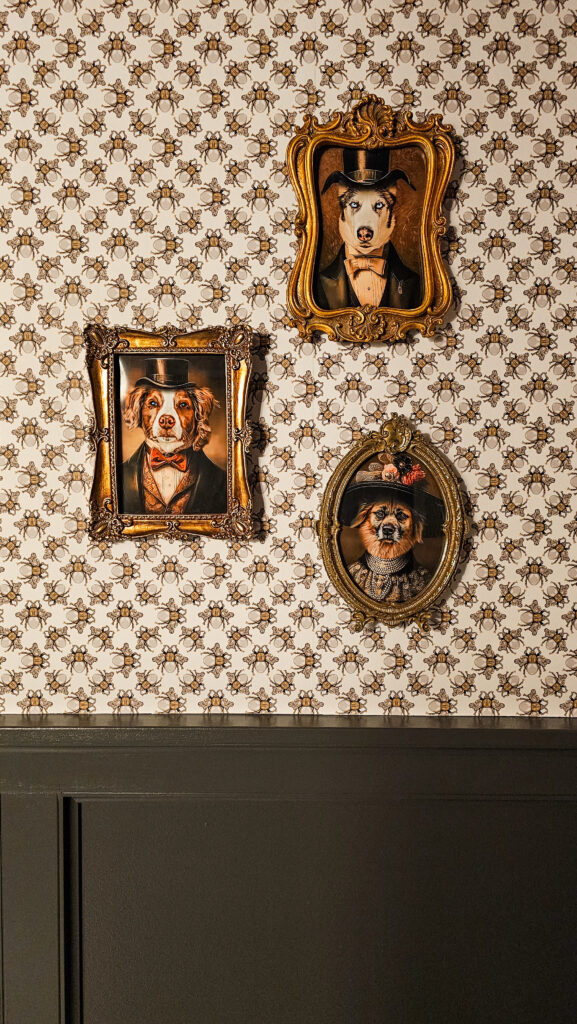
Dog Portraits
The final update I made in this bathroom was some custom artwork of my dogs. I headed over to Etsy and had a digital print made of my dogs in a time period to fit this space! I even surprised my husband with this, and you can see his reaction here.
Blog Post: Dog Artwork
Video: Custom Dog Portraits
Cost Breakdown:
- Frames – $50
- Etsy Design – $30 for all 3
- Walgreens Print – $10
This bathroom is unlike any other space I have ever designed and turned out better than I could have imagined! I wanted a moody speakeasy type vibe and I personally think this is it! It is hard to pick a favorite thing in this bathroom, but the floors are just perfect! I can’t wait to see how everything holds up and will be sure to provide an update!
Total Cost Breakdown
- Board & Batten – $175
- Shower Paint & Doors – $160
- Wallpaper – $264
- Flooring – $165
- Vanity, Countertop, & Light Fixture – $370
- Toilet – $35
- Ceiling Tiles & Paint – $335
- Dog Portraits – $90
- Total Cost: about $1,600

May 8, 2024