")
Picture Frame Molding
I wanted to add character and dimension into this bedroom space, but I didn’t want to spend a ton of money! So, I grabbed the cheapest trim I could find at the store and got to work installing this Picture Frame Molding. I also love this Picture Frame Molding because you can do this all without any power tools! That doesn’t mean you can’t use power tools, but not having a saw or nail gun won’t hold you back from this beginner friendly project!
Be sure to check out this “Faux” Crown Molding I also did above my Picture Frame Molding!
*I may earn a small commission on any linked items in this article*
Supplies
- Trim
- Miter Angle Shear Cutter
- Saw (optional)
- Finishing Nails & Hammer or Liquid Nails
- Nail Gun (optional)
- Caulk
- Wood Filler
Step Summary
- Design your picture frame molding
- Cut your trim pieces
- Install your trim
- Caulk & wood fill all your picture frame molding
- Paint
Detailed Steps
Design Your Picture Frame Molding
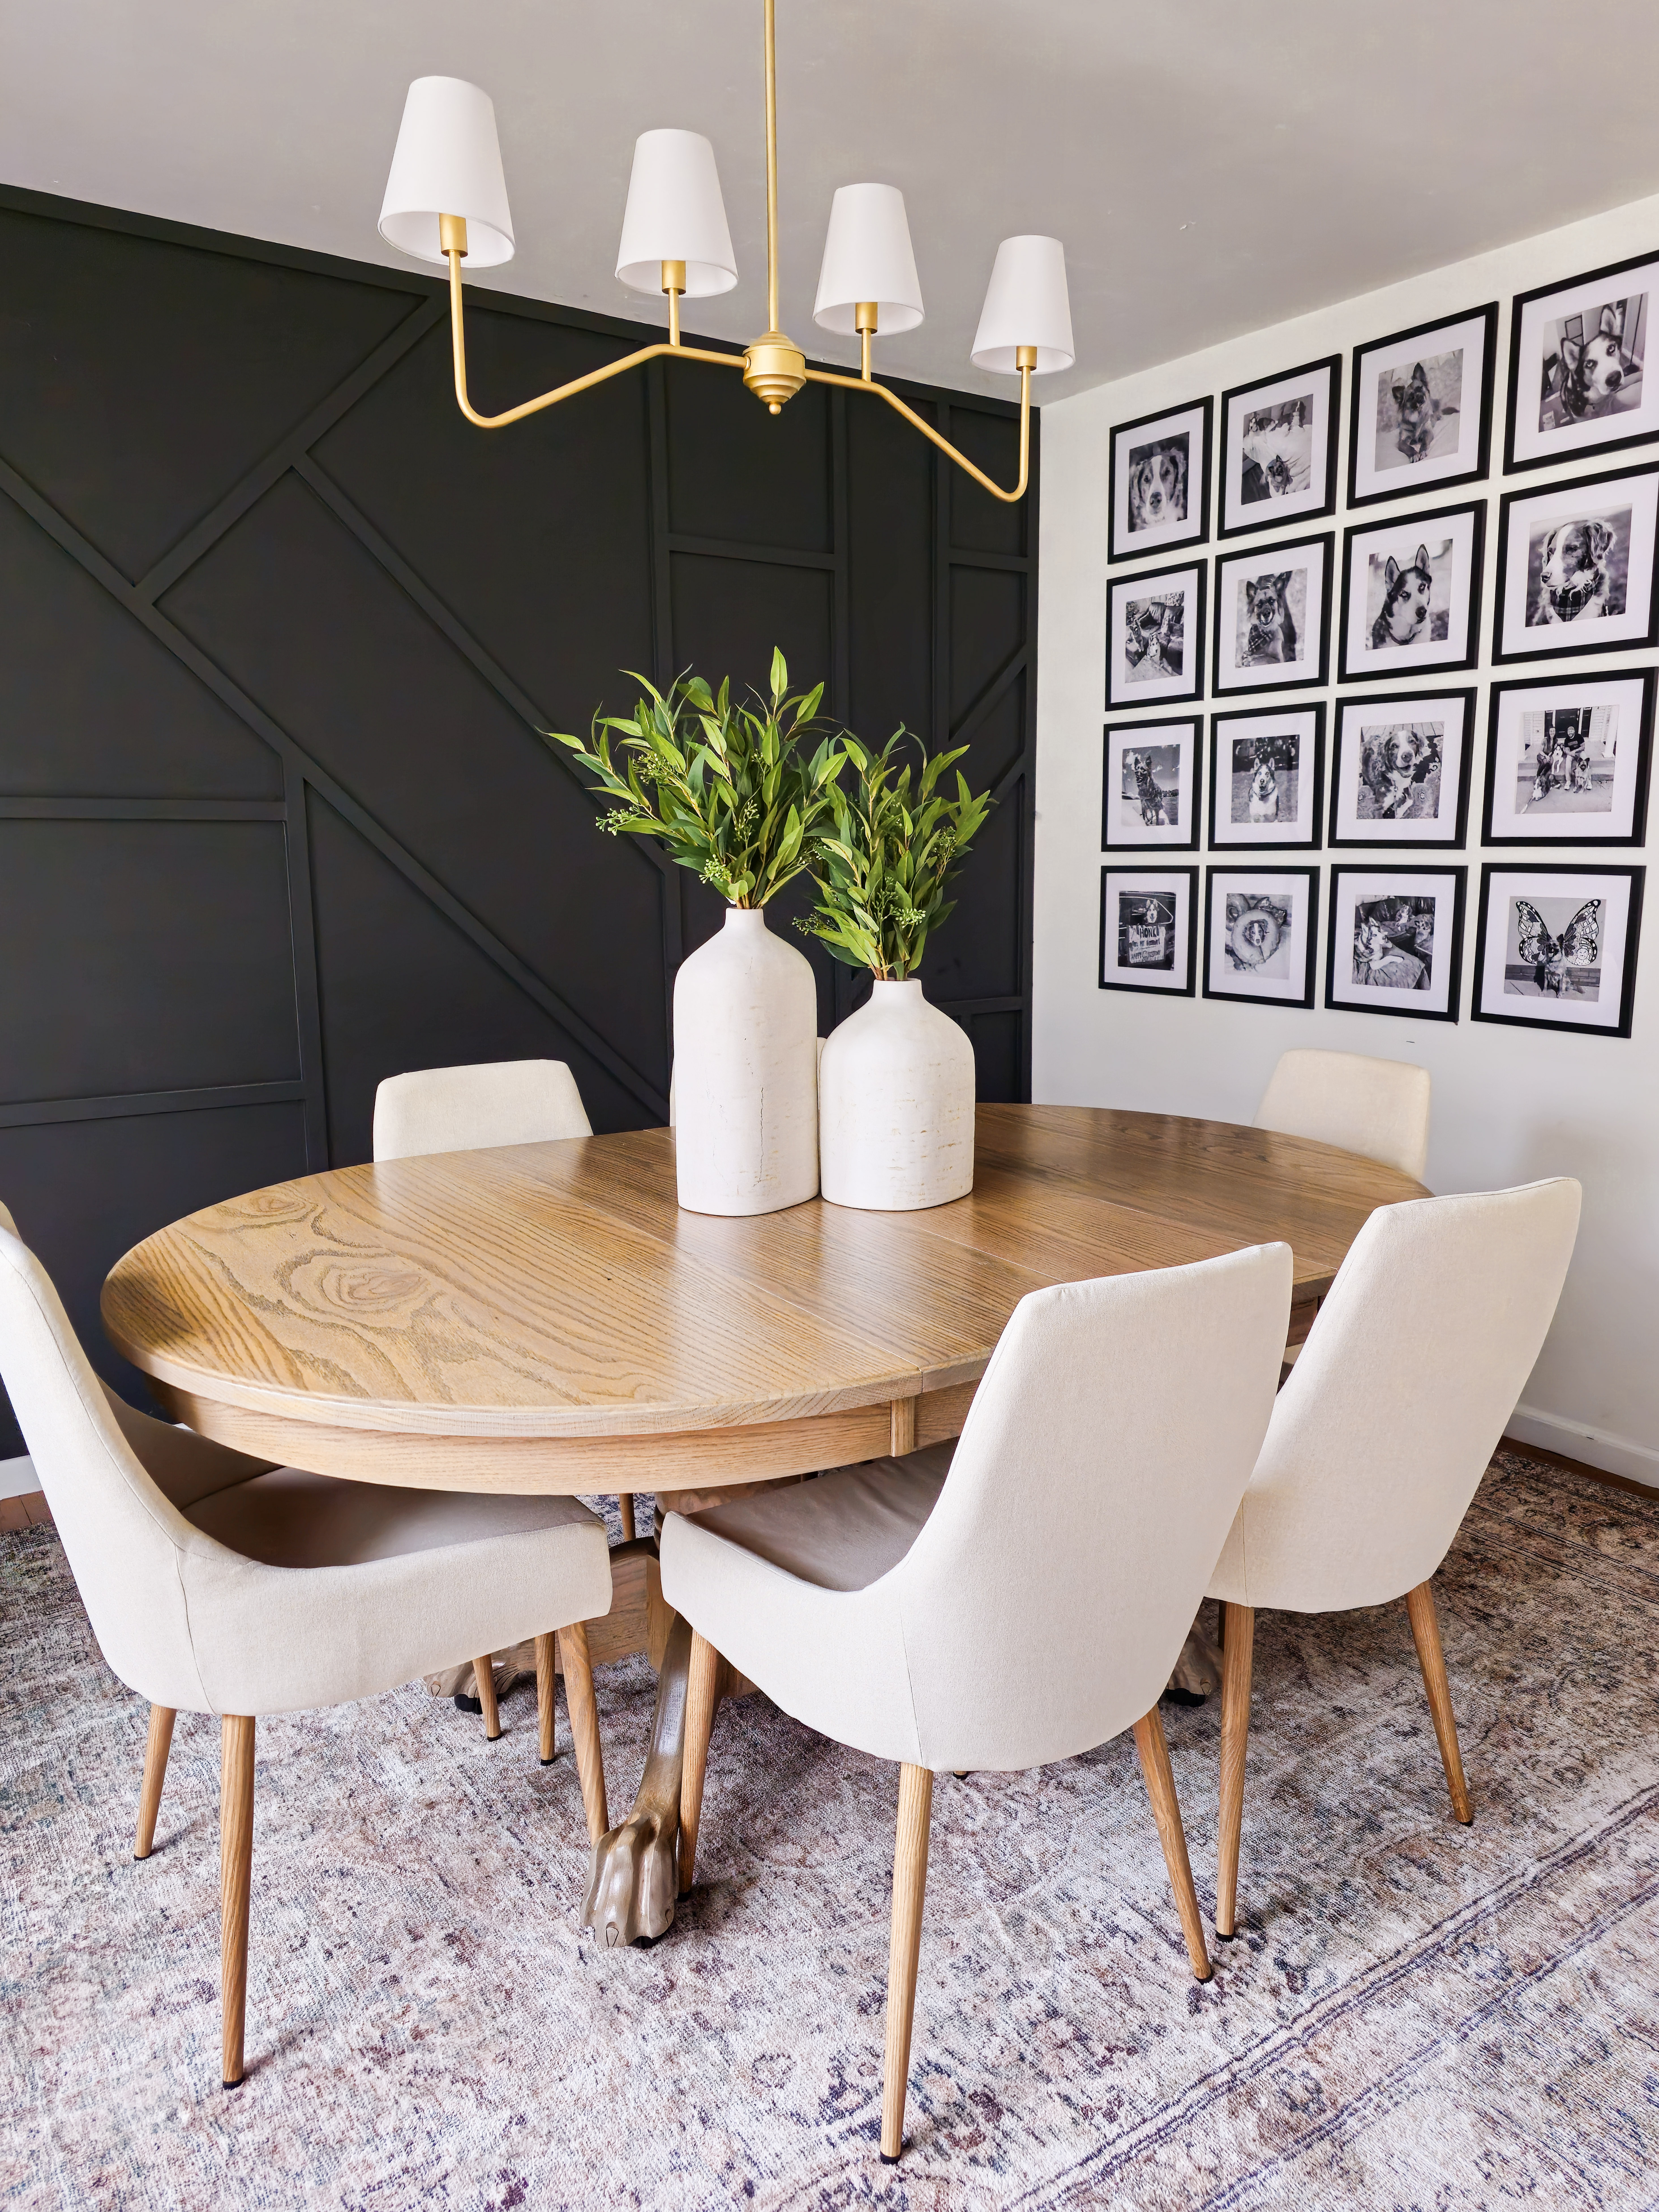
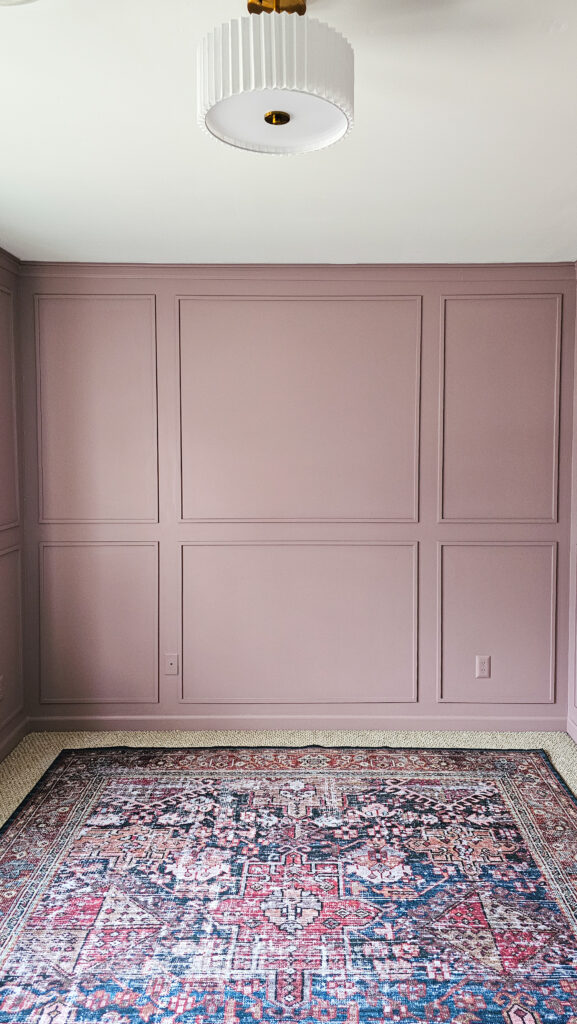
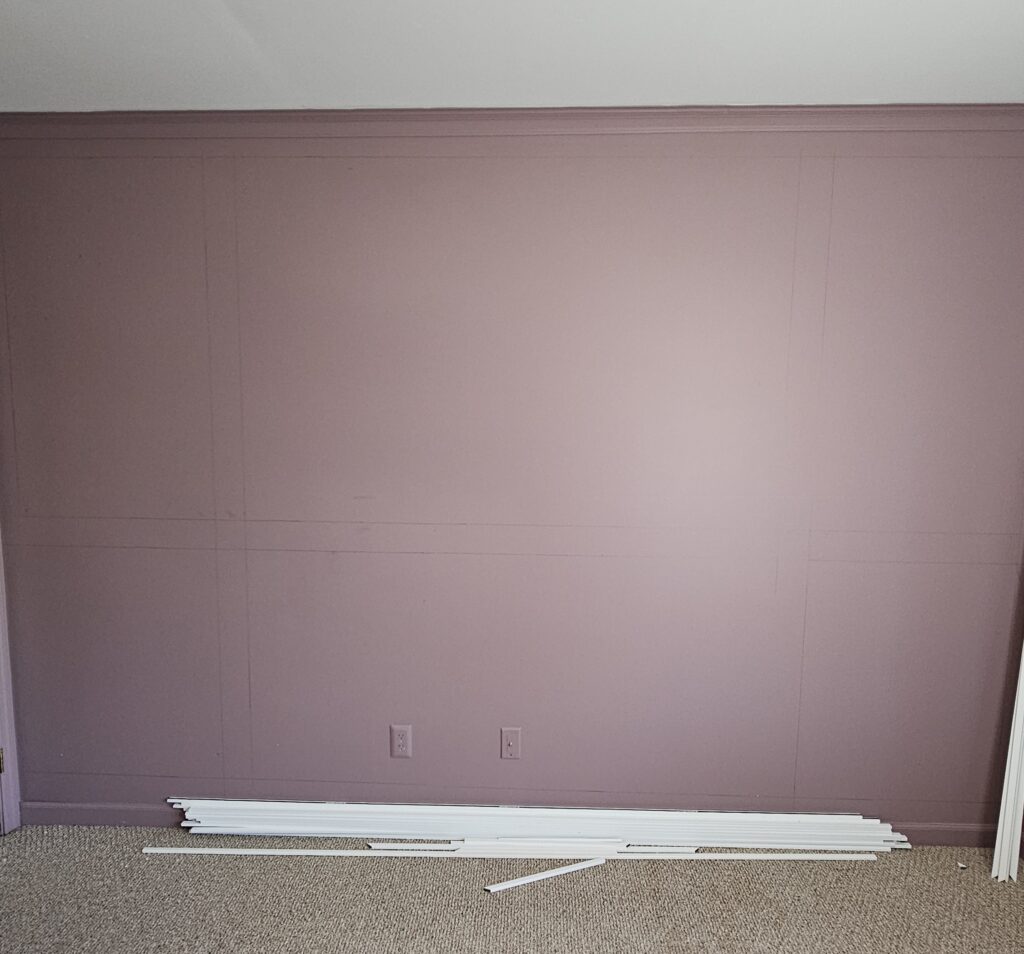
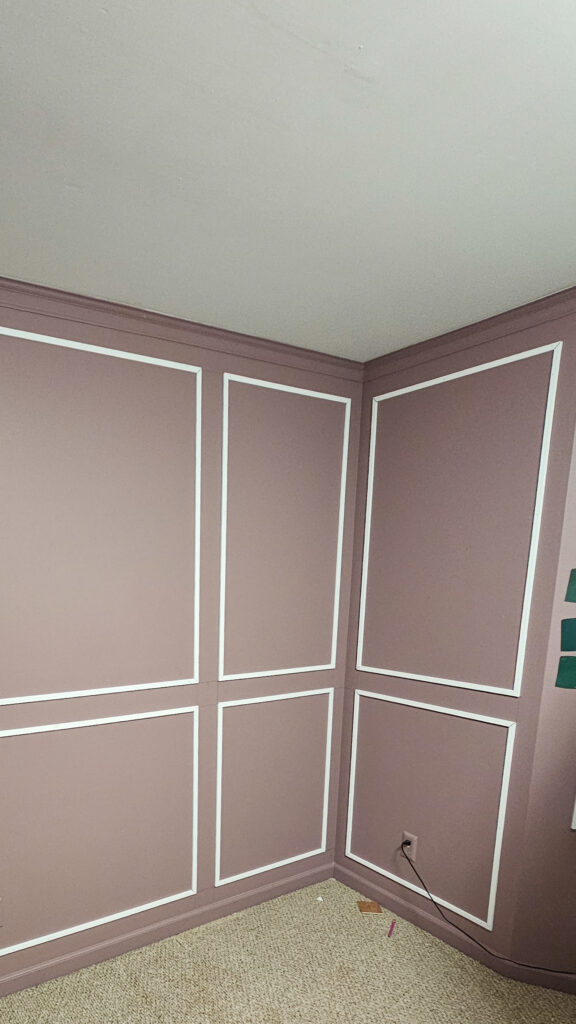
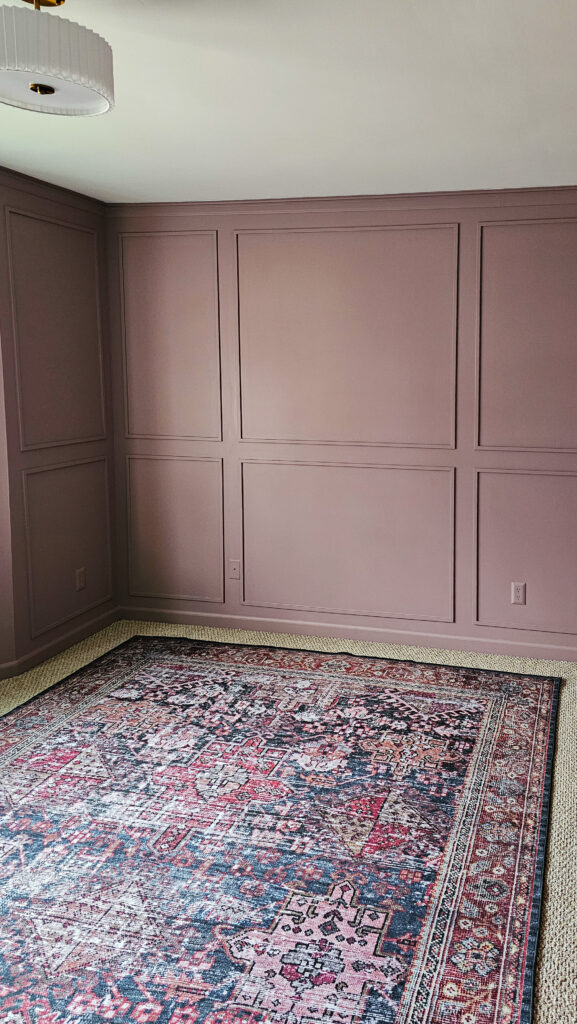
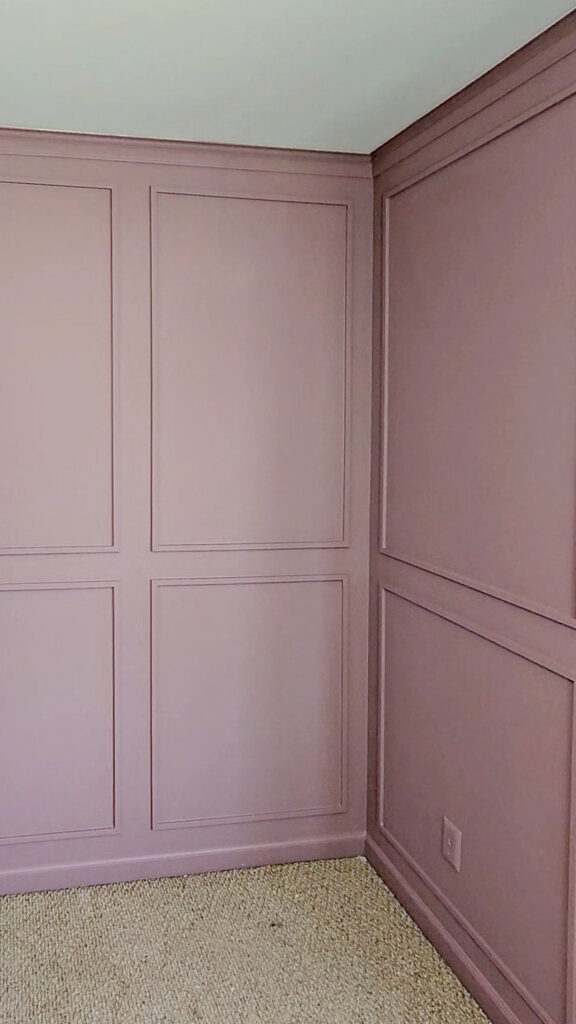
The first part of this project will be measuring the wall space you want to fill with trim! Then you need to decide how many boxes you may want. My wall here is 11.5 feet long and 8 feet tall. I decided to do my bottom boxes small than my top boxes to elevate this space. Each lower box is 40″ tall from the ground and the space between each of my boxes is 4″ on all sides.
I decided to do this Picture Frame Molding on all 4 walls in my bedroom, but this can be done on just one wall! Whichever you decide, just be sure to plan it all out ahead
Cut Your Trim Pieces
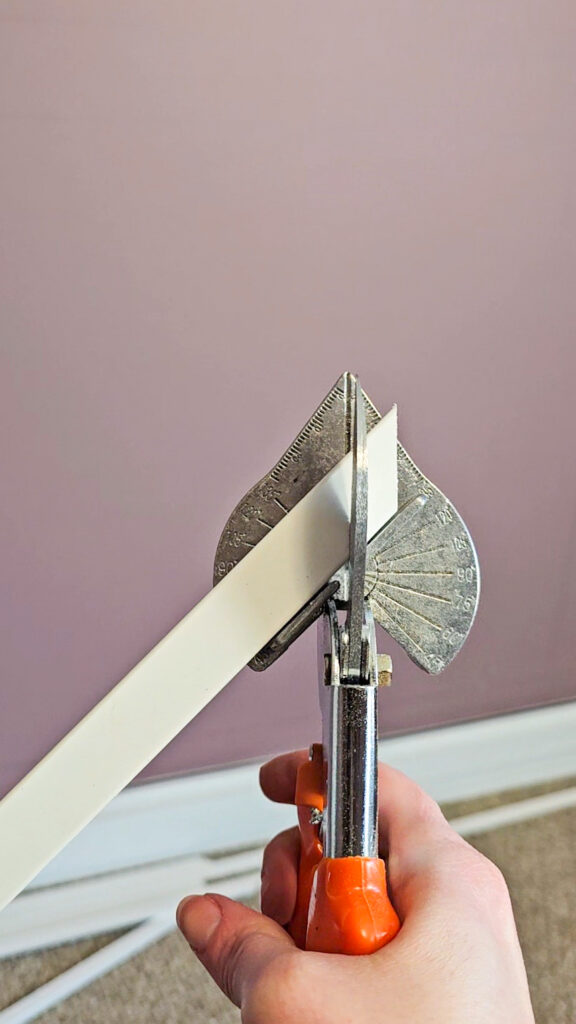
If you have a saw that can cut 45-degree corners, I would use it. However, if you don’t have a saw yet you can buy these miter angle shear cutter off amazon that will easily cut through plastic trim or small wood trim! This is what I used for my first couple boxes to show that it can be easily done! Take the trim cutter and move it to the 45-degree line, then line up your board and cut! It’s that easy. If you do have a saw, then you will want to swing the arm to the 45-degree mark and cut all your trim.
Since my space is preplanned out, I went ahead and cut all my trim pieces ahead of time before I installed them. This made the installation part go so quick!
Install Your Trim
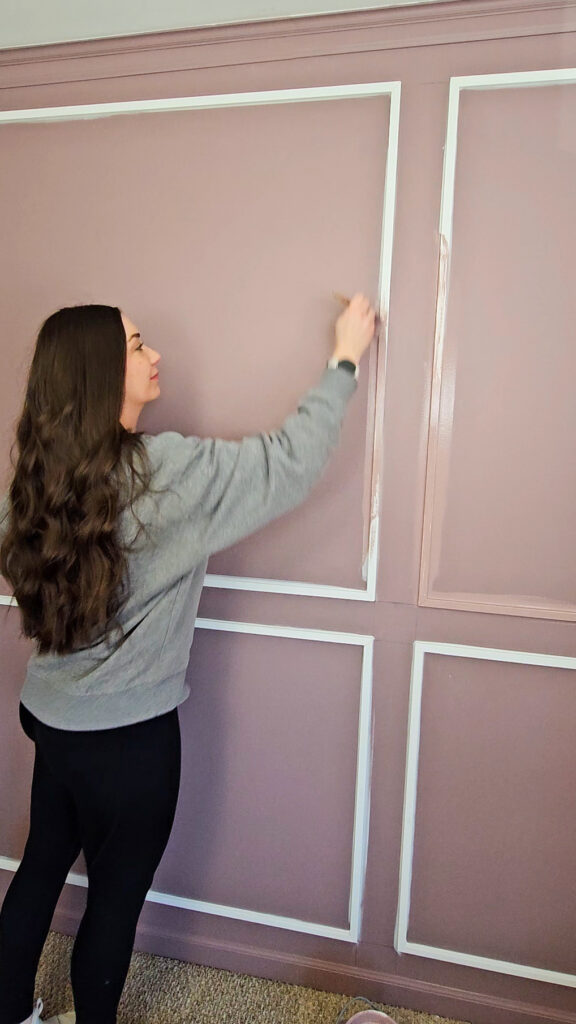
Now it’s time to install your trim. I decided to go ahead and draw all my boxes on my wall using my level so I could quickly install them without having to juggle my trim and level at the same time. Again, this isn’t required, but this helped me install the trim very fast and since it needs painted anyway it’s easy to paint over any pencil marks left.
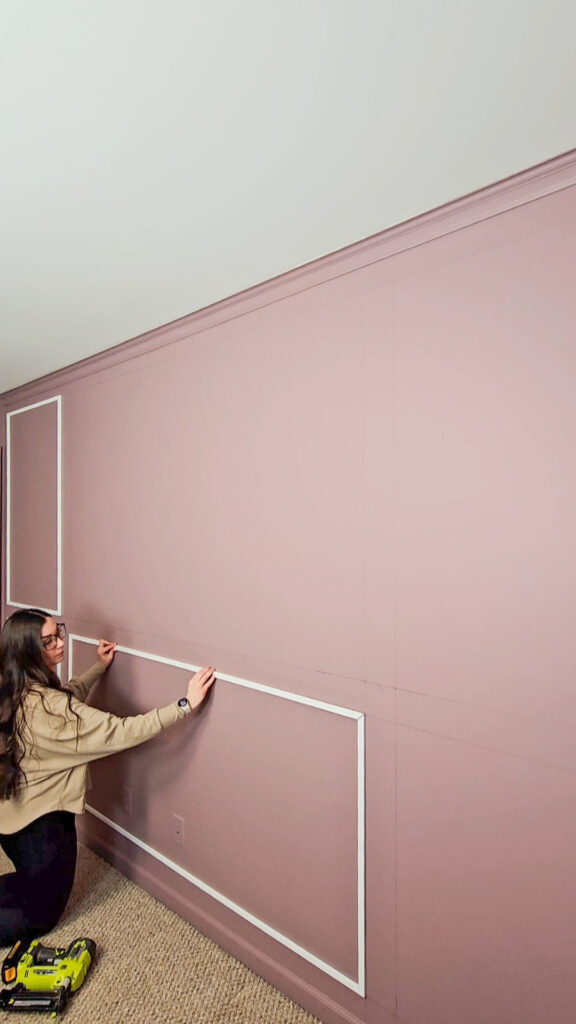
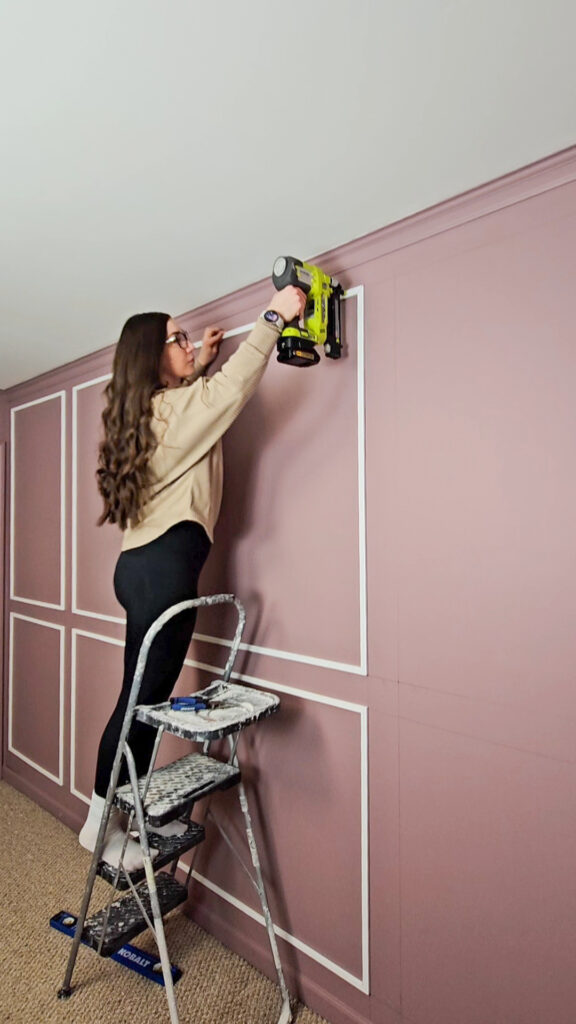
I installed my trim with my nail gun because I have one. This is one beginner tool I always recommend to people because you can do so much with it! I use it on nearly every project it seems. This brad nailer has lasted me over 4 years now and countless projects. If you do not have a nail gun yet, you can simple buy these finishing nails and a hammer! This will take more time, but don’t let that hold you back! And if that still doesn’t sound like something you want to try, there is always Liquid Nails. You can buy small bottles that don’t require a caulk gun. Just know that Liquid Nails will potentially ruin your drywall when you go to take it off. But it is still an option to install this trim!
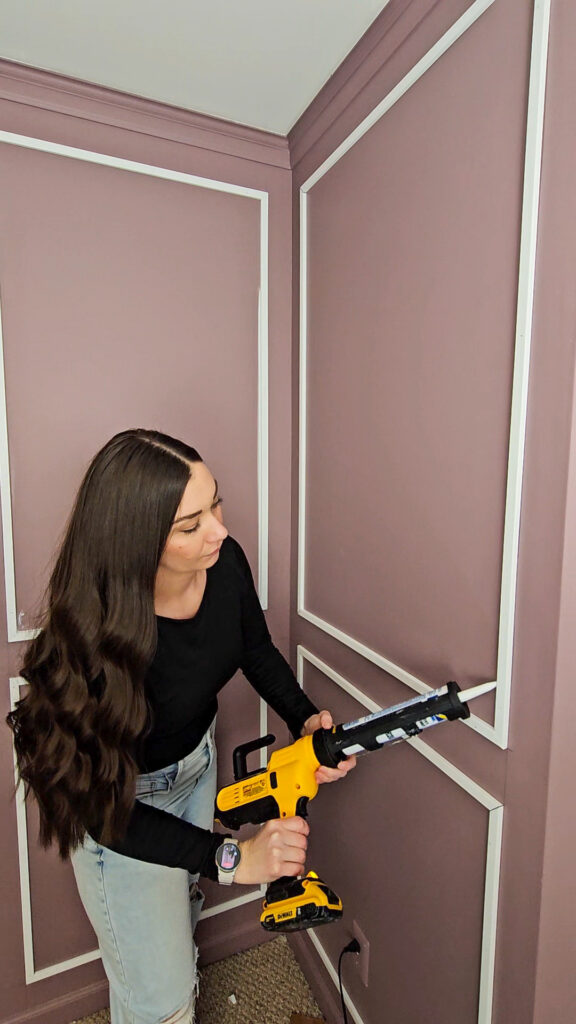
Caulk & Wood Fill
Once all your boards are installed it’s important to go back and use wood filler on all your nail holes. Then use your caulk to fill in any gaps between the boards and your wall. This gives your project a professional finish and is the fastest way to tell DIY vs pro. So, I always recommend doing this, you won’t regret it.

Paint
Finally, it’s time to paint! You could paint the trim before you install it, but I decided to paint it after it was hung up. I used this beautiful color Barberry by Benjamin Moore on my walls and I love it even more with this trim
If you’d like to see the full video on this trim on Instagram check it out here! – Picture Frame Molding Trim
If you’d like to see the full video on YouTube check it out here! – Picture Frame Molding Trim
Be sure to check out this “Faux” Crown Molding I also did above my Picture Frame Molding!
Mar 11, 2025