")
How I Built Artwork for My Hidden Nook
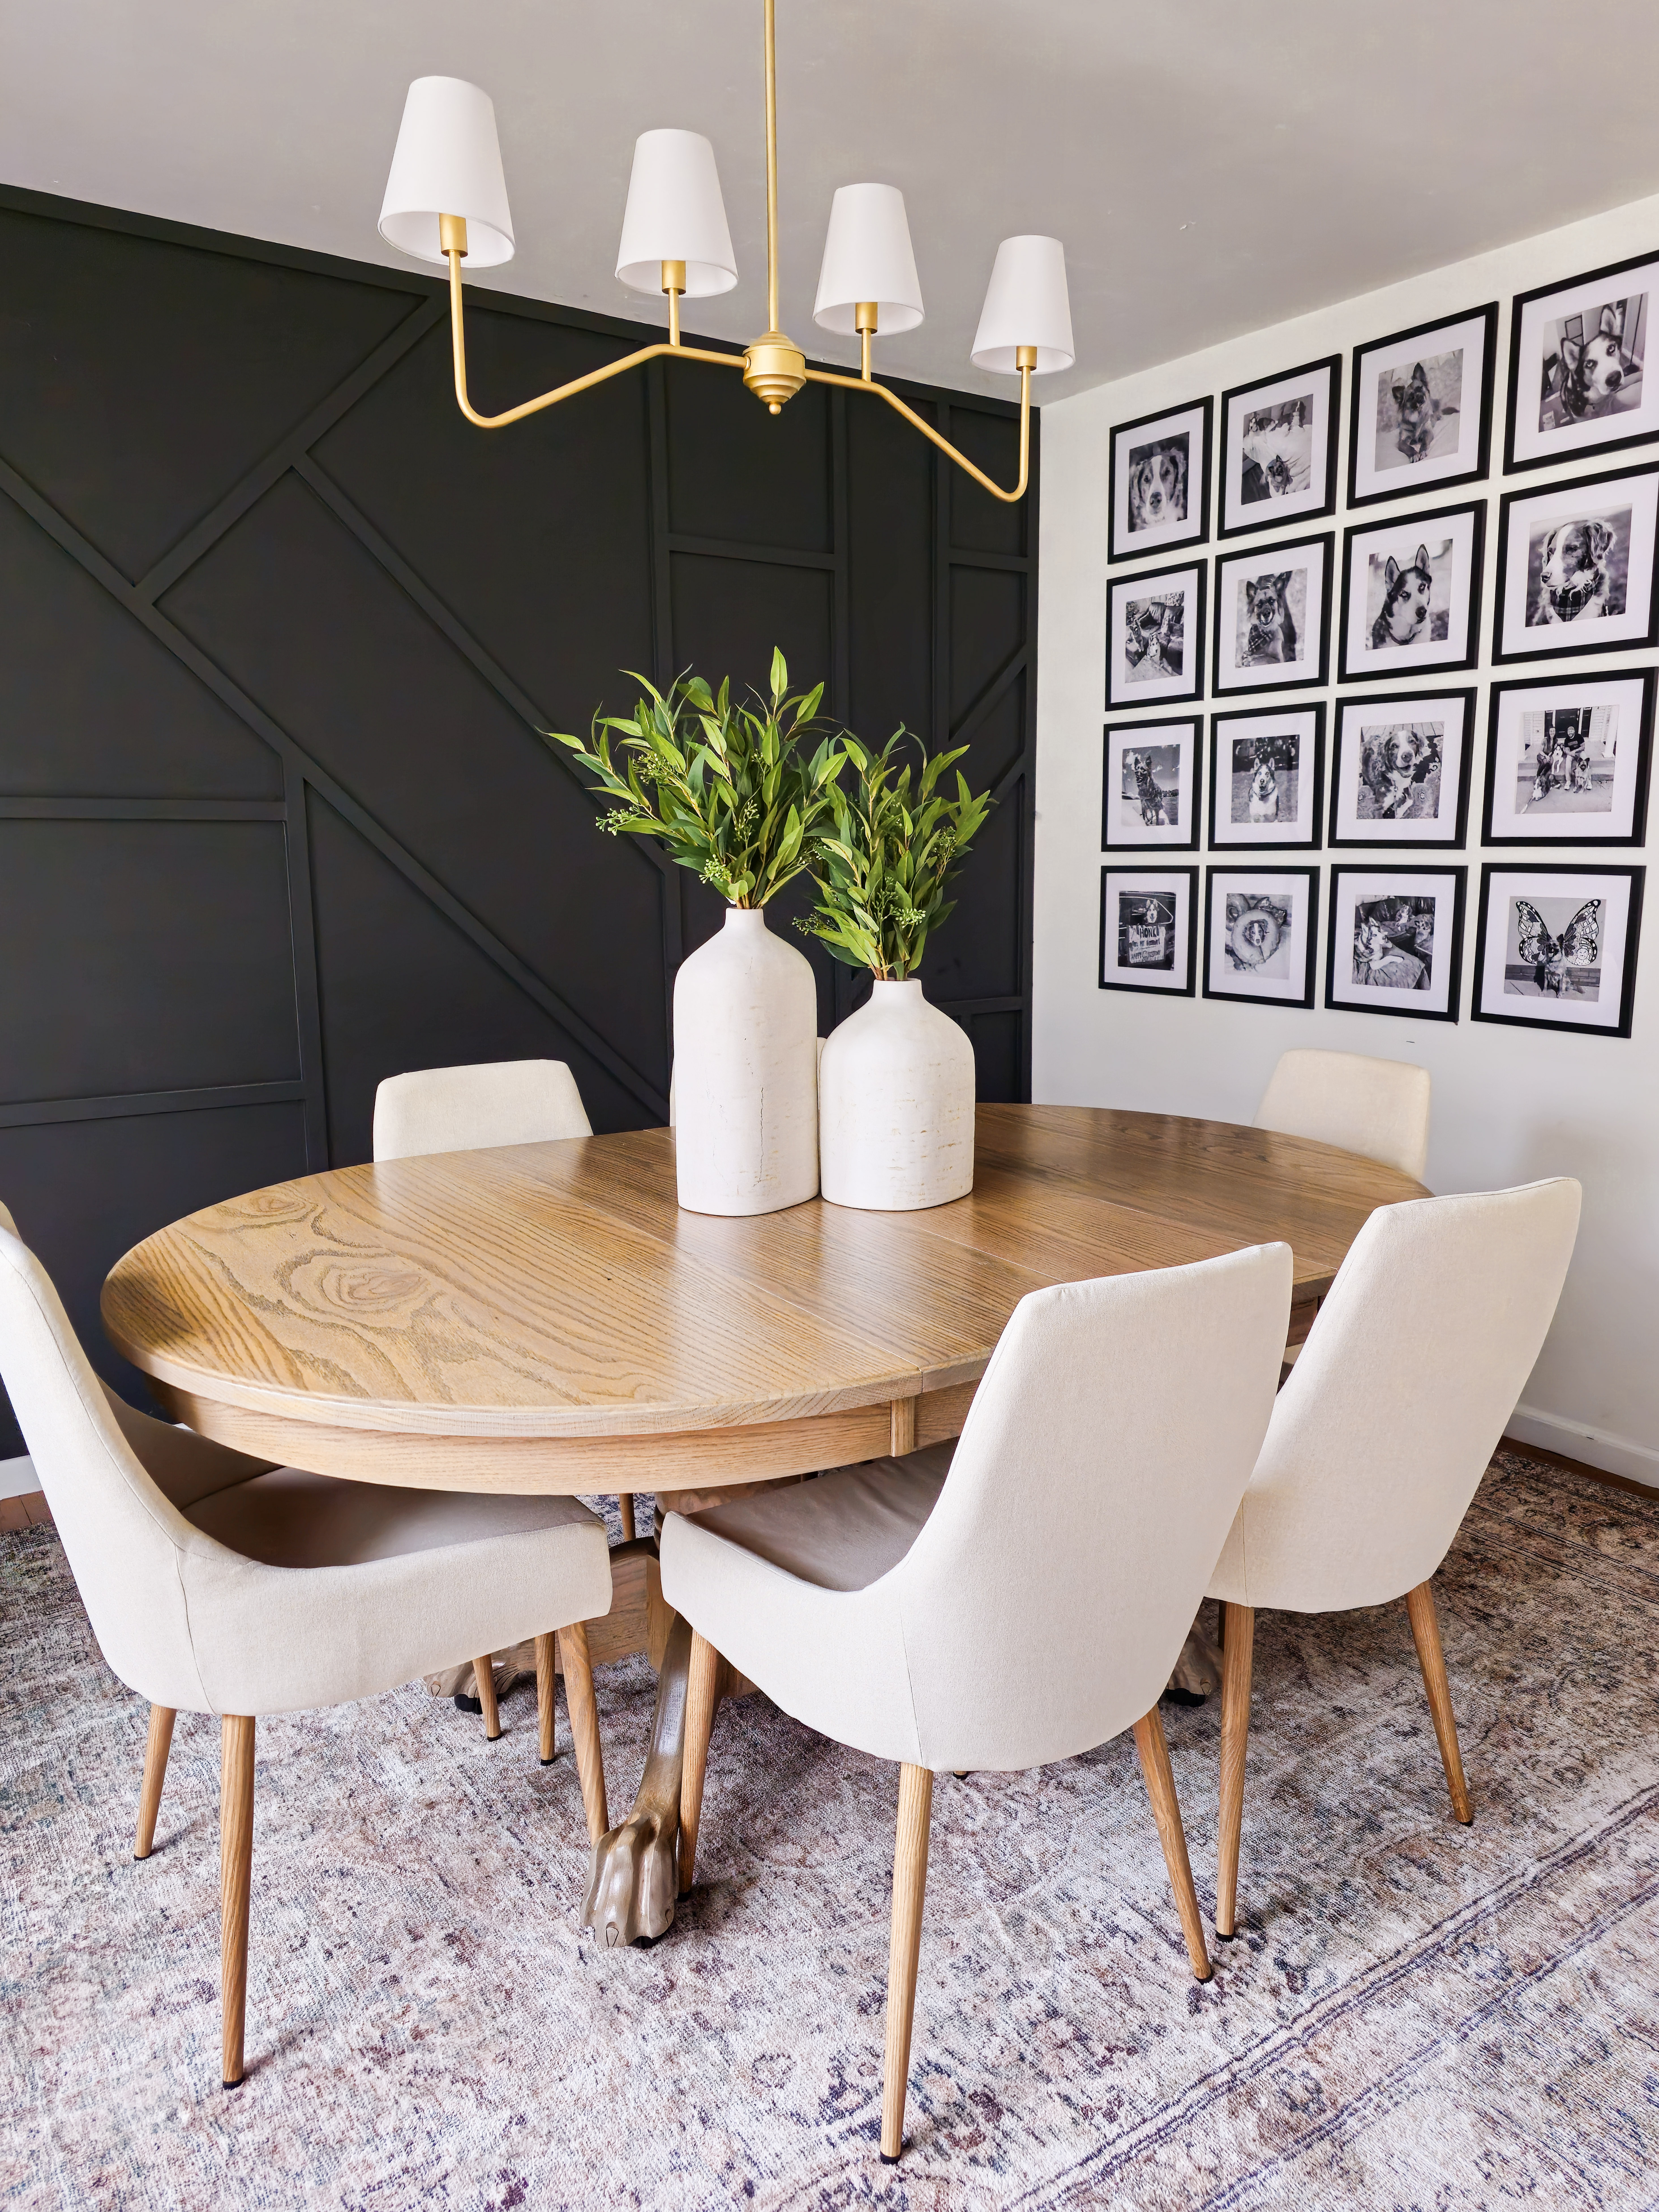
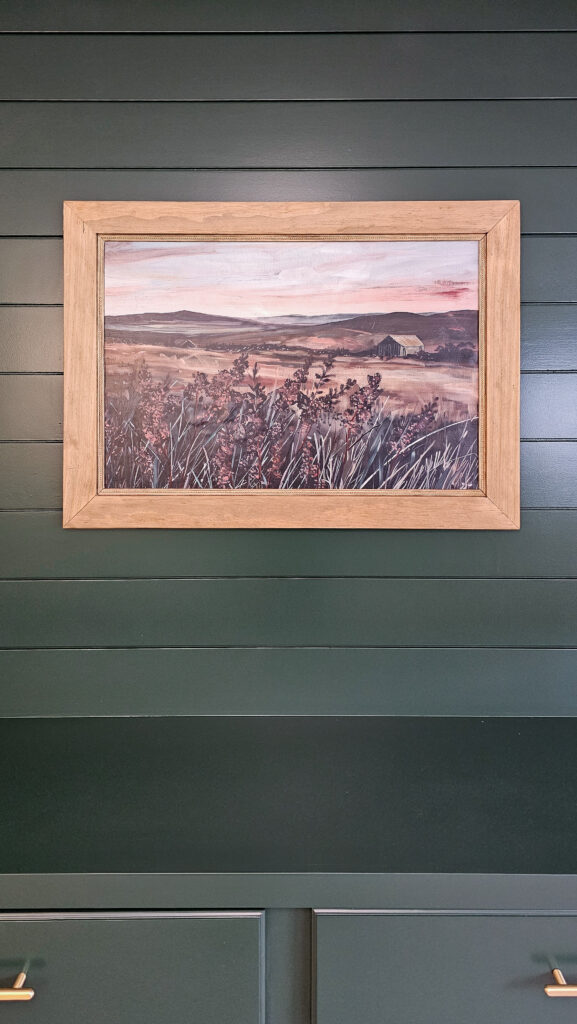
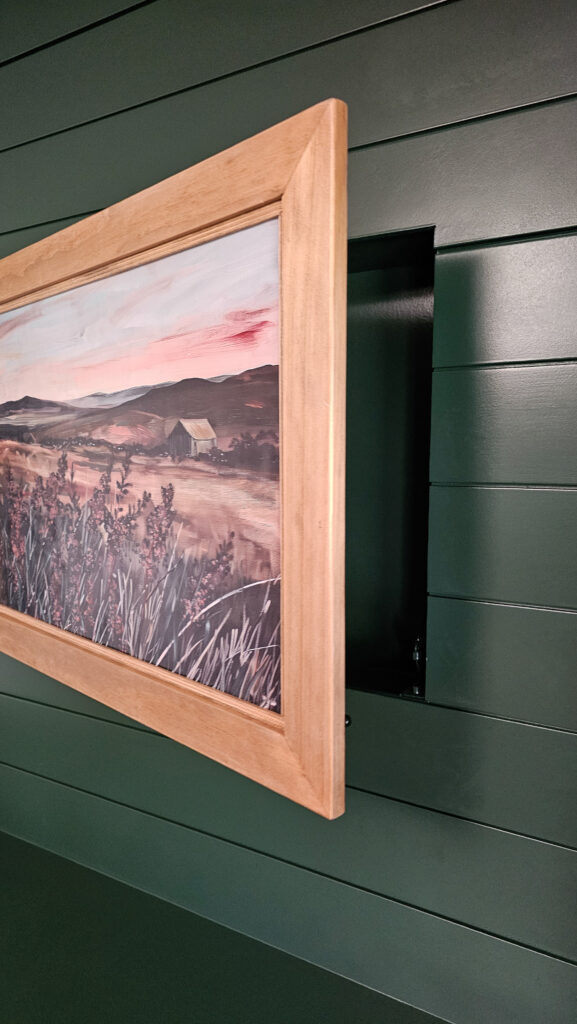
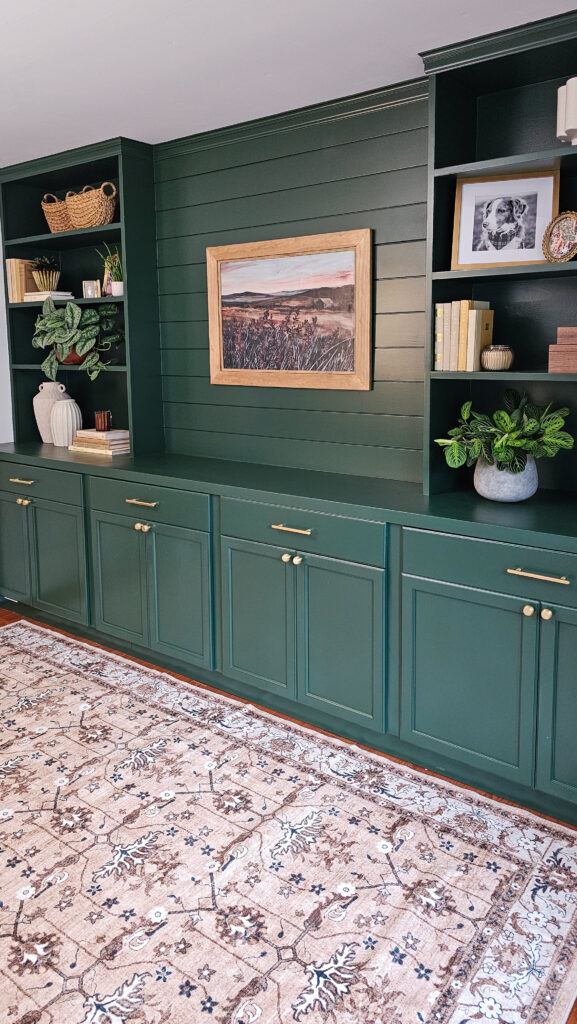
When I started building these shelves in my home office, I knew it needed one thing… hidden storage with a book lever! I detailed out how I built the hidden nook itself in the blog post here if you’d like to see more details on it. But one thing I needed was a custom piece of artwork that was sturdy enough to swing out on hinges. Below I am going to breakdown how I did just that. The easiest way to think about this project is that you are building one big cabinet door! It’s that easy.
Supplies
- 1×3 boards
- Pocket Hole Jig
- Power Drill
- Wood Glue
- 1/4″ plywood
- Router
- Saw
- Staple gun
- Mod Podge
- Poster Print
- Trim
Step Summary
- Cut 1×3 boards to size
- Attach corners with pocket holes
- Route out the back of framing
- Cut 1/4″ plywood to size
- Add plywood to back of frame
- Print out artwork
- Use mod podge to attach artwork to plywood
- Make poster print look like artwork using mod podge
- Add trim around edges
- Add hinges onto back of frame
- Install over your hidden nook
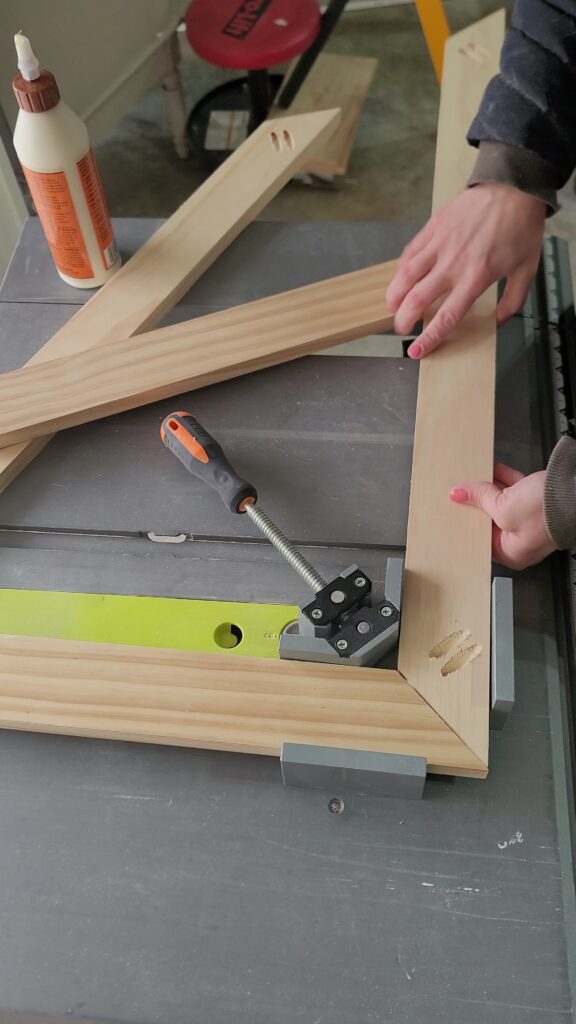
Cut 1×3 boards to size
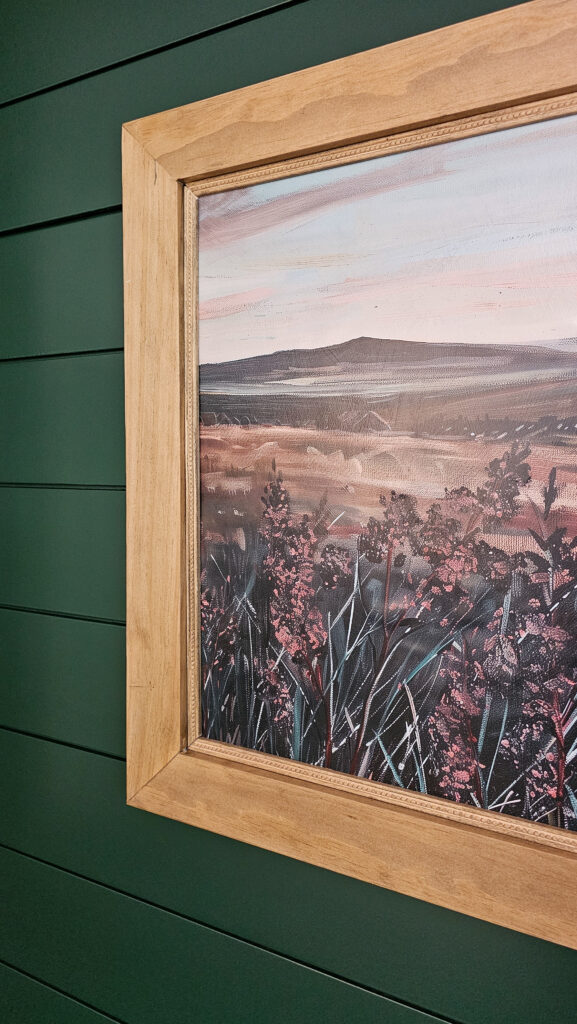
I decided to make my artwork 20×30 so I made sure in-between my boards would fit a 20×30 poster print.
Attach corners using pocket holes
I wanted 45-degree angels on my corners so I decided to attach my sides and top and bottom pieces together using pocket holes. This way they’d be hidden behind my artwork and not seen. I also added wood glue into my corners as well to make it even more secure. And because I worried the pocket holes wouldn’t be enough, I added a couple of staples as well. This was completely way too much, but this was my first time building something like this.
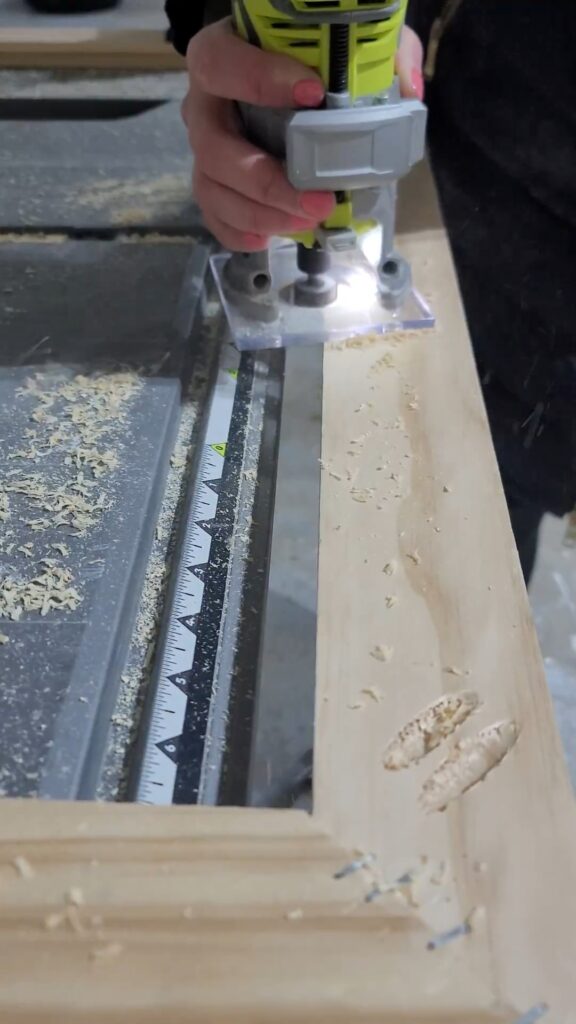
Route out the back of framing
I used my handheld router to cut a 1/4″ deep grove into the back of my frame. This will allow a 1/4″ sheet of plywood to sit flush in the back of my frame and give me something to attach my artwork onto.
Cut 1/4″ sheet of plywood
I used 1/4″ sheet of plywood and cut it to the size I needed to sit down into the grooves on the back of my frame.
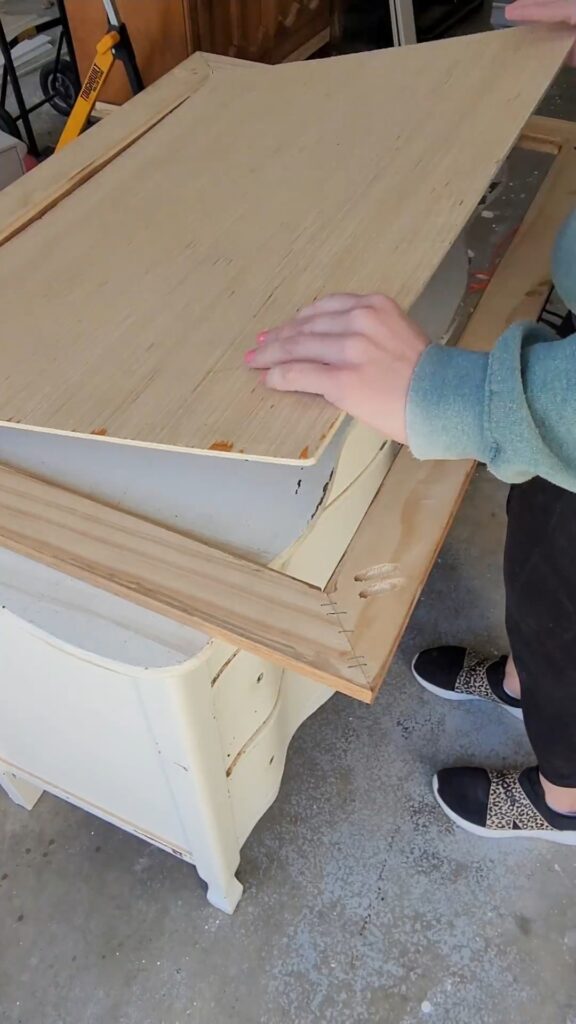
Add plywood into framing
I first put wood glue along the routed edges and then set my 1/4″ plywood into the groves. You can then use a pin nailer or stapler to attach the plywood to the framing. At the time all I had was a staple gun, so the back of my frame isn’t that pretty. I would recommend a pin nailer if you had one to avoid seeing the staples.
Print out artwork
I went onto Etsy and purchased a digital copy of the artwork I wanted for my space. I then uploaded that to Walgreens photo center and had it printed out on a poster print. This cost me about $15 total.
Use mod podge to attach artwork
To easily add this print to the 1/4″ plywood, just cover the plywood in mod podge and smooth out the poster print so there are no air bubbles.
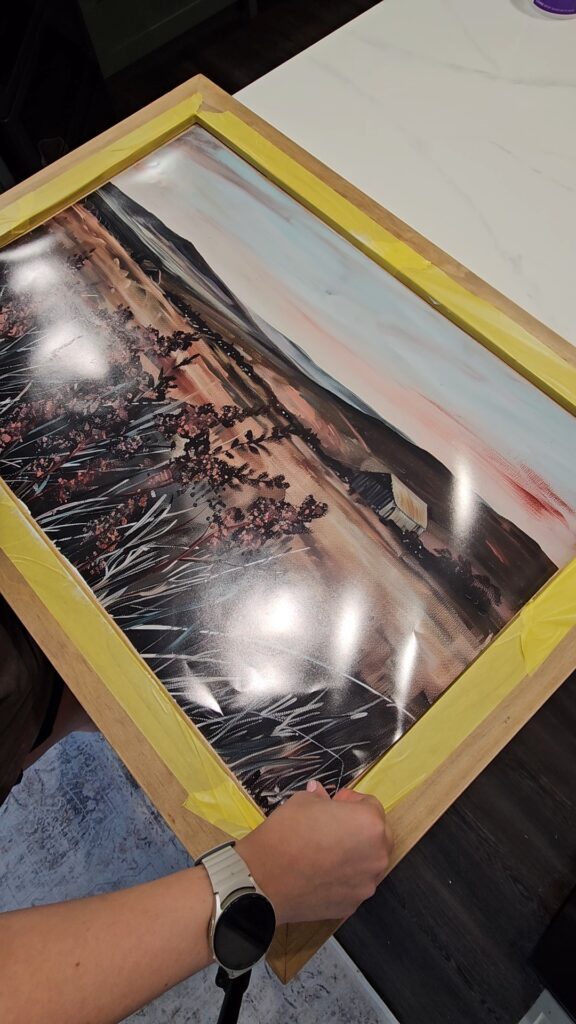
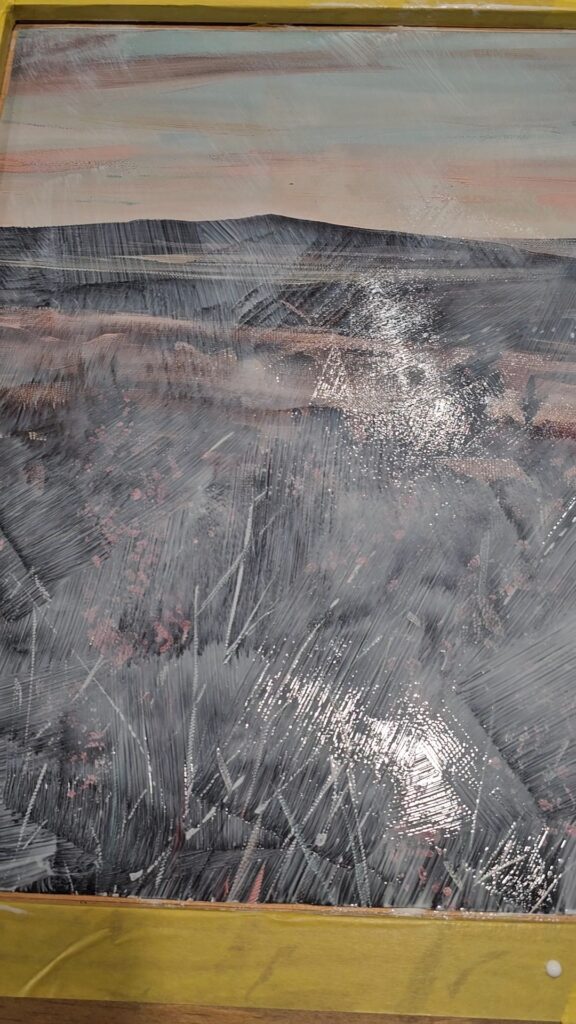
Make your print look like artwork
You don’t want to leave your poster print as it is. It’s most likely shiny and looks like a big, printed photo. You want to get a coarse paint brush and paint on brush marks with the mod podge. This will make your print look like its a big painted piece of artwork! Make sure to do super thin layers of mod podge or your print can bubble up.

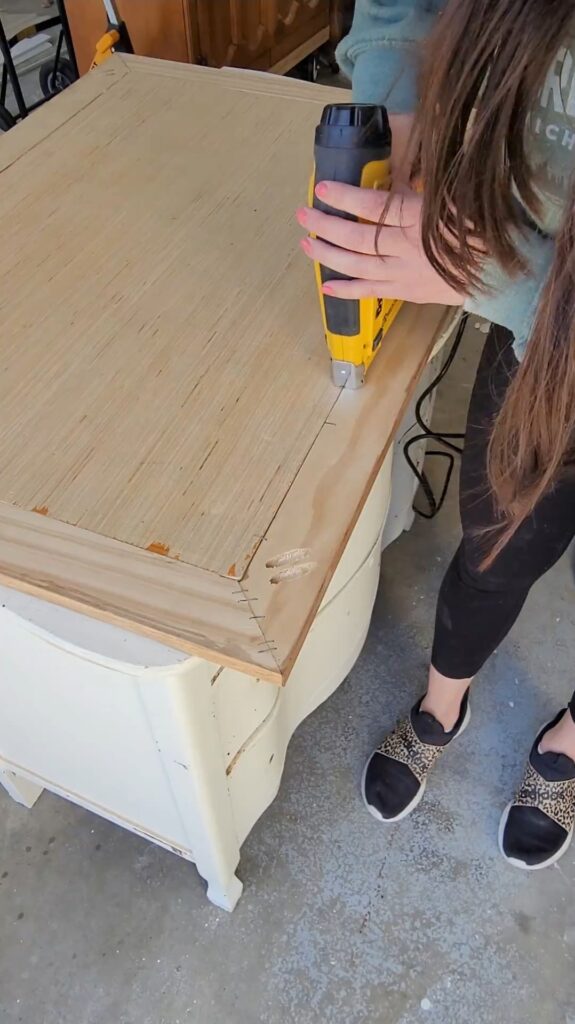
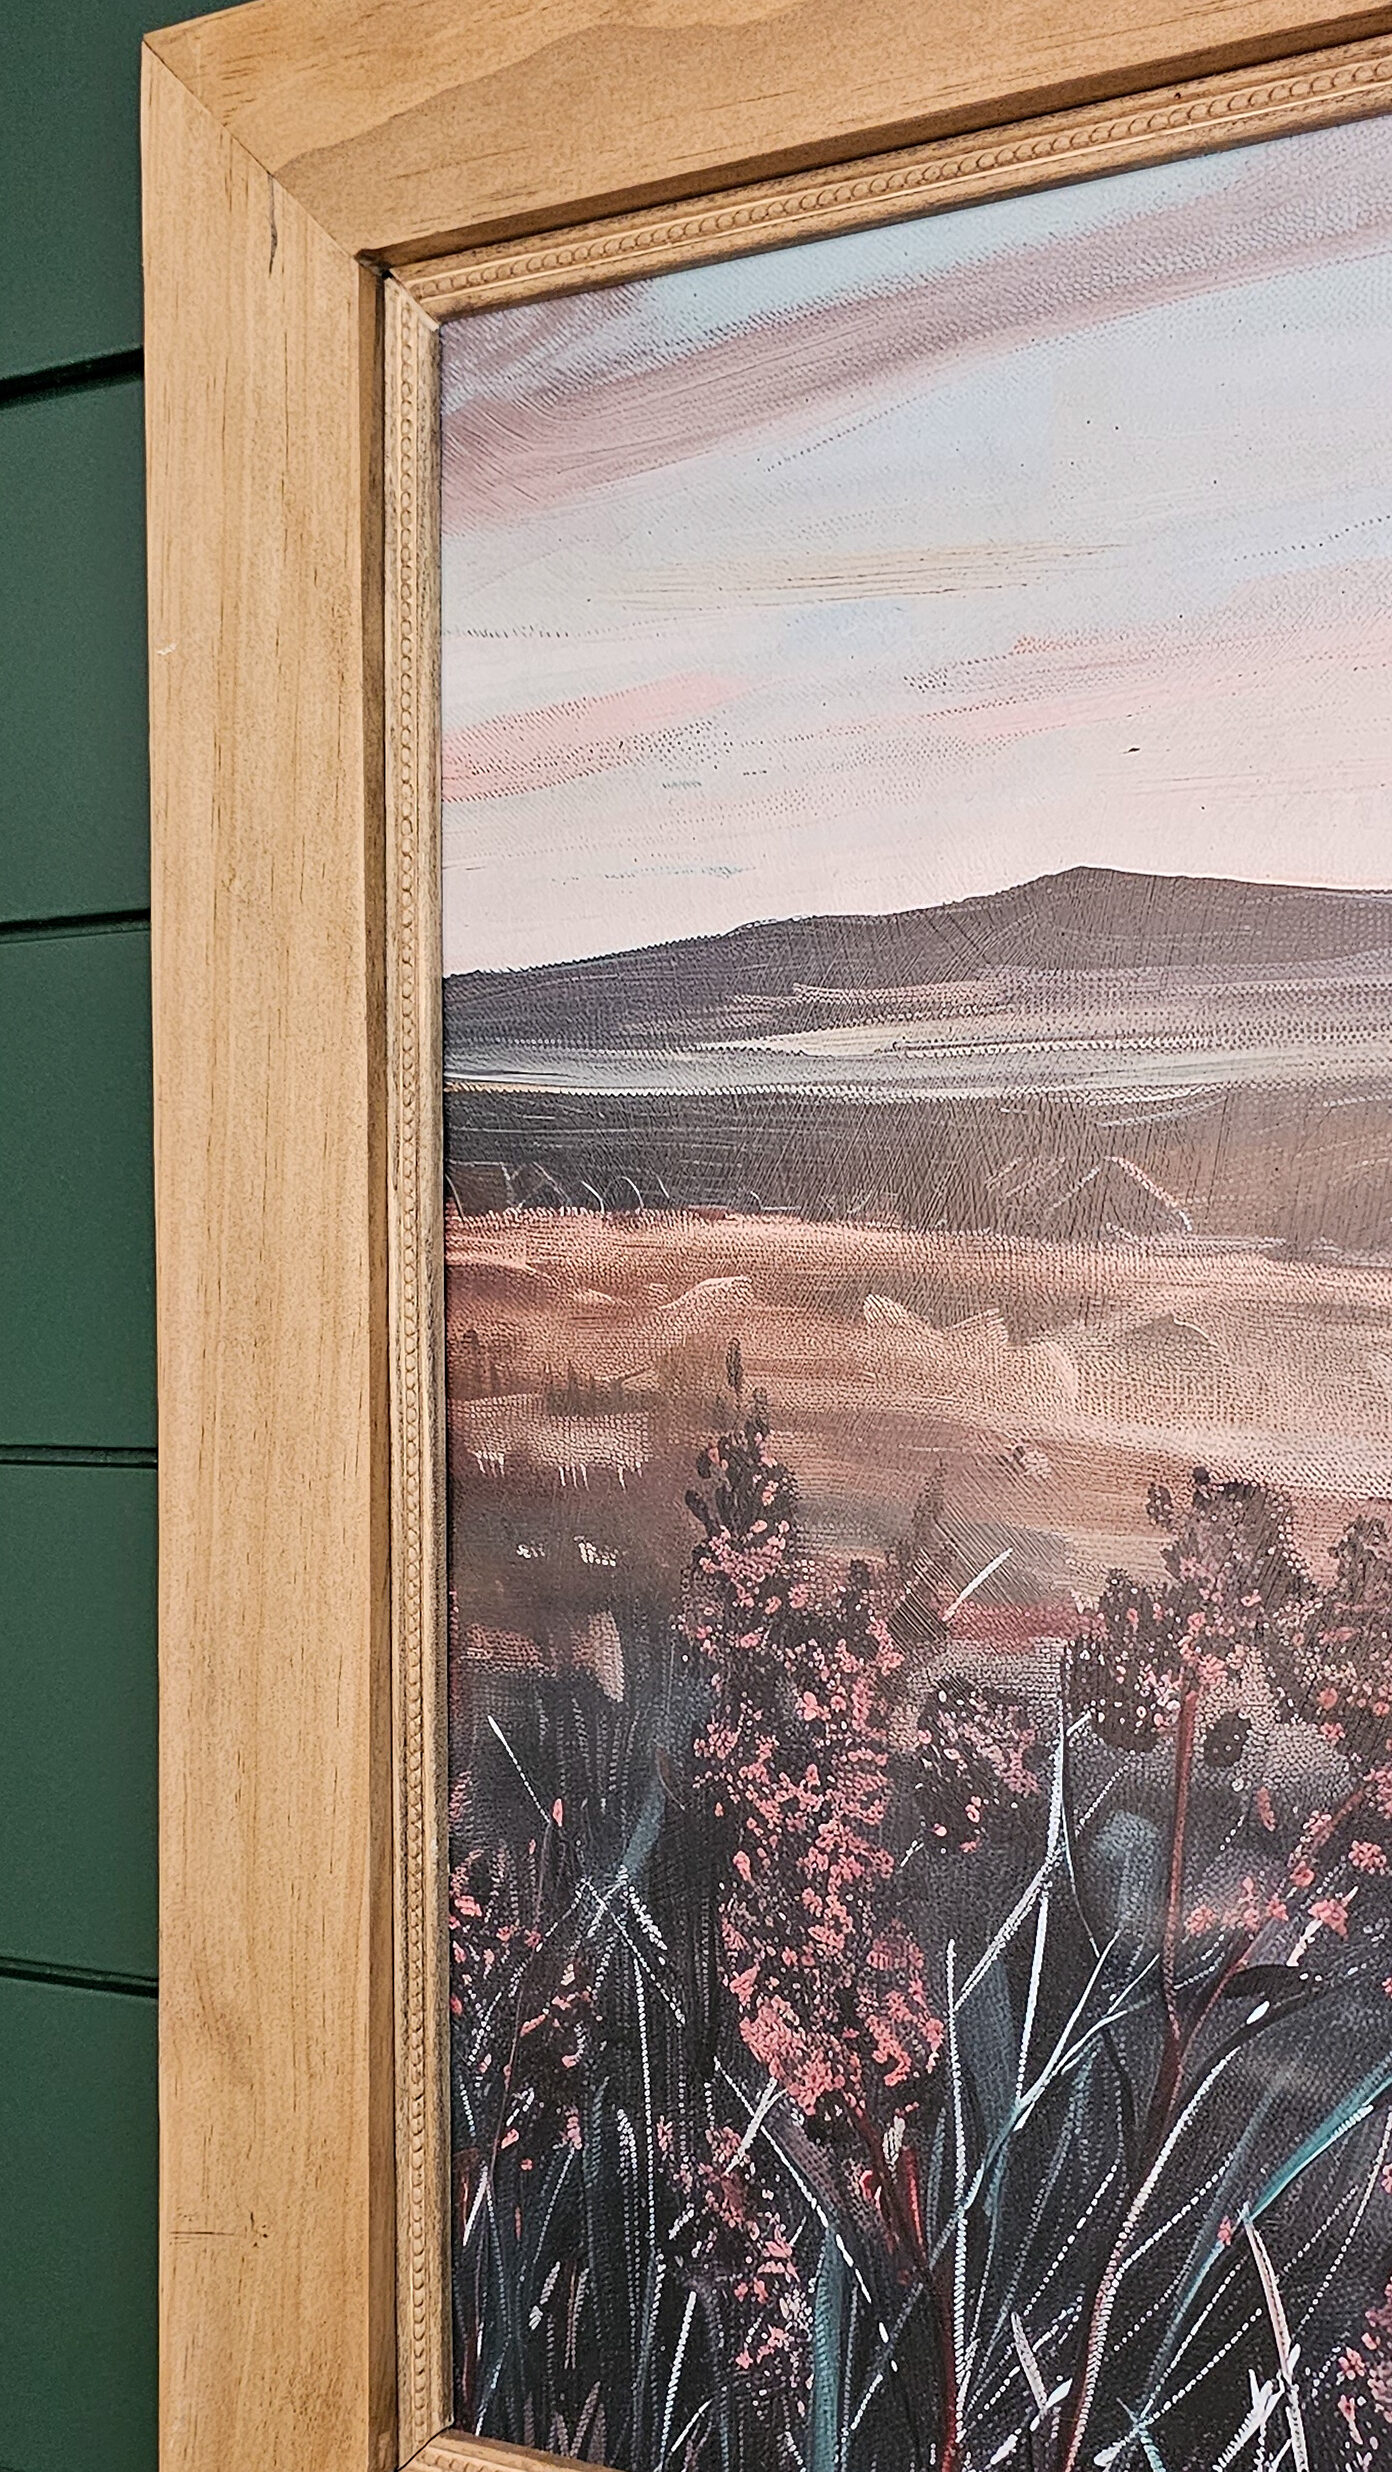
Add trim around edges
I didn’t want the poster print to just show the raw edges in my wood frame, so I added in this tiny, detailed trim using my pain nailer. It only elevated this piece even more!
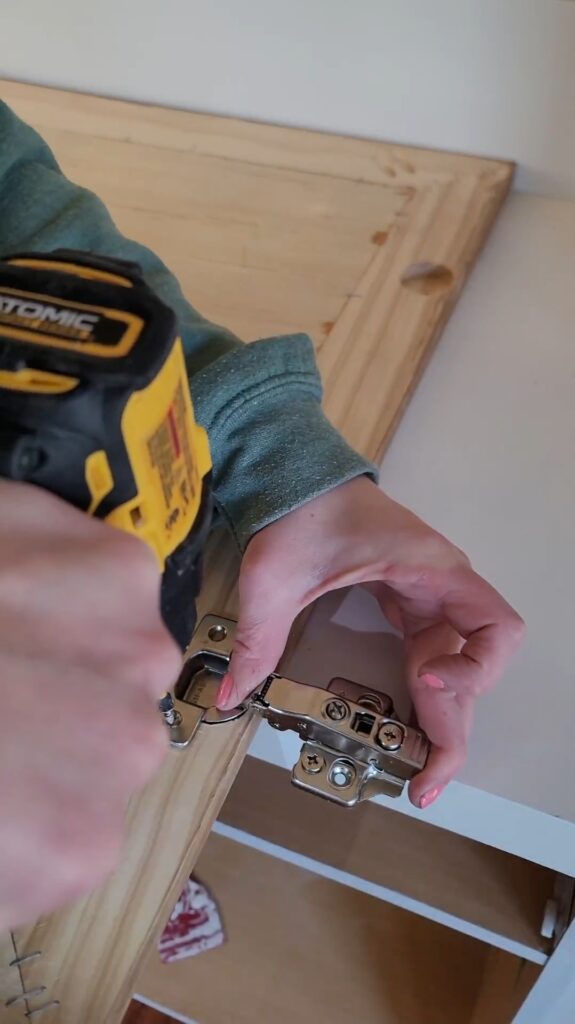
Add hinges onto back of frame
I used soft close full overlay hinges. I used this hinge jig to make my holes and then attached my hinges.
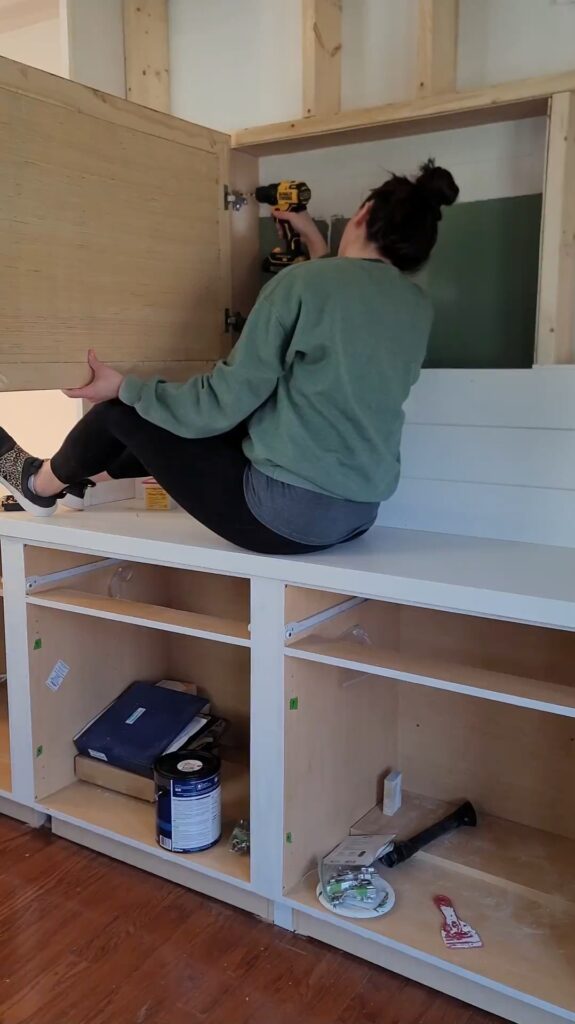
Install artwork over hidden nook
Once my cabinet hinges were in place, I added in my framed artwork to hide my nook!
If you’d like to check out my full blog post on how I built this hidden storage with a book lever, be sure to check it out here!
Jul 8, 2025