


")
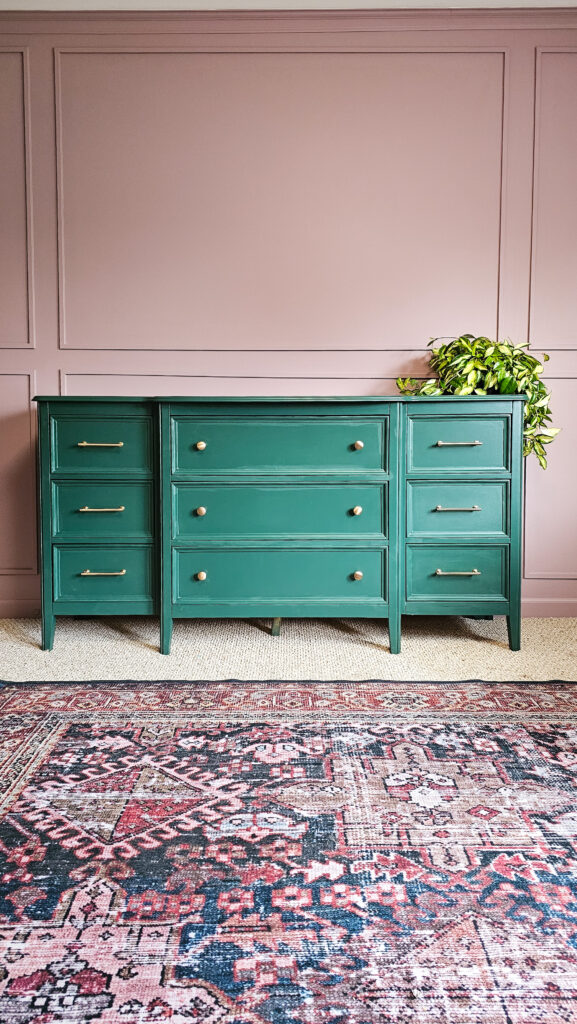
How I Brought an Old Dresser Back to Life!
DIY Dresser Makeover: How I Brought an Old Dresser Back to Life!
Have an old, tired dresser sitting in your home (or spotted one at a thrift store) and wondering what to do with it? A DIY dresser makeover might be just the project you need.
In this post, I’ll walk you through exactly how I refinished an old dresser—step-by-step. This budget furniture flip took a little patience, a few basic supplies, and created an incredible before-and-after transformation you’ll want to try yourself! I always love to recreate my spaces with existing things I own, and flipping furniture is a great step to achieve the look you want on a small budget!
If you love furniture transformations, be sure to check out my last furniture flip! I took an old vanity and gave it a faux wood makeover using just paint!

Why Choose a DIY Dresser Makeover?
Old dressers are often made with great materials but just need a little love. With the right techniques, you can:
- Save hundreds of dollars compared to buying new
- Create custom furniture to match your style
- Help reduce waste by upcycling instead of tossing
Plus, DIY furniture flipping is seriously satisfying—watching something broken and dated turn into a showstopper never gets old.

Supplies You’ll Need
Here’s everything I used to complete my DIY dresser makeover:
- Sandpaper – medium and fine grit
- Electric sander (optional but recommended)
- Primer
- Paint
- Color: Dark Evergreen by Behr
- I love Dutch Boys’ Cabinet & Trim paint, and you can get it color matched to any other brand!
- Paint Brush
- Foam Roller
- Paint Sprayer (optional)
- Budget Friendly Option: HomeRight Paint Sprayer
- Splurge Option: Graco Paint Sprayer
- Paint Spray Tent (optional)
- Polycrylic Topcoat
- Handles
- Knobs
- Handle Hardware jig (optional)
- Screwdriver or Power Drill
- Replacement Drawer Slides (for fixing broken drawers)
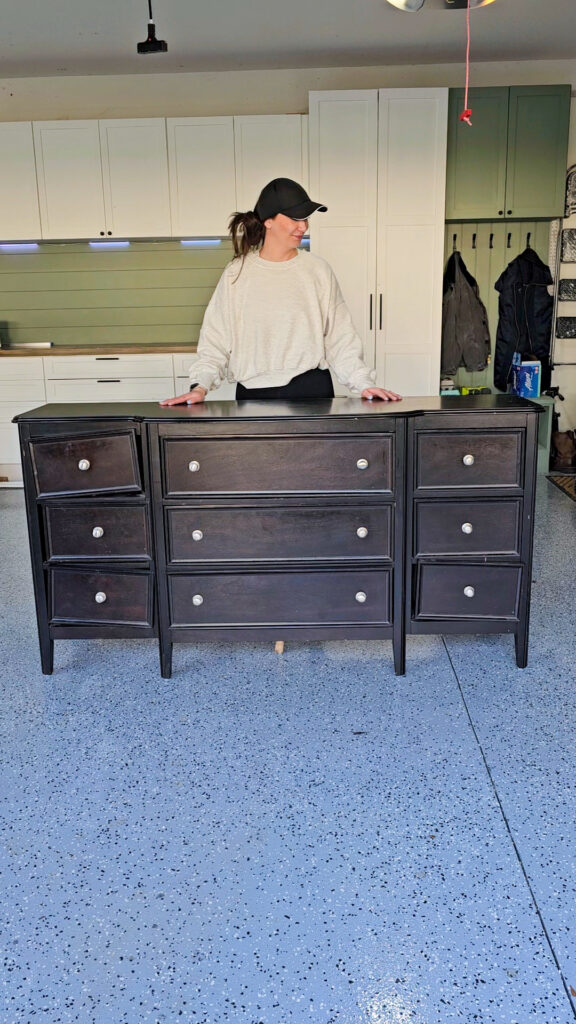
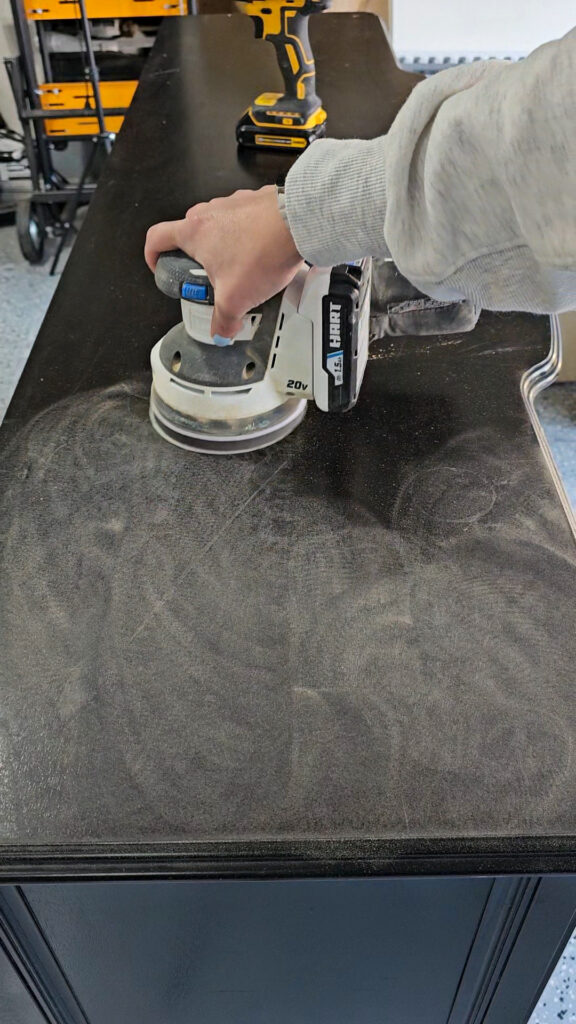
Step 1: Sanding the Dresser
First things first: sanding.
Old finishes, grime, and bumps need to come off before any new product goes on.
- Start with a medium grit (around 120) to remove old finish or rough patches.
- Switch to fine grit (220) to smooth everything out.
- If you have an electric sander, this part will be quicker, but hand-sanding works too for smaller areas.
Tip: Always sand in the direction of the wood grain to avoid scratches!
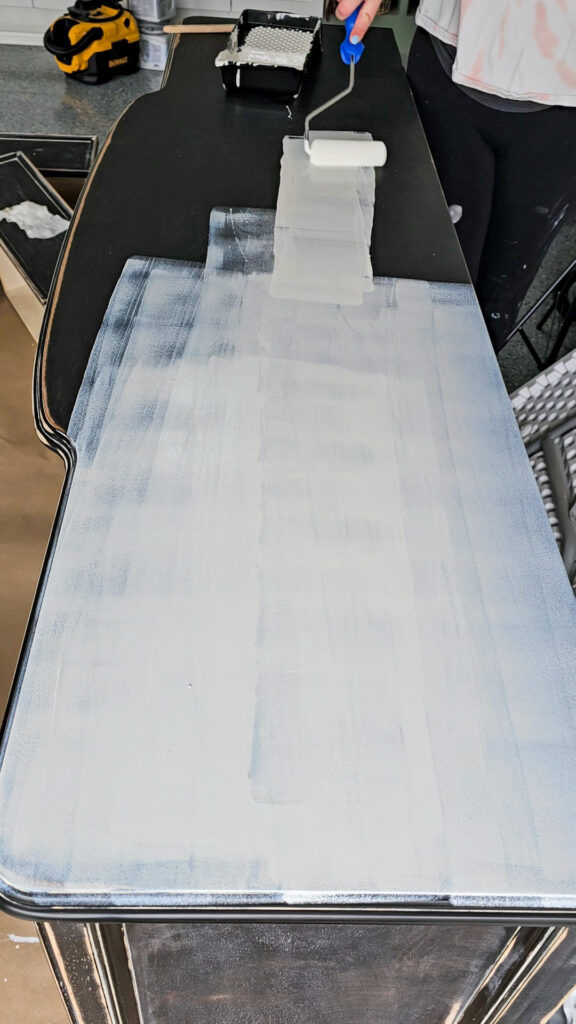
Step 2: Priming for a Flawless Finish
Once everything was sanded and wiped clean, I applied a coat of high-adhesion primer.
Priming is essential if you want your paint to stick and avoid chipping later.
- Use a foam roller for smooth surfaces and a brush for detailed areas.
- Allow the primer to dry fully (follow your primer’s instructions).
Pro tip: A good primer can also block stains and hide dark wood tones if you’re painting with a lighter color.
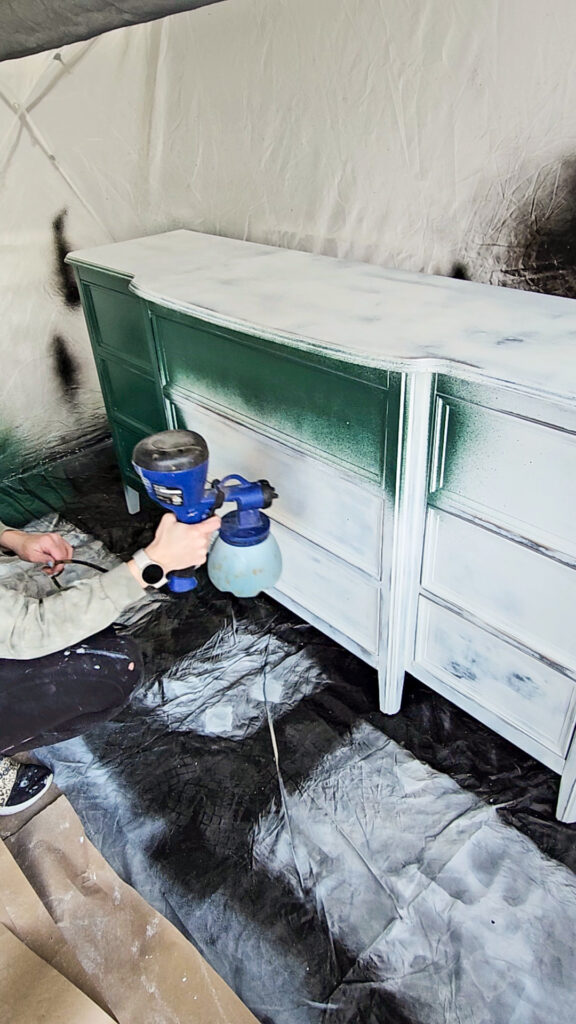
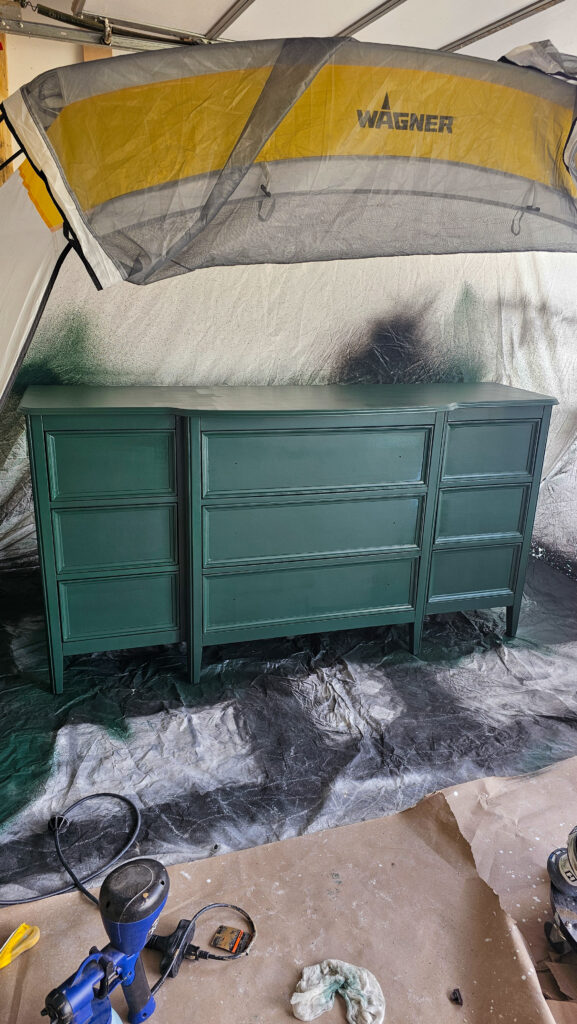
Step 3: Painting the Dresser
This is where the fun begins!
I chose Dark Evergreen by Behr, but you can pick whatever fits your space.
- Apply thin, even coats with a foam roller and/or brush. You can even spray it like I did if you want to!
- Let each coat dry fully before applying another.
- I used two coats for full coverage, but depending on your color, you might need a third.
- A spray tent is so nice to have to keep your paint and project contained!
DIY dresser makeover tip: Thin coats look more professional than thick, drippy ones. Be patient—it’s worth it!
Step 4: Sealing with a Polycrylic Topcoat
To protect all the hard work and create a durable finish, I applied a clear poly top coat.
- Choose satin, semi-gloss, or matte finish depending on the look you want.
- Apply with a high-quality brush for the smoothest results.
- Two coats are usually perfect for dressers that will get daily use.
This extra step is what makes your budget furniture flip stand the test of time.
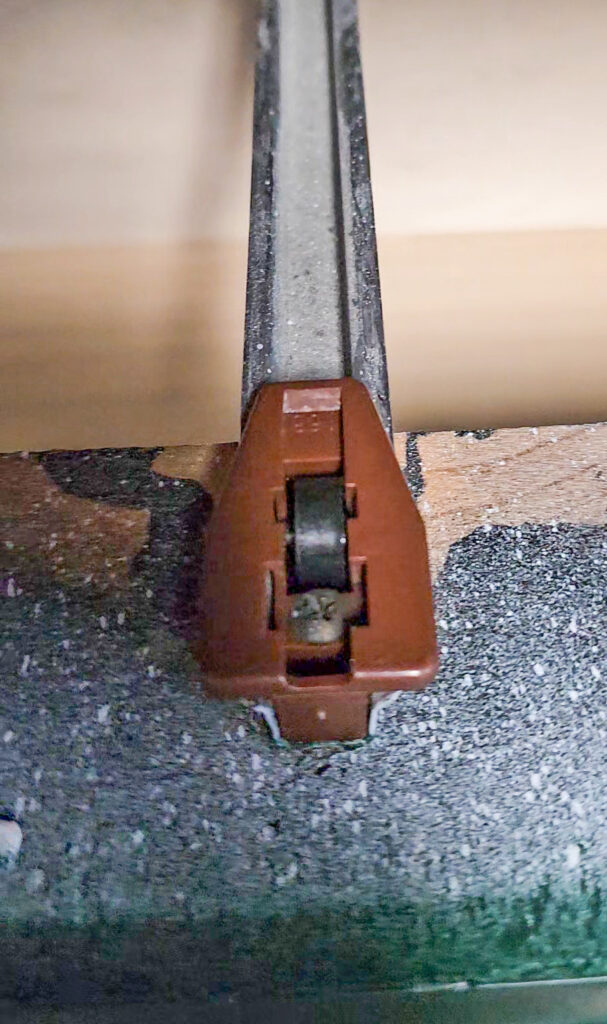
Step 5: Repairing Broken Drawer Slides
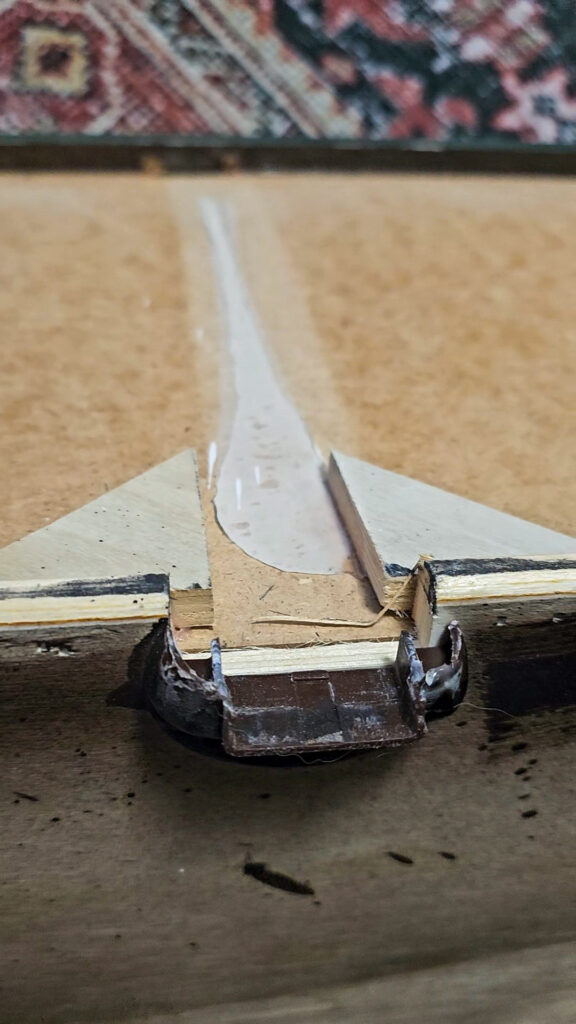
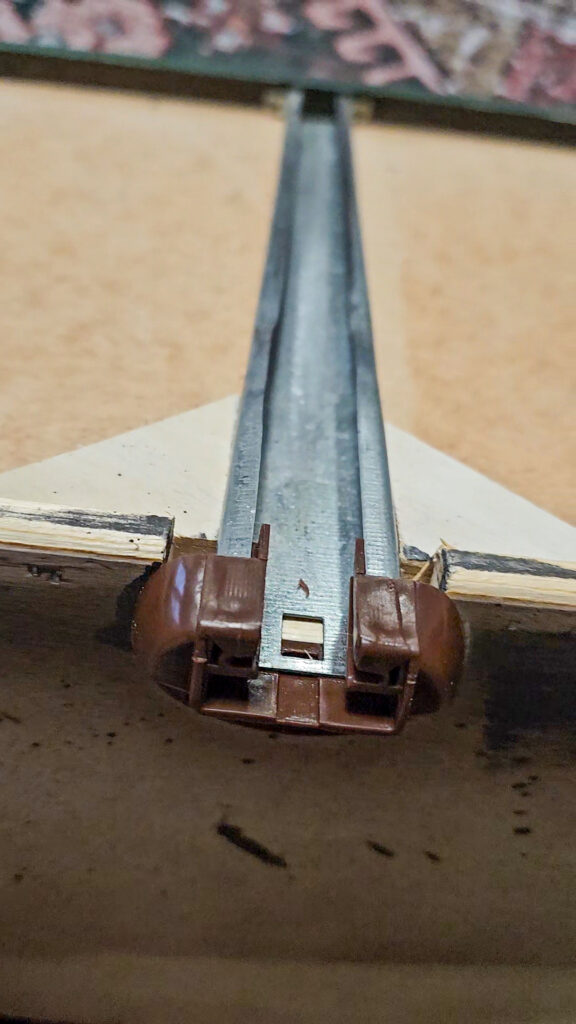
One of the drawers on my dresser had a broken slide, but it was an easy fix!
- I removed the damaged slide and replaced it with a new one (you can find replacement slides online!)
- If the drawer is just loose or sticking, sometimes wood glue and clamps will do the trick.
Never skip fixing the functionality—a beautiful dresser should also work perfectly!
Here is the front part of the drawer slide. I just looked at my ones that weren’t broke, searched Amazon using a picture, and found the perfect match!

This is the bottom of the drawer which also had broken pieces. Unfortunately, I like to pull my drawers out too far and they are overfilled… so the weight broke a few of these too! Dressers will most likely have similar style of plastic hardware but just use Google or Amazon search lenses find your perfect match!
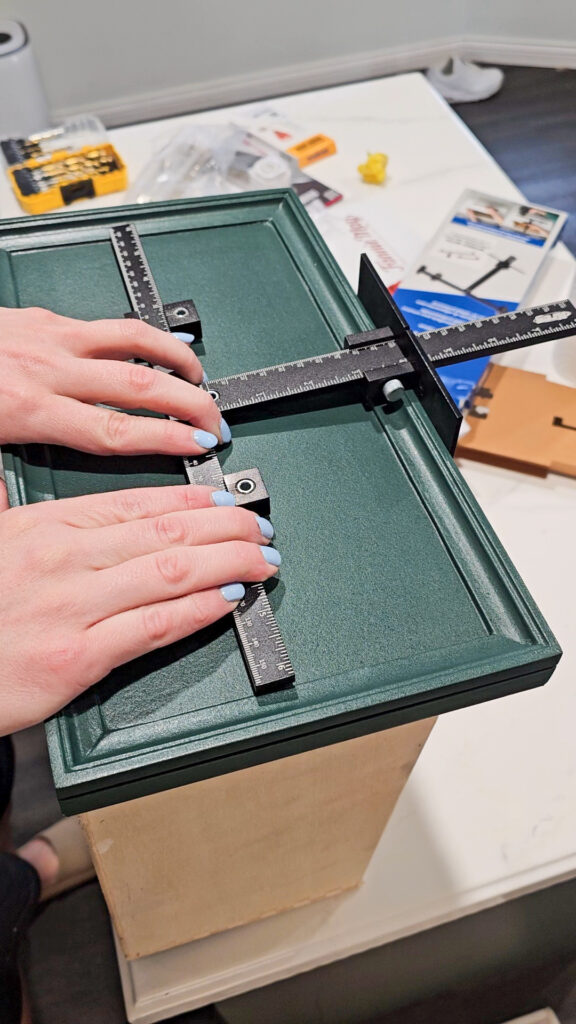
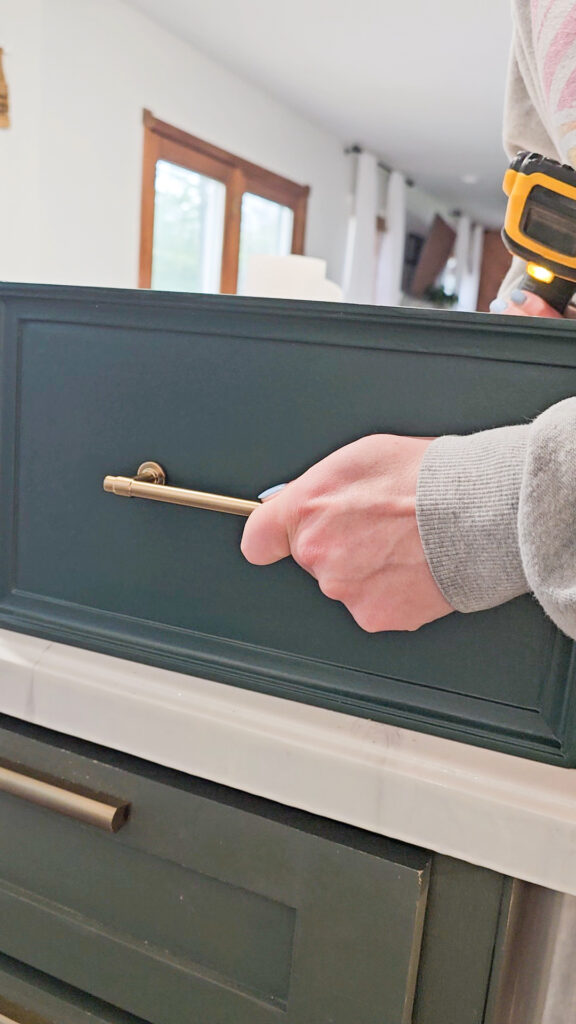
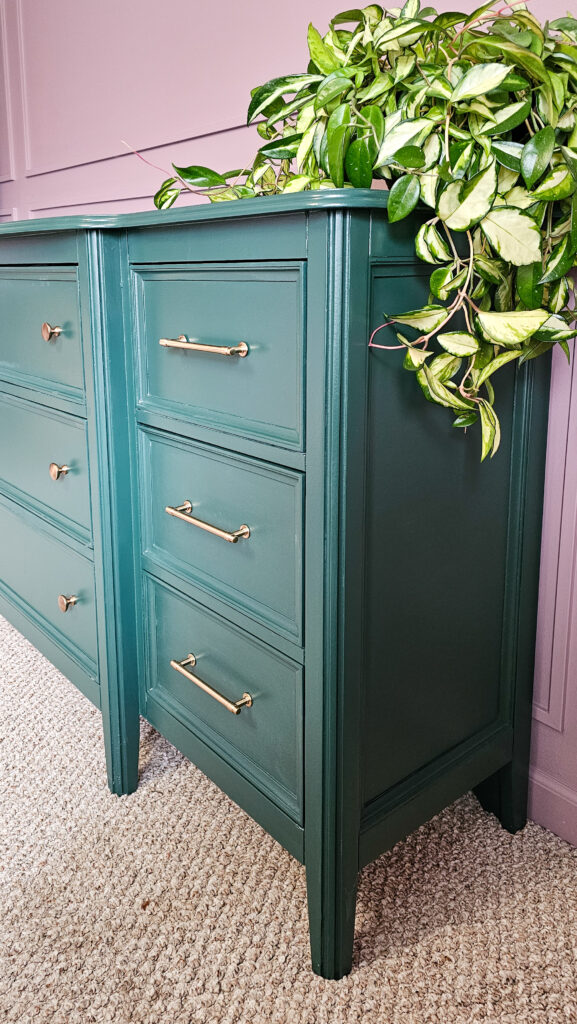
Step 6: Changing Out the Hardware
The final touch was updating the old knobs and handles.
I chose a combination of knobs and handles to give the piece a fresh, custom look.
- Unscrew the old hardware
- Measure and drill new holes if needed
- Attach your new knobs or pulls
DIY Tip: If you are installing new hardware and need to line up new holes, a hardware install jig can help line everything up perfectly! Just measure once and you use the guide on all your drawers.
I used this jig from Kreg. It was simple to setup, and I wish I had bought one sooner.

The Final Reveal: Before and After
After a few days of work (and a lot of excitement), the dresser looked completely transformed.
What once was a sad, broken piece of furniture now shines as a statement piece in my home.
This DIY dresser makeover proves you don’t need a huge budget or fancy tools to create something beautiful. With a little creativity, you can bring new life to any piece!
Final Tips for Your DIY Dresser Makeover
- Always work in a well-ventilated area.
- Prep work (sanding and priming) makes ALL the difference.
- Take your time between coats—rushing leads to mistakes.
- Customize with color, hardware, or even drawer liners for a special touch.

Inspired to start your own project? Save this post for later and start hunting for the perfect dresser to flip!
Tag me @Cedar_Hill_Builder if you try your own makeover—I’d love to see it!
If you love furniture transformations, be sure to check out my last furniture flip! I took an old vanity and gave it a faux wood makeover using just paint!
Apr 26, 2025