


")
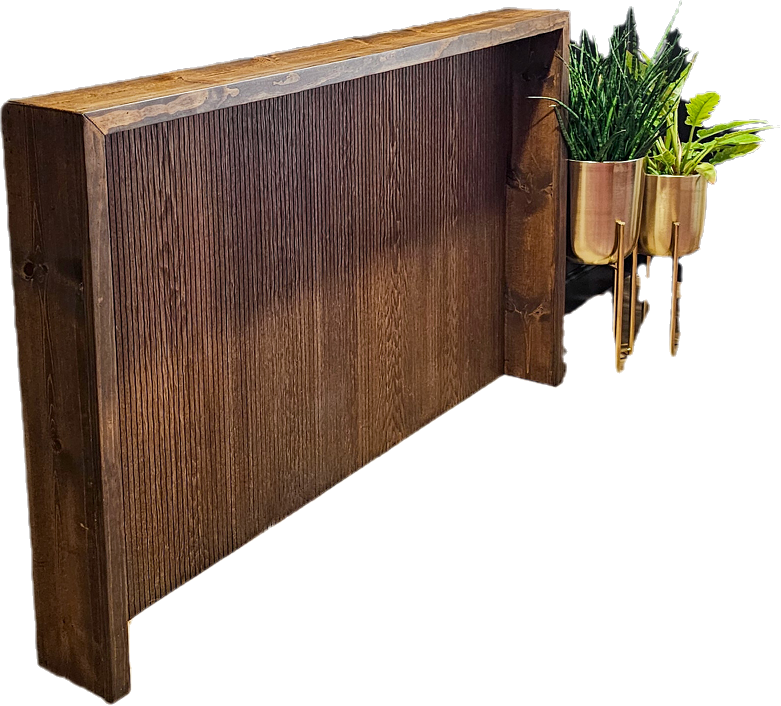
TV Console Table Build
I recently found this table online I loved, but it was out of stock and the wrong dimensions for my basement. I decided to try to build one similar! The design itself isn’t complicated so let me show you how I did it!

*I may earn a small commission on any linked items in this article*
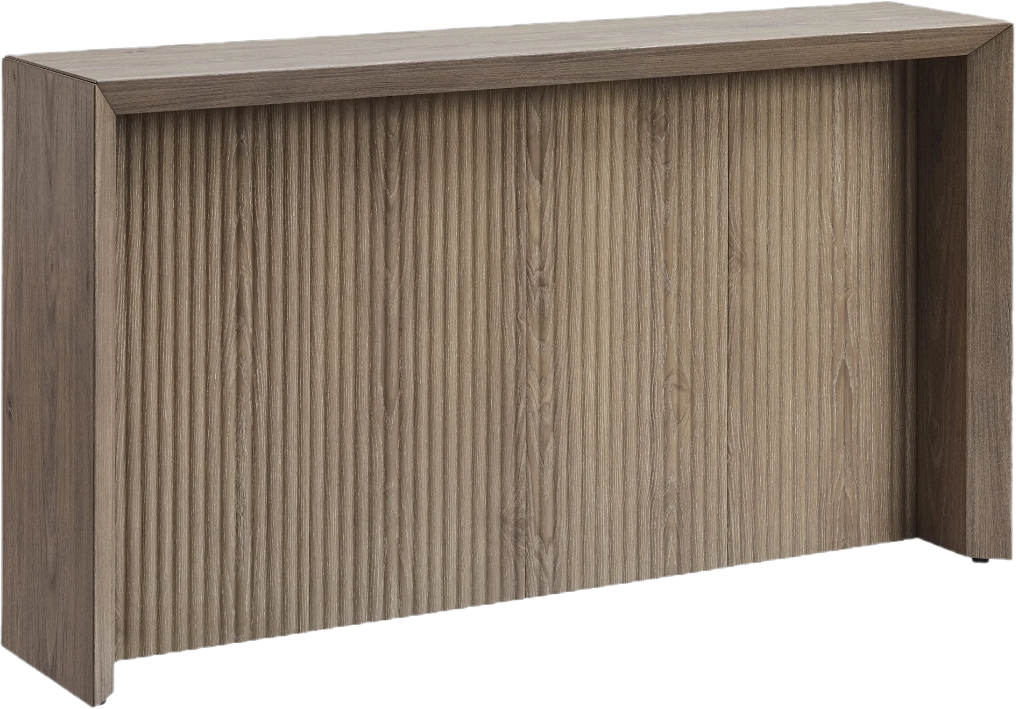
The Inspiration:
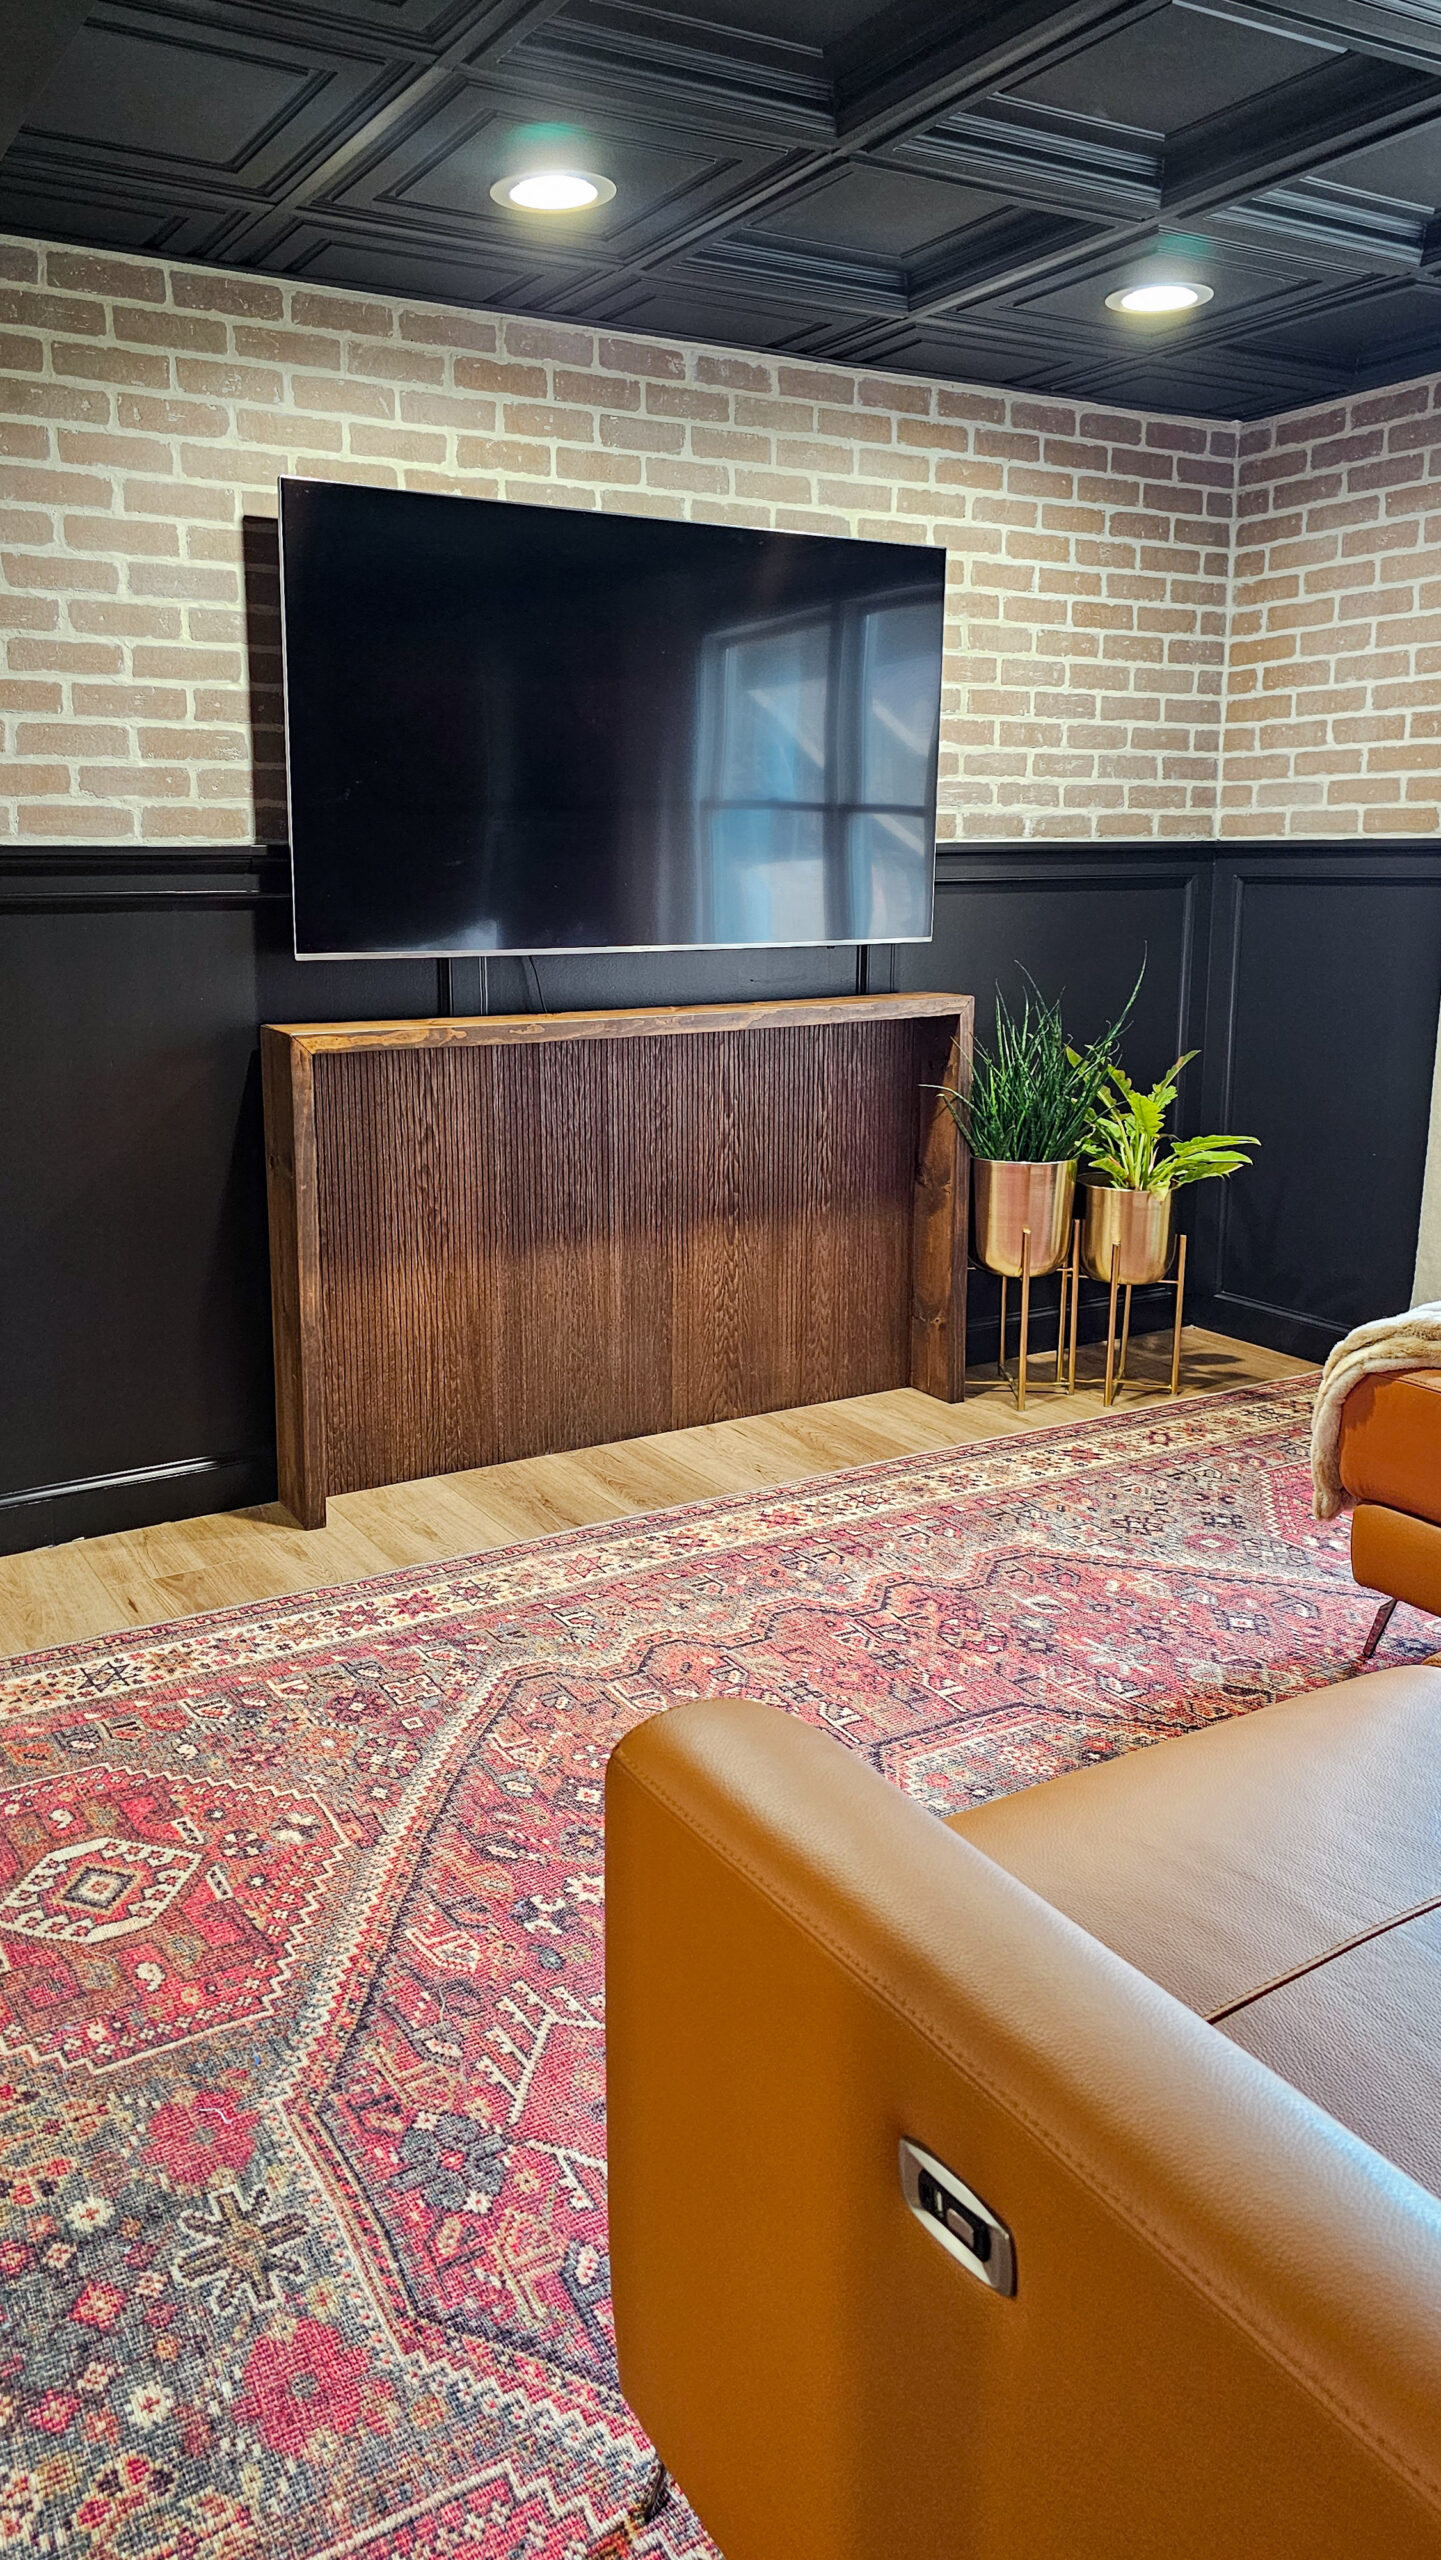
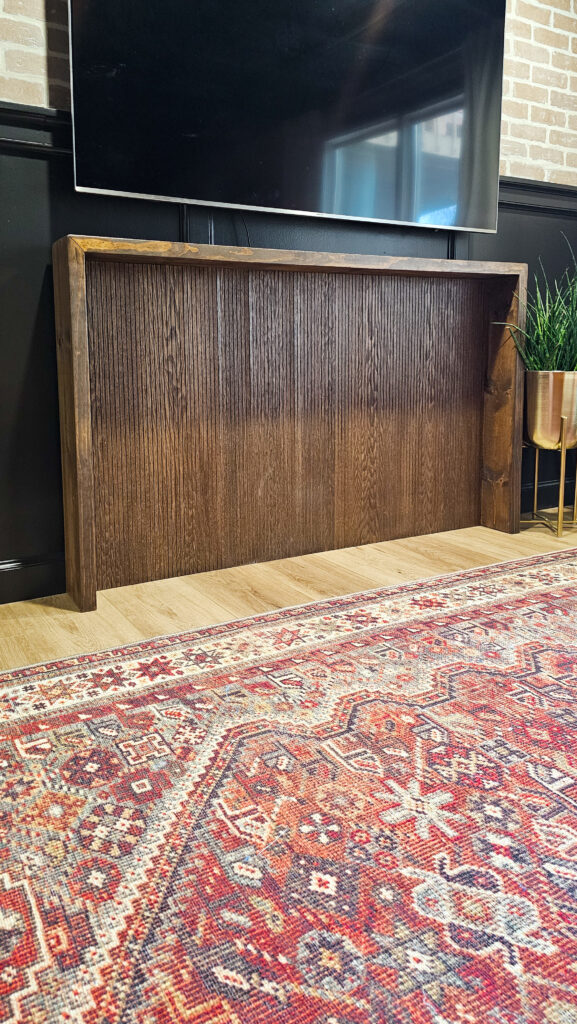
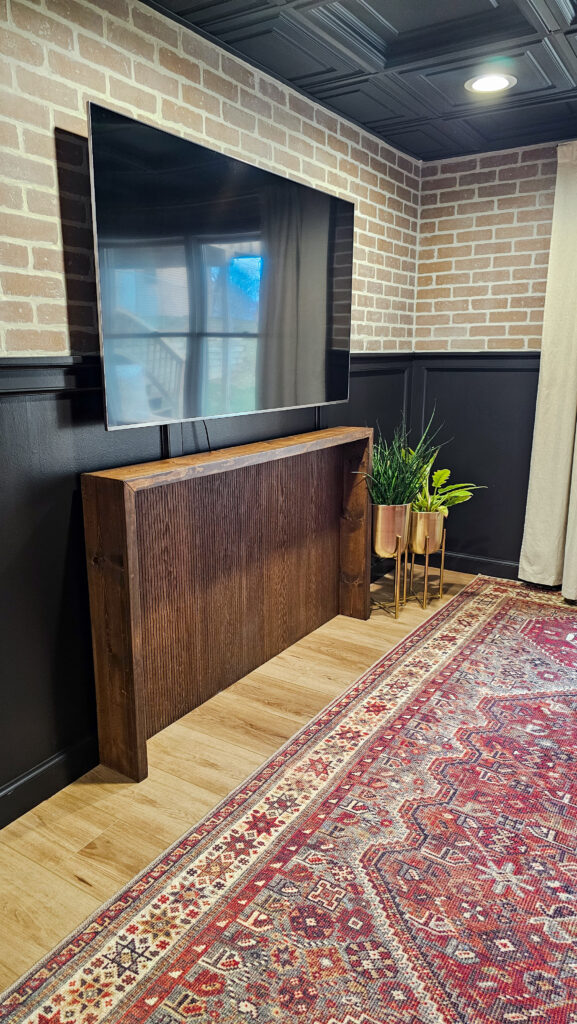
The Final Result:
If you’d like to see how I did this faux brick wall or changed out my ceiling panels, just head to my linked blog posts! You can also check my entire Basement Projects on my main page!
Supplies
- 1x8x8 boards
- 1/4″ Plywood Panel
- Pole Wrap
- 1×2 boards
- Saw
- Power Drill
- Wood Glue
- Minwax Stainable Wood Filler
- Minwax Pre-stain
- Minwax Stain – (Color: Special Walnut)
- Minwax Stain – (Color: Espresso)
- Minwax Polycrylic Max
Steps Summary
- Create thicker wood boards
- Miter cut waterfall edges
- Attach sides and top together
- Add back framing
- Install 1/4″ plywood
- Apply pole wrap
- Wood fill and sand everything
- Apply Minwax Pre-stain
- Apply Minwax stain
- Apply Minwax topcoat
Detailed Steps
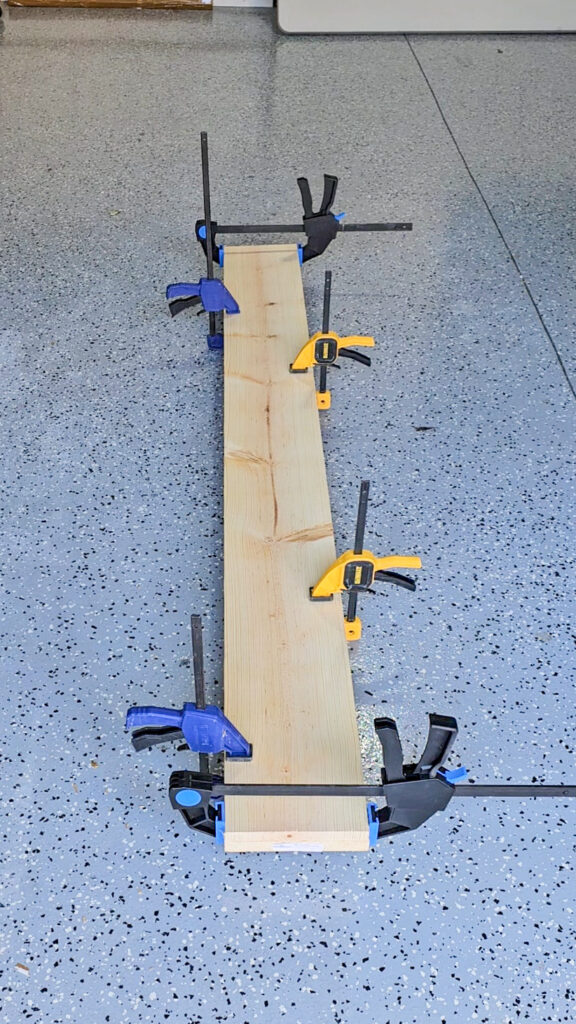
Create thicker woods boards
Buying thick lumber (1.5″ thick) can be really expensive. I like to use this trick to create the illusion of thicker boards to save money! First you will take your 1x6x8 boards and glue them together. Use wood glue to attach them and you will need to put something heavy on the boards or apply clamps and let it all dry.


Once the boards have dried you can cover the edge one of 2 ways: edge banding or a 1×2 board. I opted to use a 1×2 board because it made my table wider, and this is probably the cheaper option for a project this small. I have previously used edge banding and it works just as well and stains too just like wood!
I added wood glue to my edges and then used my nail gun to add the 1×2 board to my edge. Now instead of 3/4″ thick wood, I have 1.5″ thick looking wood boards my table.
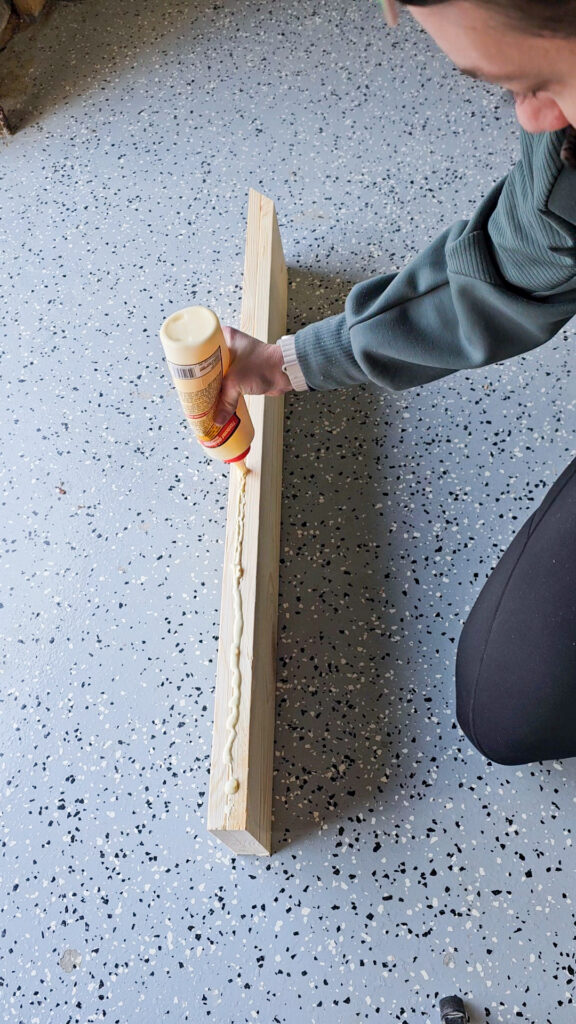
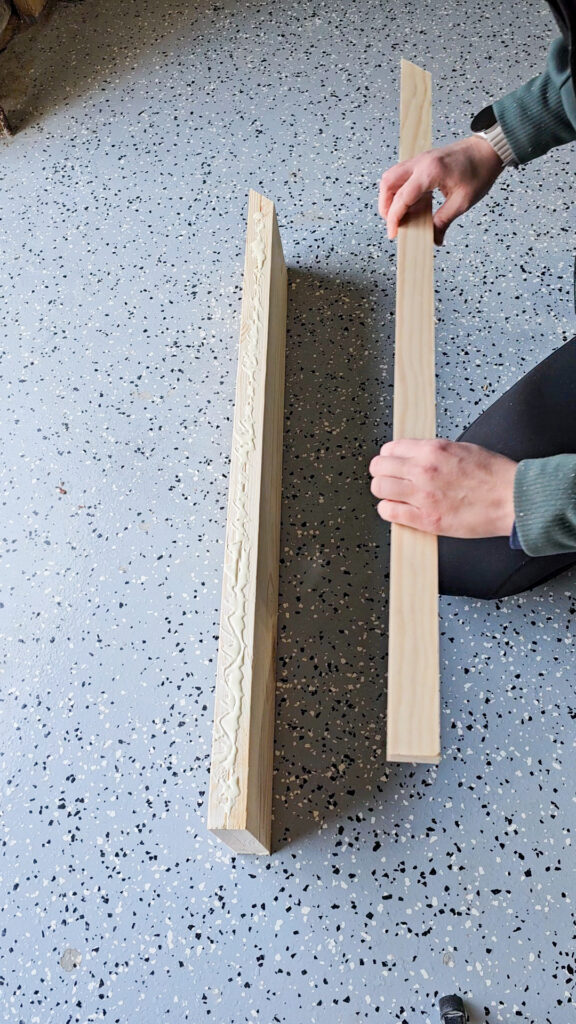
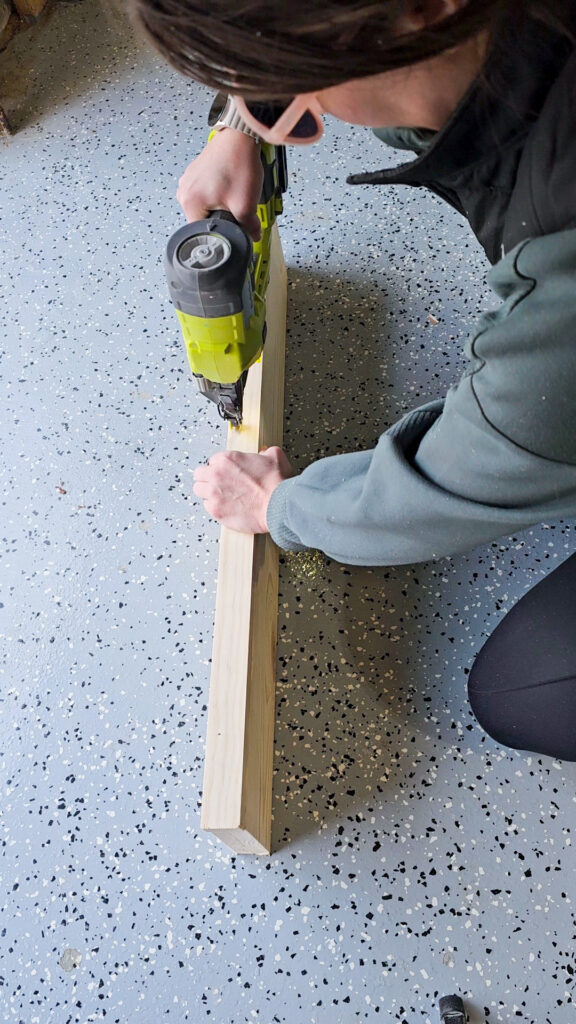
Table Dimensions & Cut List
Overall Dimensions: 36″ Tall x 60″ Wide x 8″ Deep
Cut List:
- Legs – 36″ long – 2 cuts
- Table Top – 60″ long – 1 cut
- 1/4″ Panel – 34.5″ tall x 59.25″ wide
- Polewrap – 34.5″ tall x 59.25″ wide
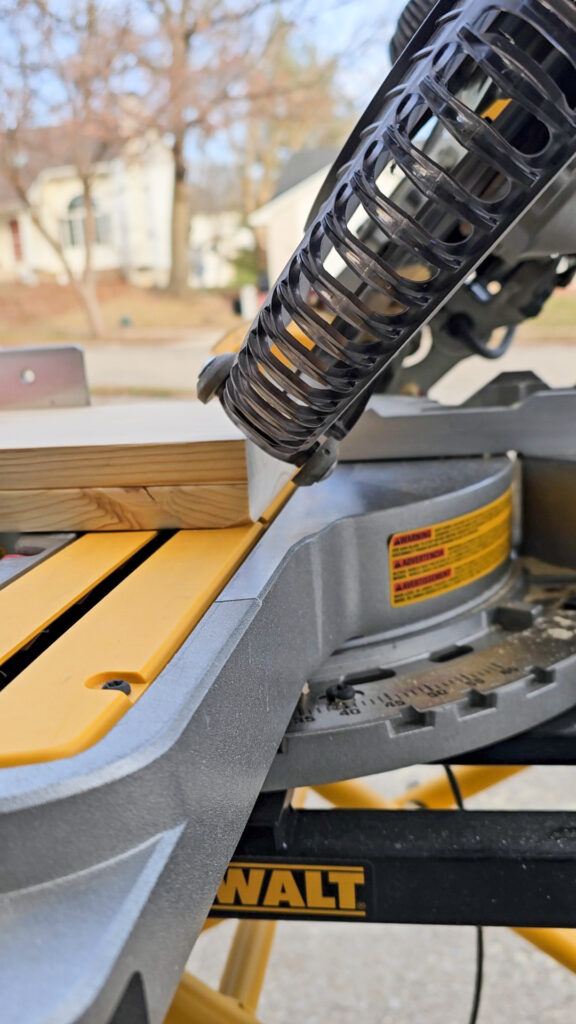
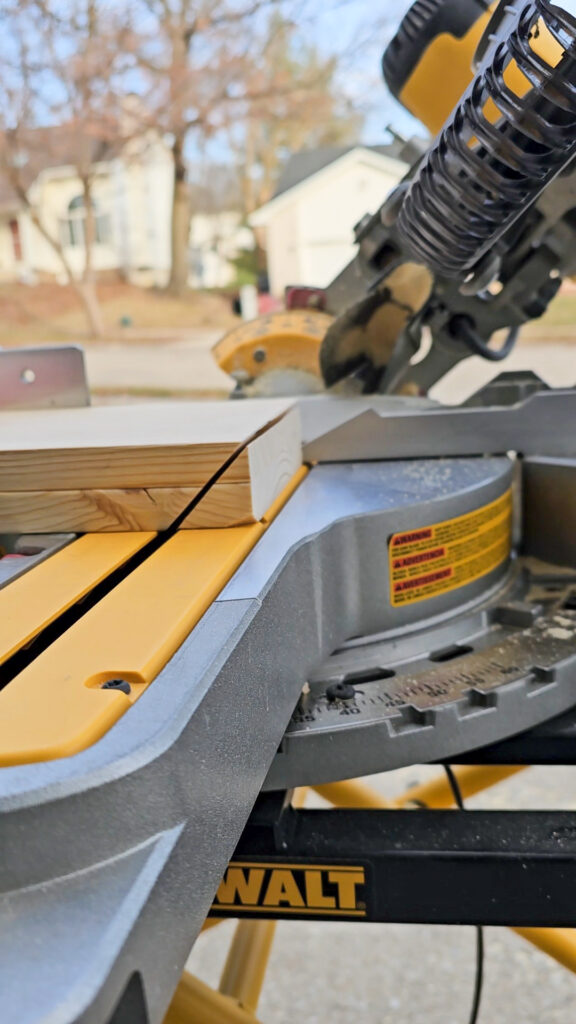
Miter Cut Waterfall Edge
The table itself I am trying to dupe has a waterfall edge, meaning it has a continuous look to it from the top to the side legs. This is easily achieved with a miter saw. If you don’t own a miter saw, circular saws can also do mitered edges as well! If this still isn’t an option, you can simply leave out the waterfall edge and your table will still look beautiful!
I moved my saw to do a 45-degree cut on the top edges of my legs and both sides of my top board
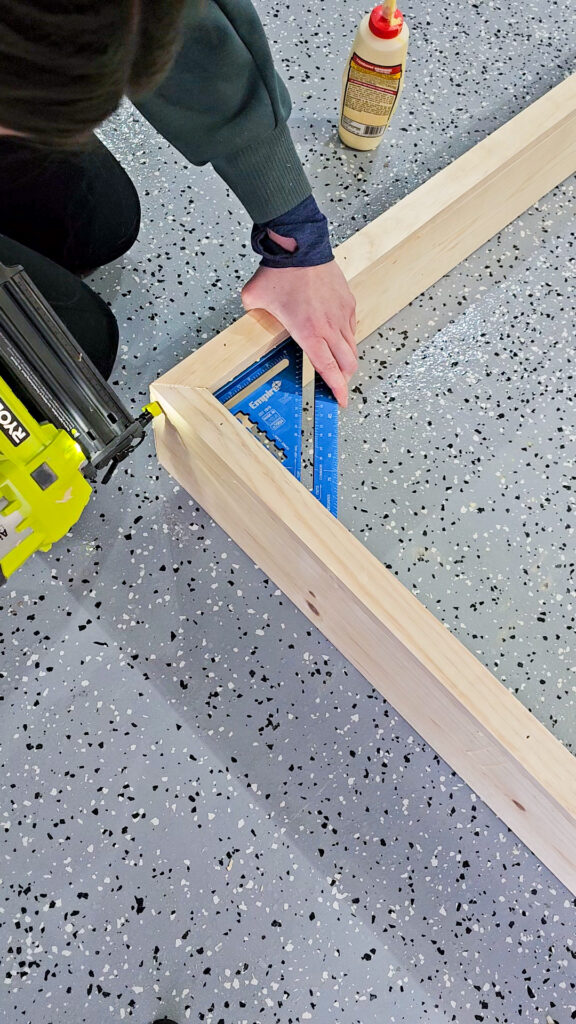
Attach Legs & Top Together
To attach the legs to the tabletop, you can use just glue and a nail gun. I used 2″ long nails to ensure my legs were secure. It is important to use wood glue when joining boards together because it provides extra durability for your table. You want to make sure your legs and top are perfectly square, so you can use a Carpenter’s Square to check it.
Add Back Framing
Originally I had wanting to add my back panels to my table by adding groves along the back with my router. However, because my table is 60″ wide the panels in the middle would be very flimsy. So I decided to add some simply framing along the back to provide structure for the middle panels and something to attach them to.
I grabbed scrap 1×2’s I had in the garage and just glued and nailed them into the console table legs to create a back. I am glad I went this direction, because the console table itself had extra support as well.

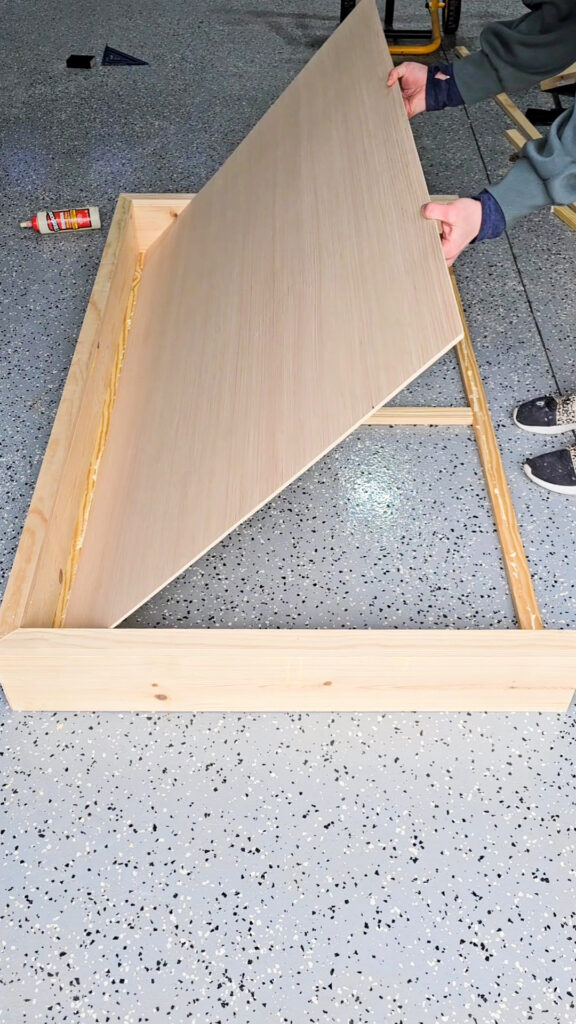
Install 1/4″ Plywood Backing
I bought a 1/4″ piece of plywood to add along the back. You might not need this if your table is not as wide as mine, but again since my console table was 60″ wide, I felt this would add extra structure for my pole wrap. If you do not own a saw to cut this big sheet down, you can ask your hardware store to make the cuts for you! This is a free service and takes one step out of the process for you. Just be sure to come ready with your measurements you will need. I always triple check everything before I head to the store.
Once my plywood panel was cut, I just added wood glue along my framing boards and then used 1/2″ long nails to attach the board to the framing.
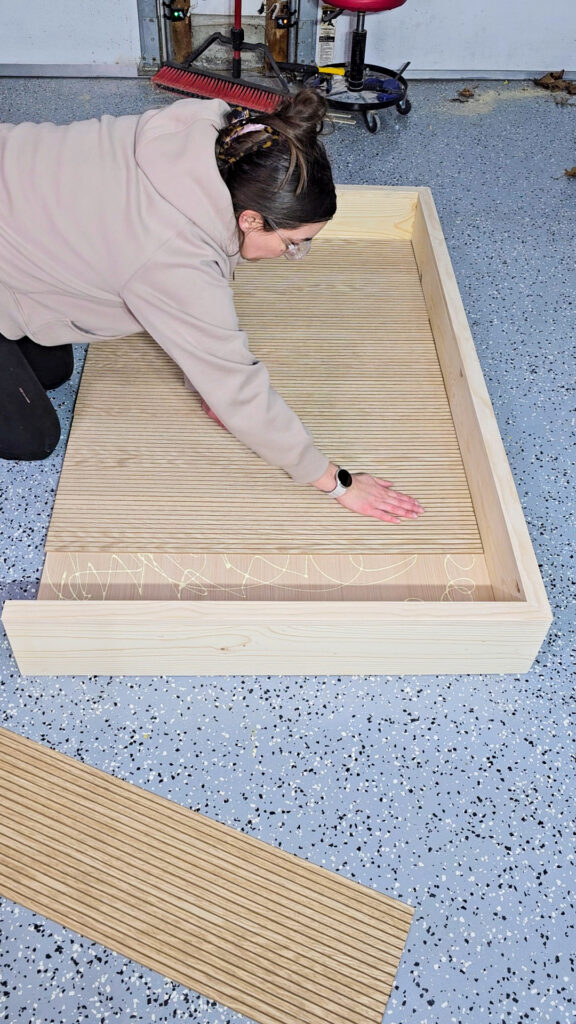
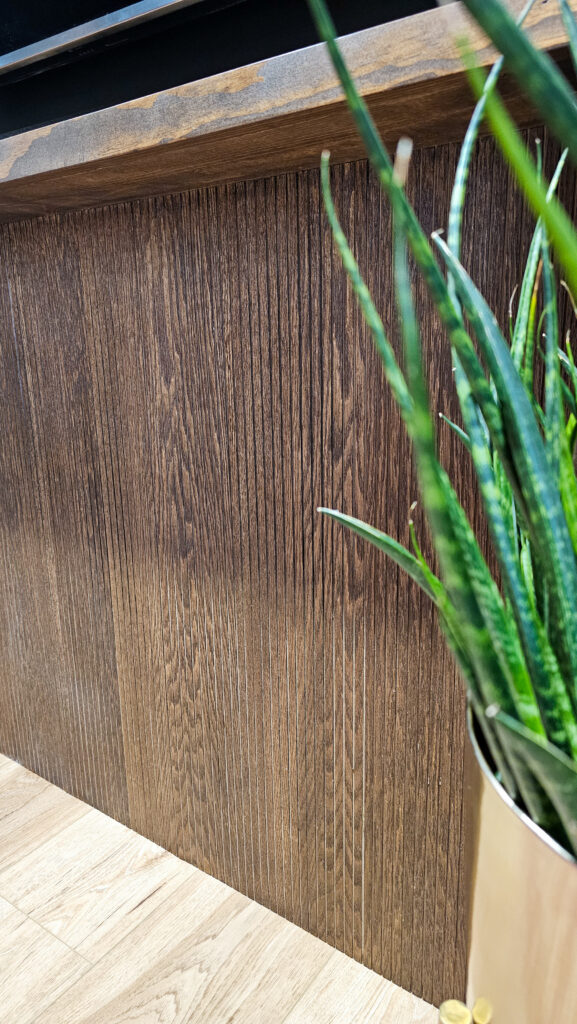
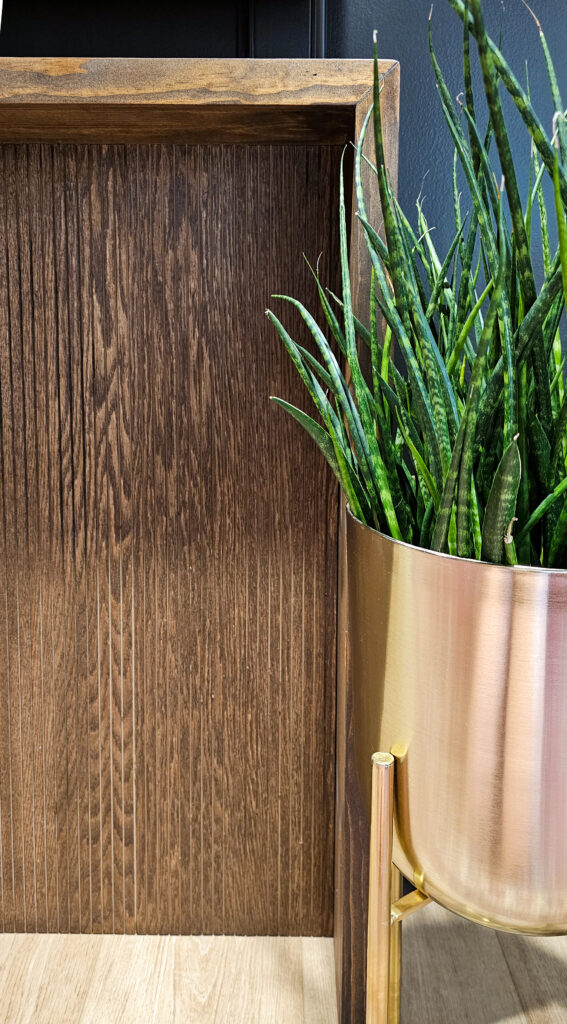
Apply Pole Wrap
Pole wrap is very easy to work with and is stainable or paintable! I love the fun detail that this pole wrap added into the console table. You can just a saw to just cut the panels to the height you need. I applied using just wood glue, not nail. The pole wrap isn’t very heavy, so glue was plenty to hold it on
Wood Fill and Sand Everything
You will want to fill all your nail holes in with this Minwax Stainable wood filler. This will help those holes blend in with your stain.
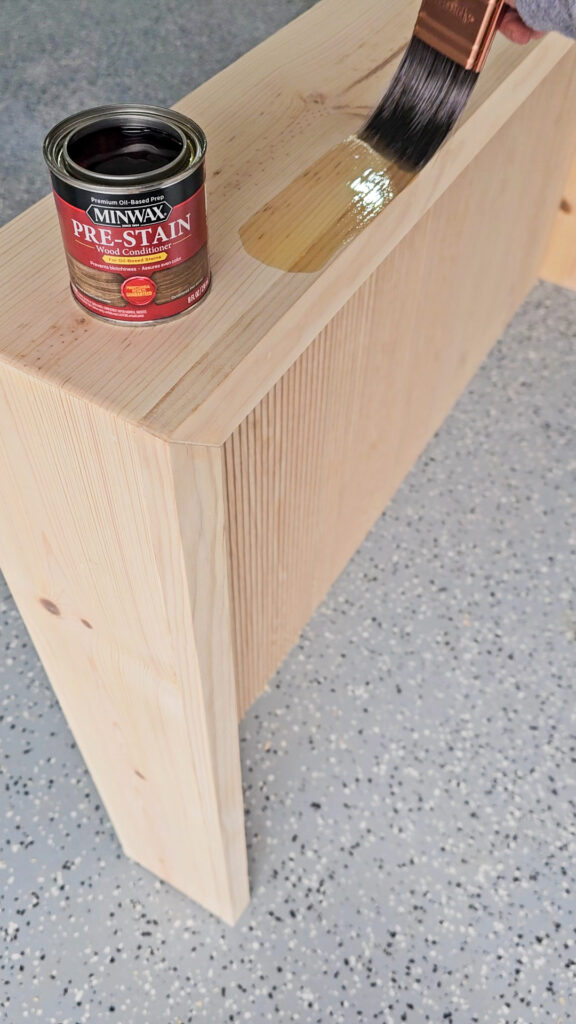
Apply Minwax Pre-stain
One thing that I have learned staining wood, is you want to use pre-stain, especially on woods like pine. This will help the color evenly absorb and help with any blotchiness you may have had before. I never realized this was my issue until I started using Pre-stain! Just apply it, let it sit, then wipe off any excess.
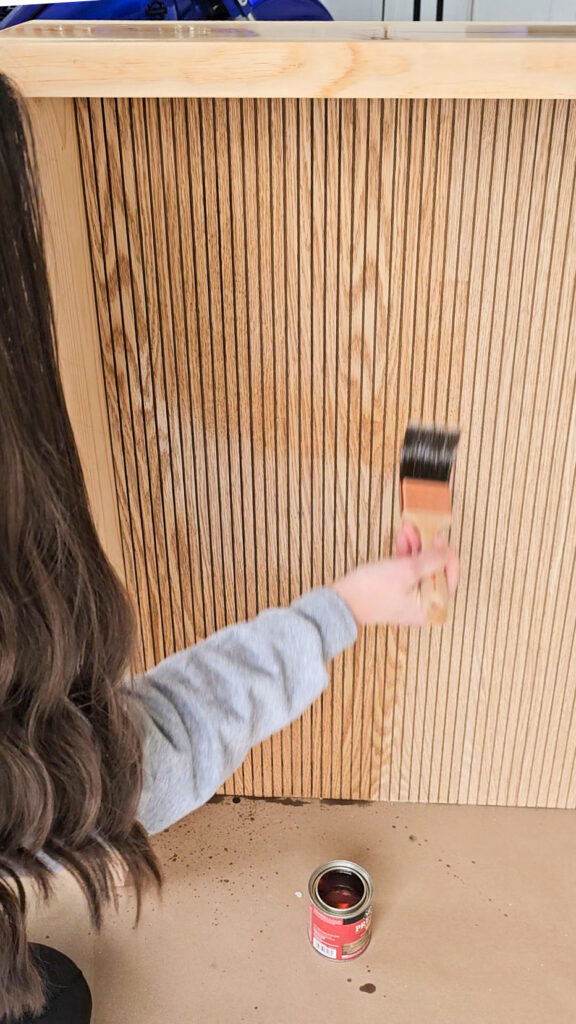
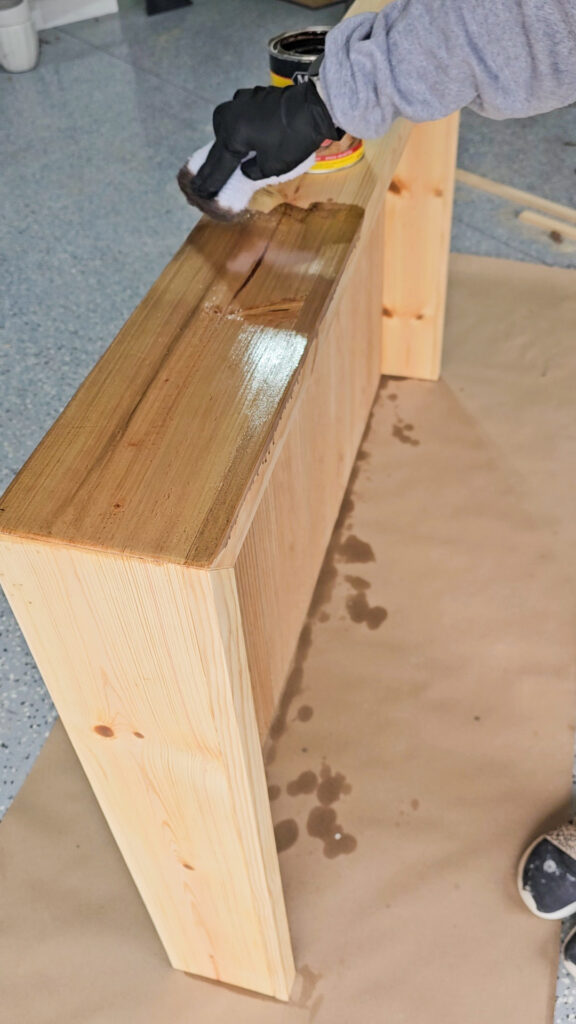
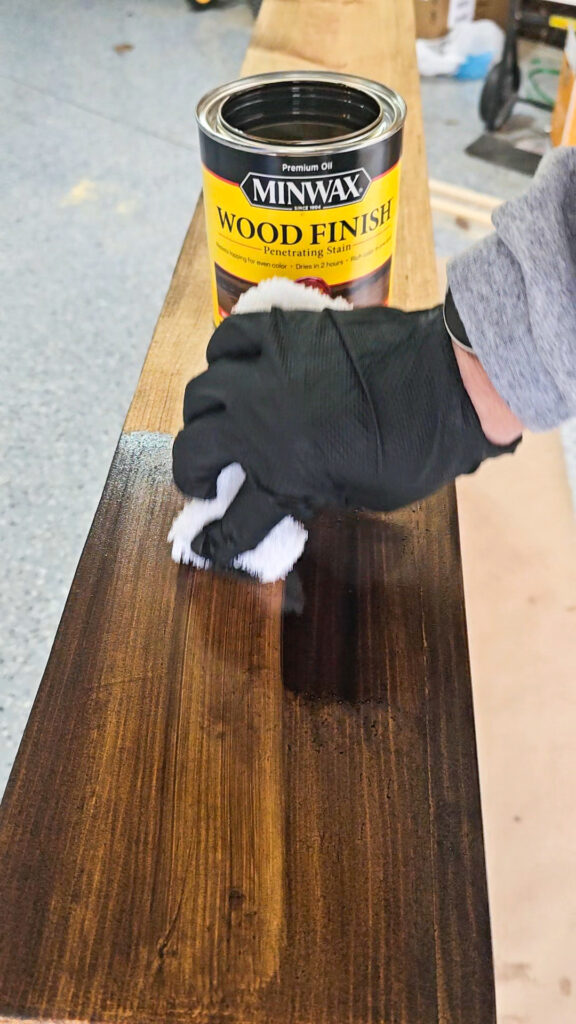
Apply Minwax Stain
This is where I ran into a dilemma! I loved 2 colors, so I decided to do a combination of 2 colors: Special Walnut + Espresso. This is my favorite thing about staining wood is you can easily create your own custom color for your furniture. The Special Walnut created a great warm base for my console table, and the Espresso added that rich tone I was looking for.
Just use a stain rag or brush to apply the stain and wipe off any excess!
Applying Special Walnut:
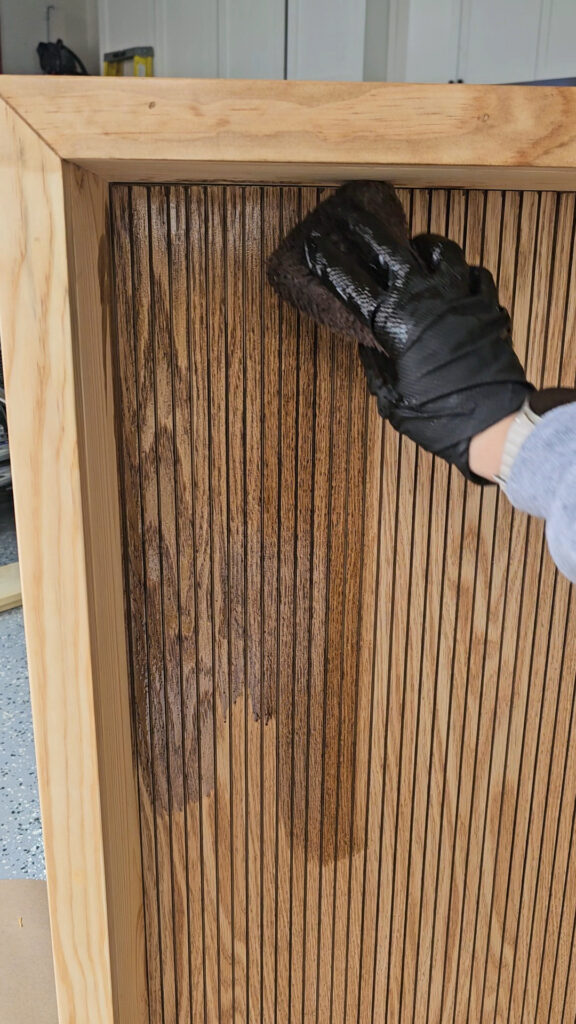
Applying Espresso:

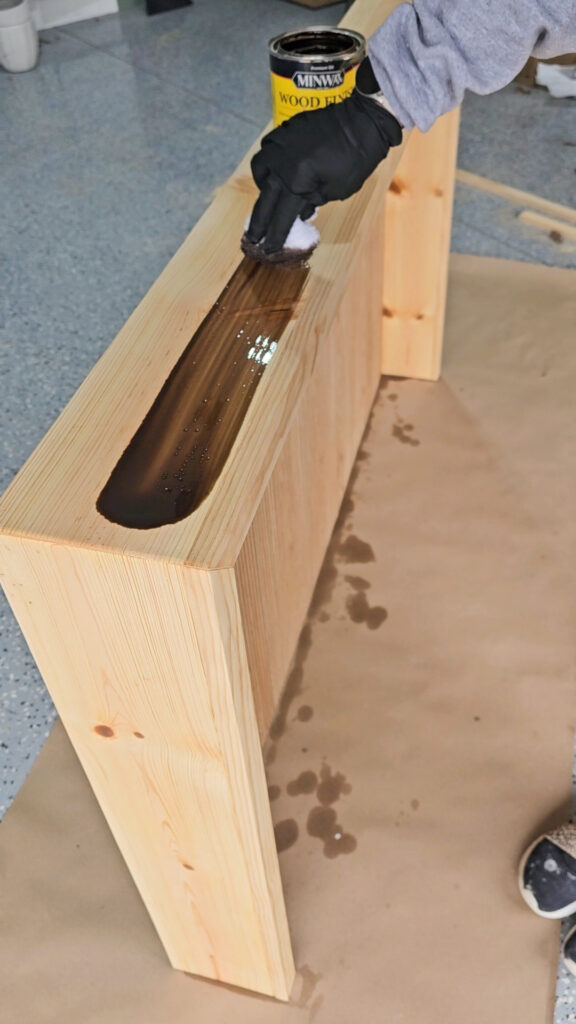
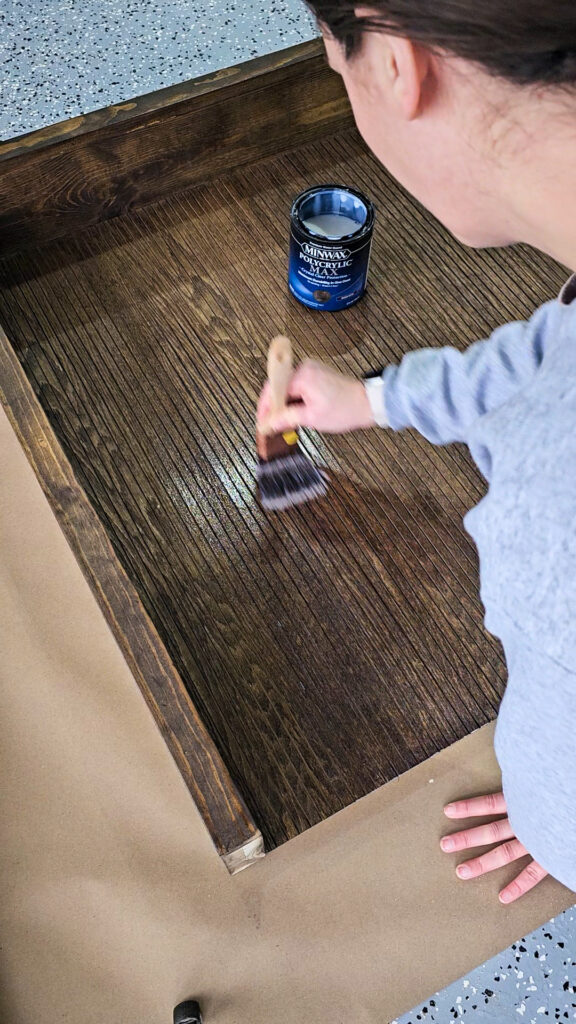
Apply Minwax topcoat
I used Minwax’s Polycryclic Max for my topcoat. You only need one coat to provide enough protection for your new console table!
I love how this look in the space and am so glad I decided to build it rather than buy it!
Check out my video here on How I Built this Console TV Stand!
Check out my video here on the full staining process!
Decor Links:
- Gold Plant Stands
- Rug
- Couch
- Brick Panels
- Ceiling Panels
- Replacement Can Lights (app controlled)
Feb 3, 2025