


")
Build these DIY Dog Steps
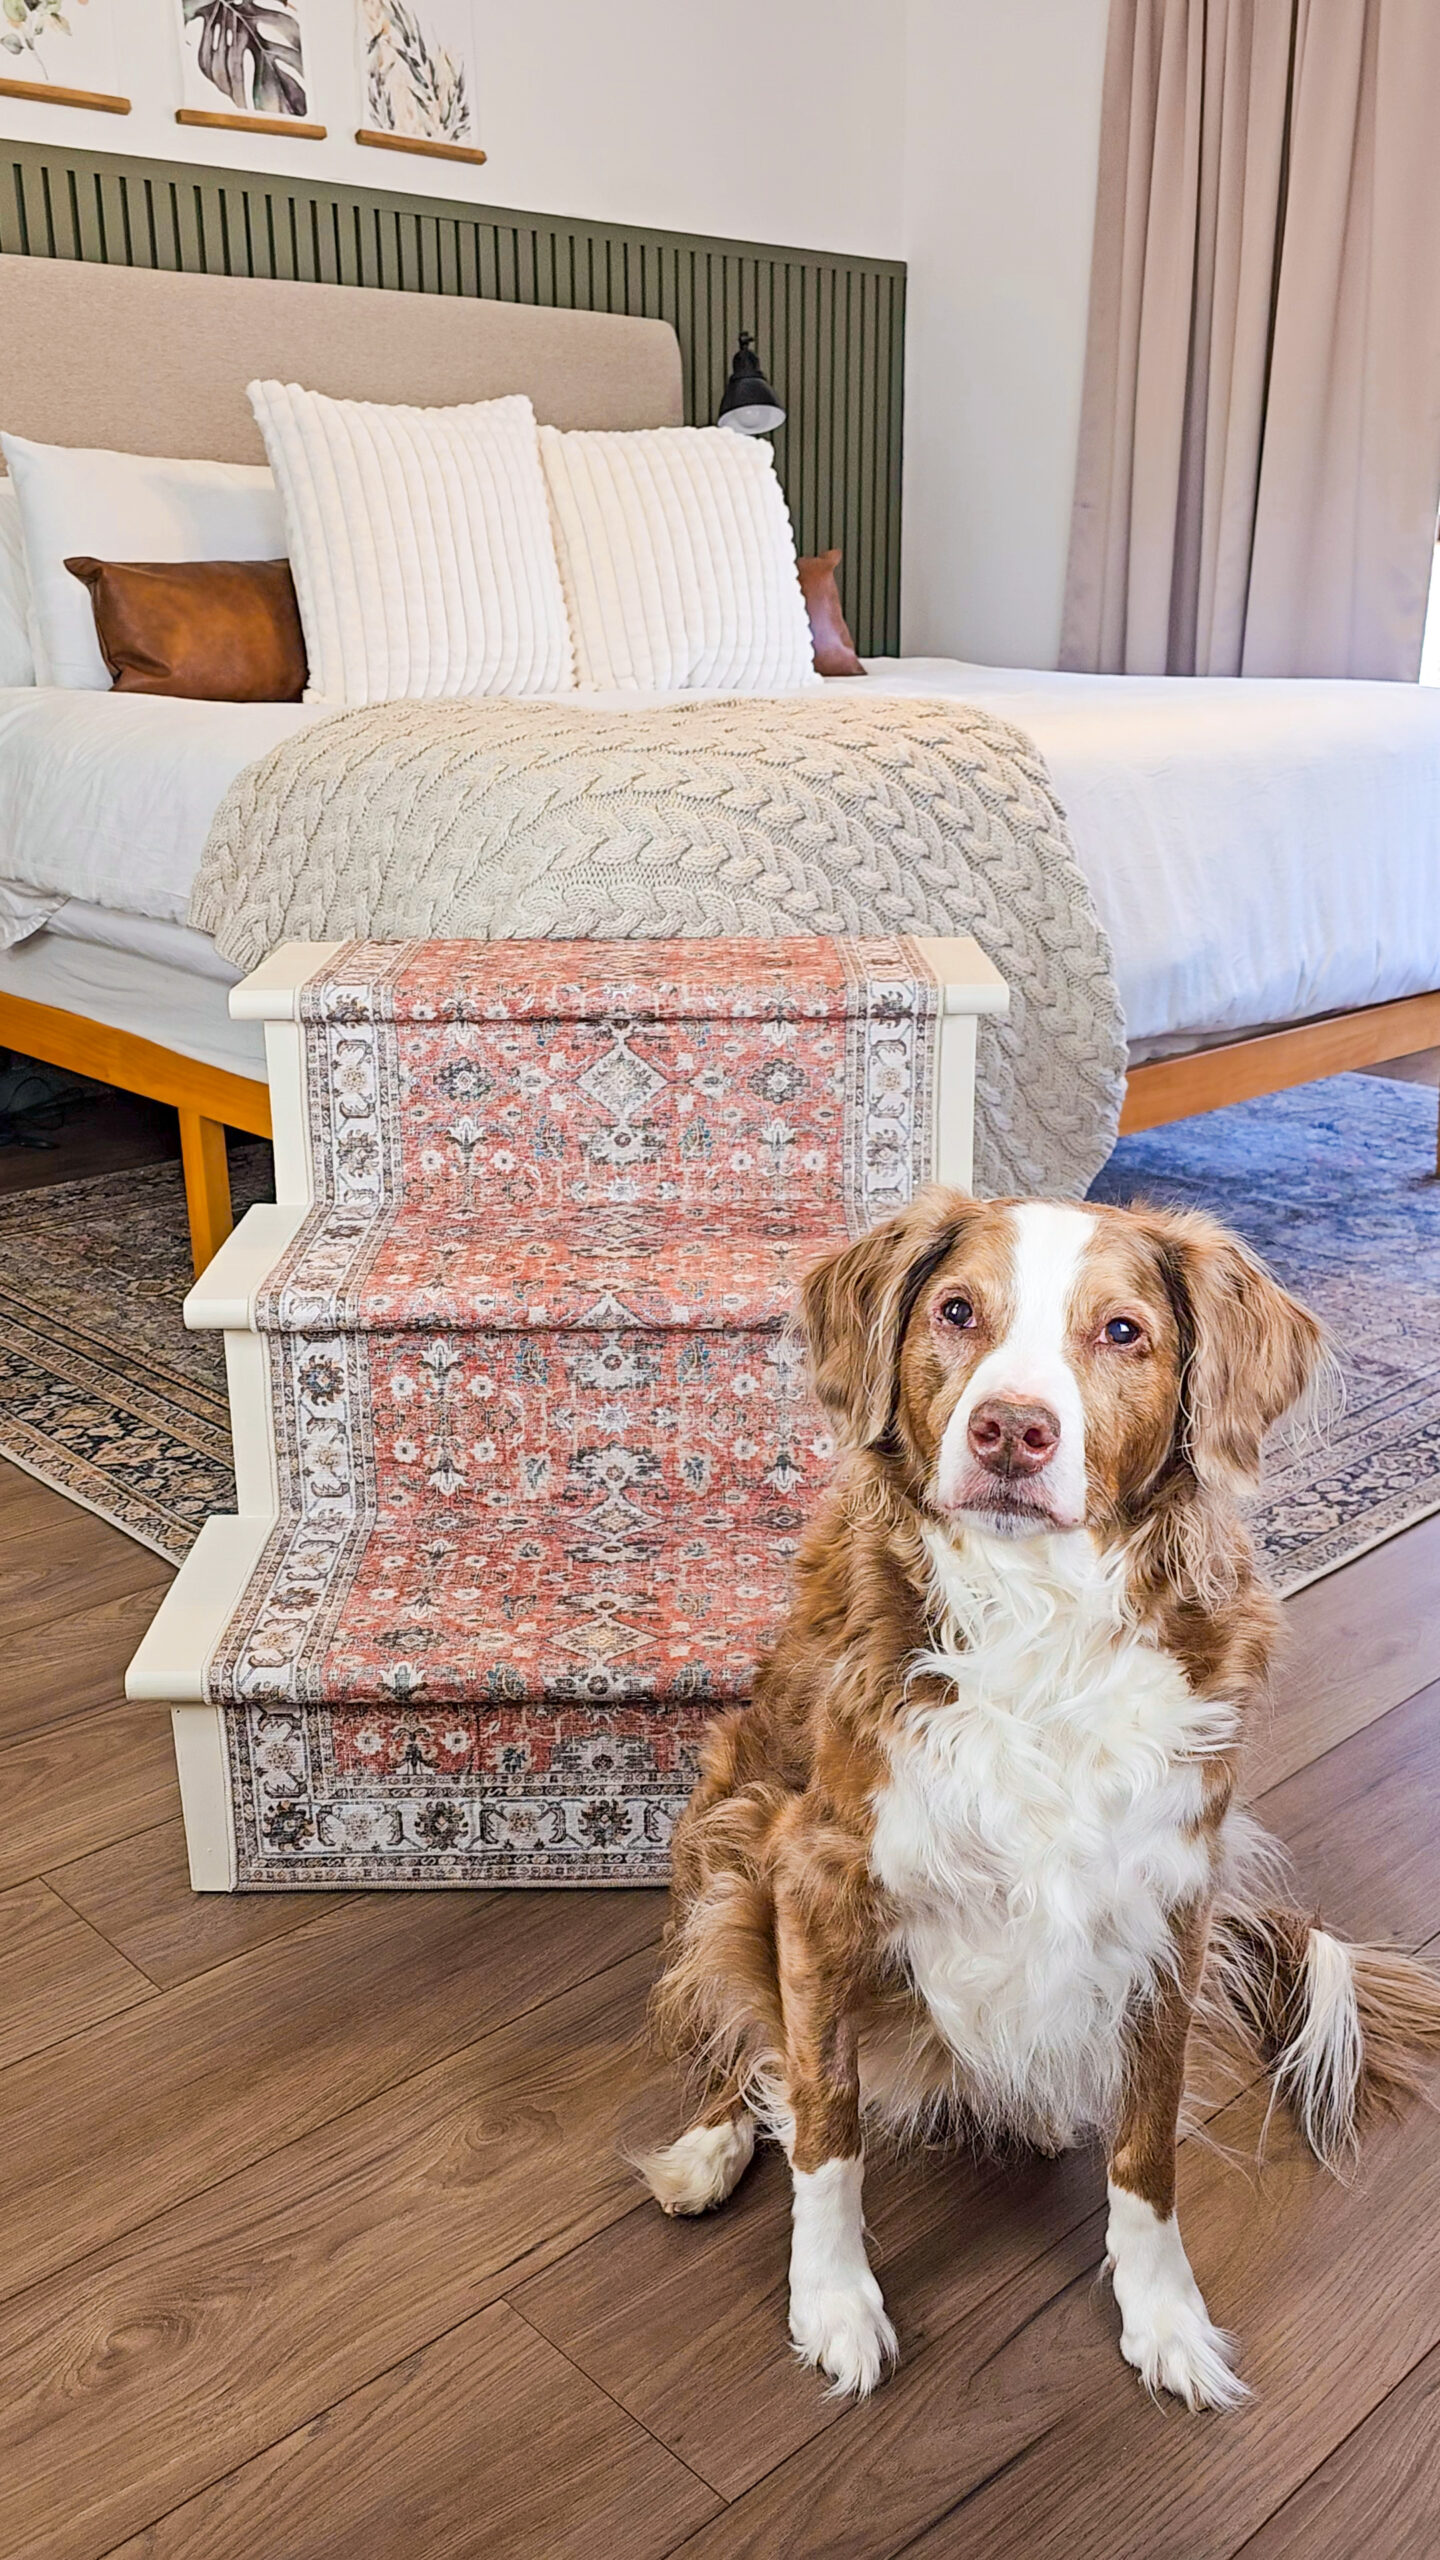
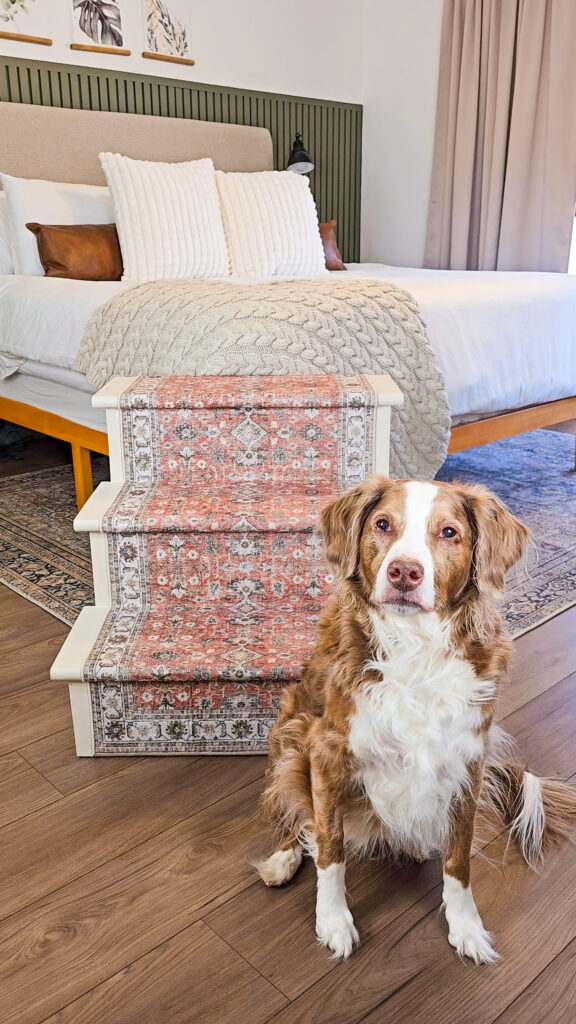
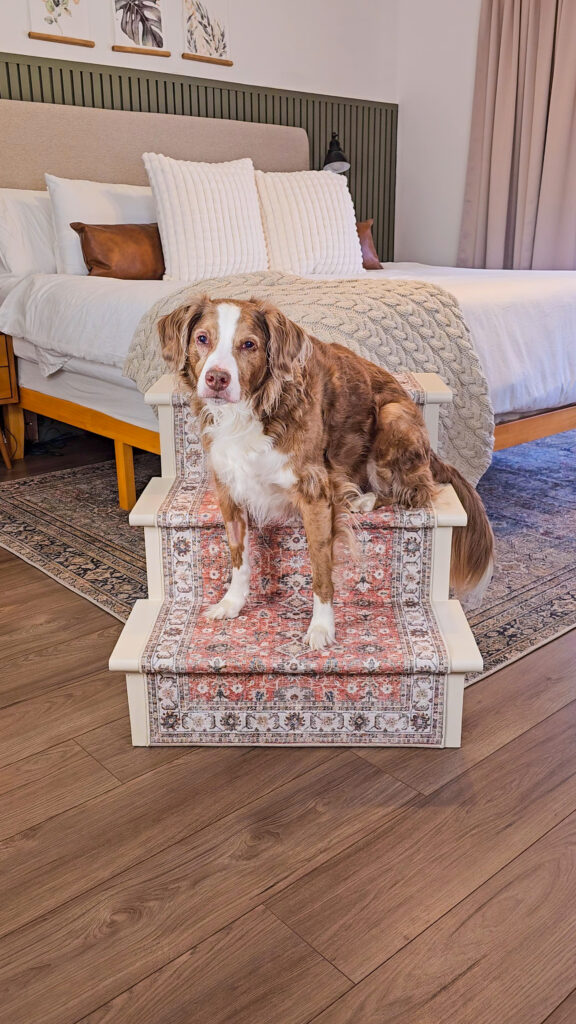
Our dogs love to sleep in bed with us and as they have gotten older, I have gotten more worried about them jumping up and down from the bed. Because our dog Boomer is starting to have vision problems and I want to be sure he is always able to cuddle in bed with us no matter what! I mean, it truly is his bed he allows us to sleep in. But when I looked online for dog steps, they were primarily made for smaller dogs, or were extremely expensive. So, I set out to build my own dog steps for medium to large sized dogs! You could also make this on a smaller scale for smaller dogs. Let me show you how I built these DIY Dog Steps for Boomer & Nala for around $100!
*I may earn a small commission on any linked items in this article*
Supply List
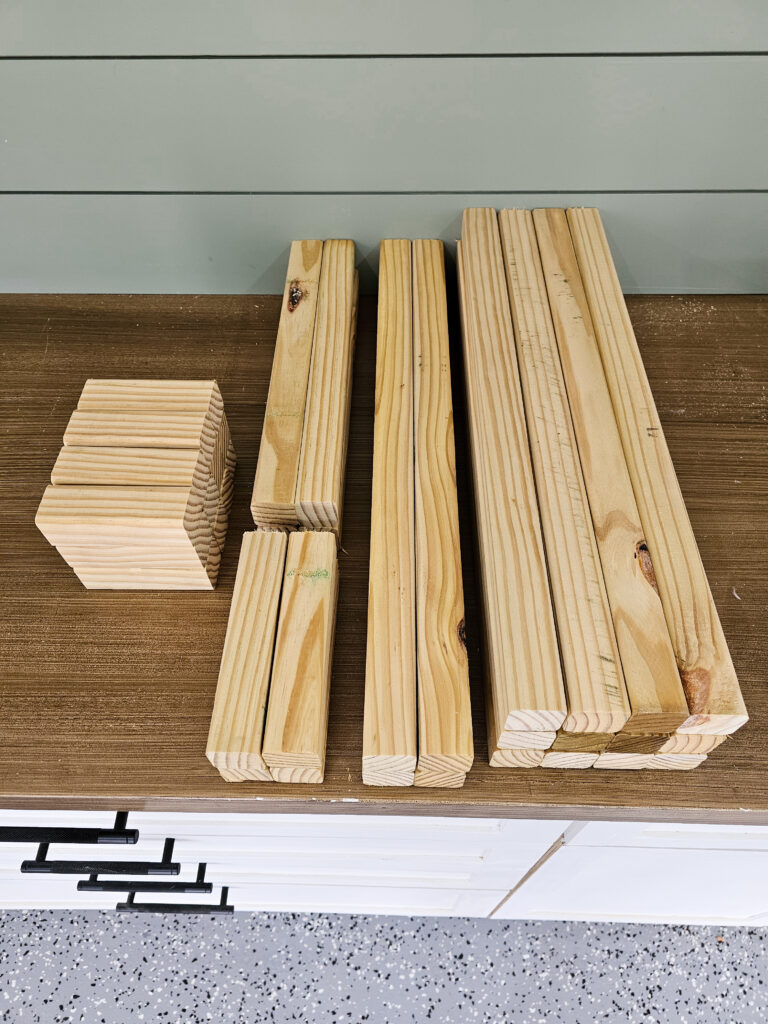
- 2×2 Boards
- Stair Treads
- 1/4″ Plywood
- Wood Glue
- Screws
- Wood Filler
- Sanding Block
- Caulk
- Runner Rug (optional)
- Carpet Tape (optional)
Tool List
- Power Drill
- Saw
- Nail Gun
- Staple Gun (only if adding in runner)
Step Summary
- Determine size of steps
- Cut 2×2 boards
- Assemble step frames
- Attach step frames together
- Cut 1/4″ plywood for sides
- Add 1/4″ plywood to sides
- Add in stair treads
- Add in stair risers
- Fill in nail holes and seams
- Paint Steps
- Add in Runner (optional)
Detailed Steps
Determine size of steps
I built my steps for my dogs Boomer & Nala. They are medium sized dogs. Boomer weighs 60 lbs and Nala weighs 40 lbs. So I wanted to make the steps big enough they’d want to use them without much training. I based the height of my steps on my actual stairs in my house. I decided to do only 3 steps up. Below are my measurements.
Cut 2×2 boards
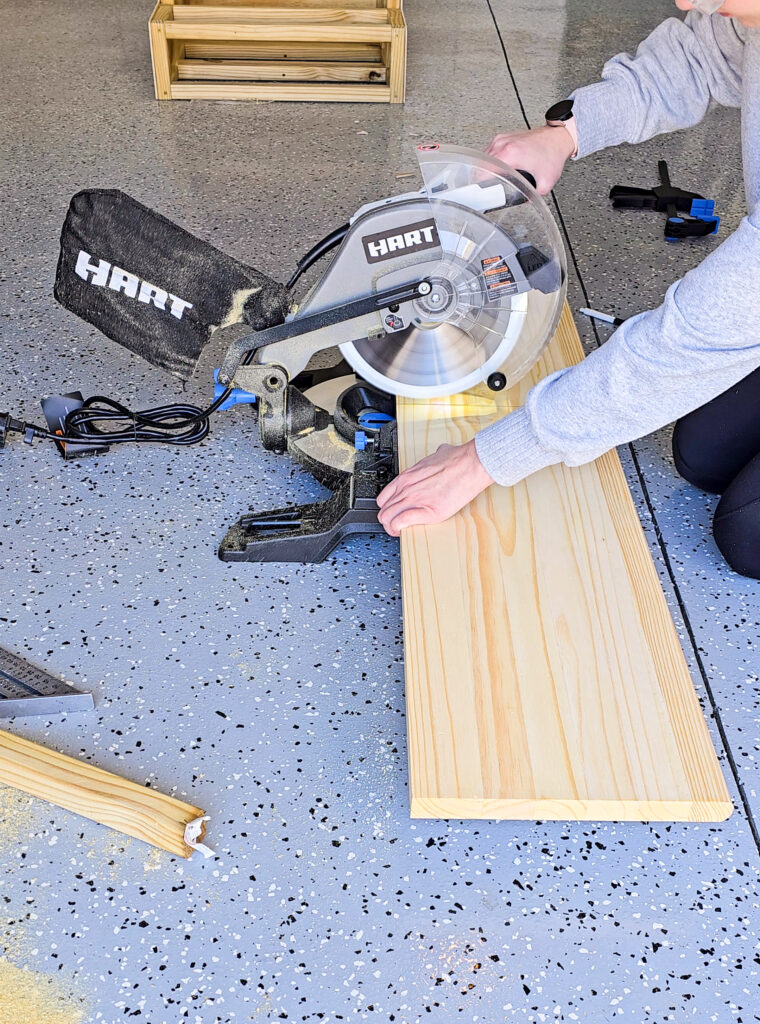
You will use the 2x2x8 pine boards to create the “skeleton” of your steps. These are light and easy to work with. I cut all my 2×2’s on a miter saw before assembling them together. Below is my cut list
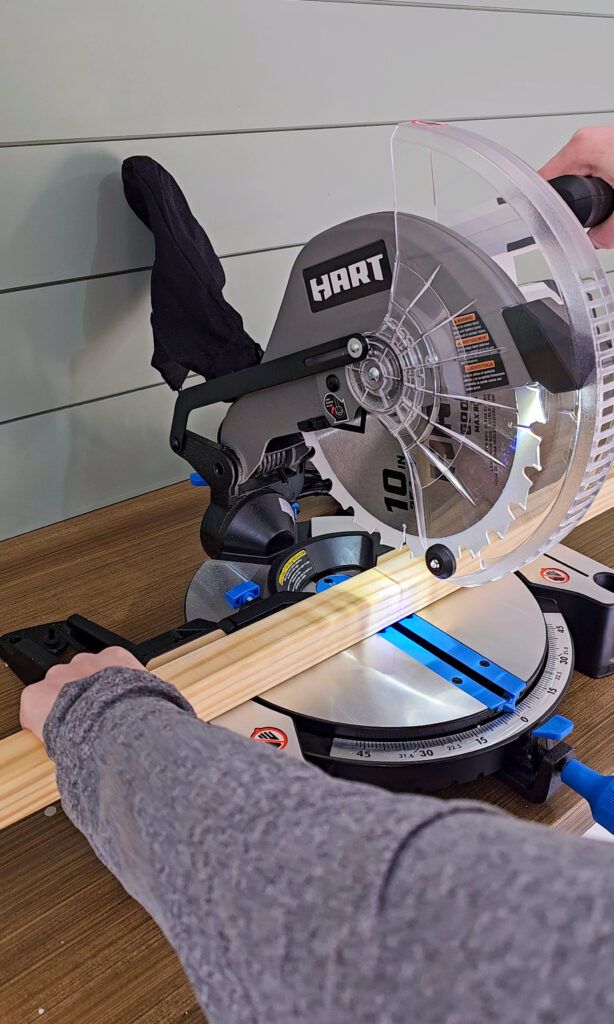
Here is my cut list to make my exact steps:
Tallest Step Dimensions = 23.5″ tall x 26″ wide
2nd Tallest Step = 15.25″ tall x 26″ wide
Smallest Step = 7″ tall x 26″ wide
Cuts Needed:
- 23″ cut – 12 total
- 23.5″ cut – 4 total
- 15.25″ cut – 4 total
- 7″ cut – 16 total
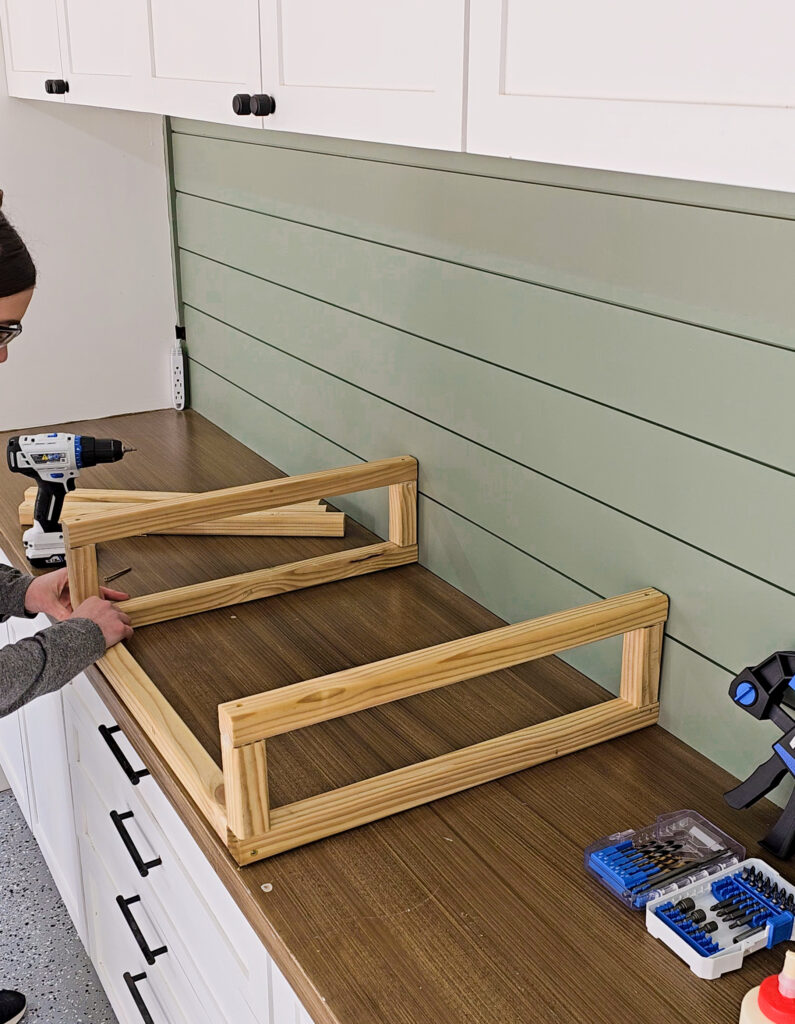
Assemble step frames
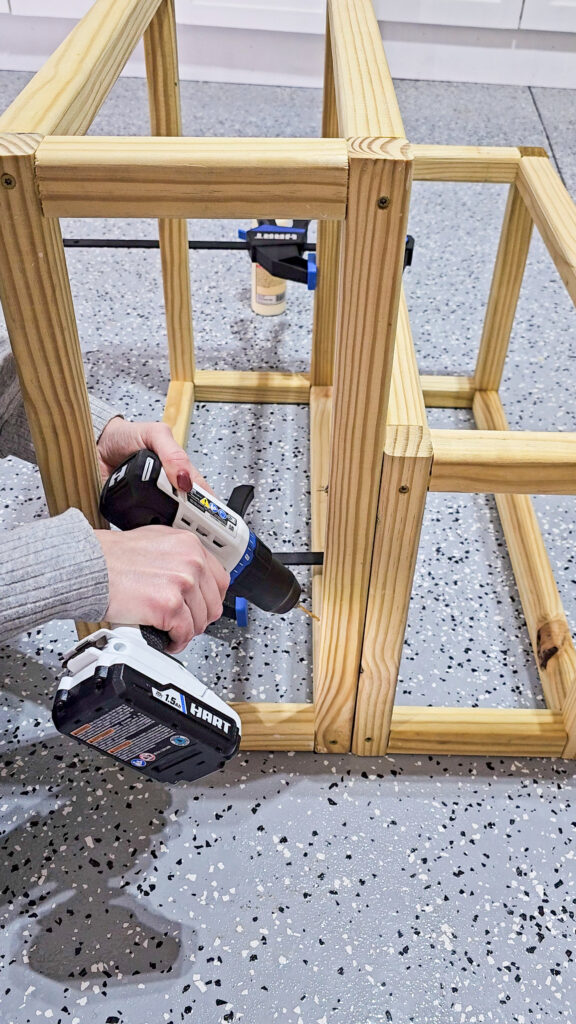
For this step you are making boxes for each step. You have 2 side frames to assemble and then you will add in 4 center boards on each corner to attach your 2 frames. When assembling your pieces together, it is important to use wood glue. It will make your steps extra secure! Use a drill bit to drill a pilot hole to make assembly easier. Once your pilot holes are drilled, use a screw to attach your boards together.
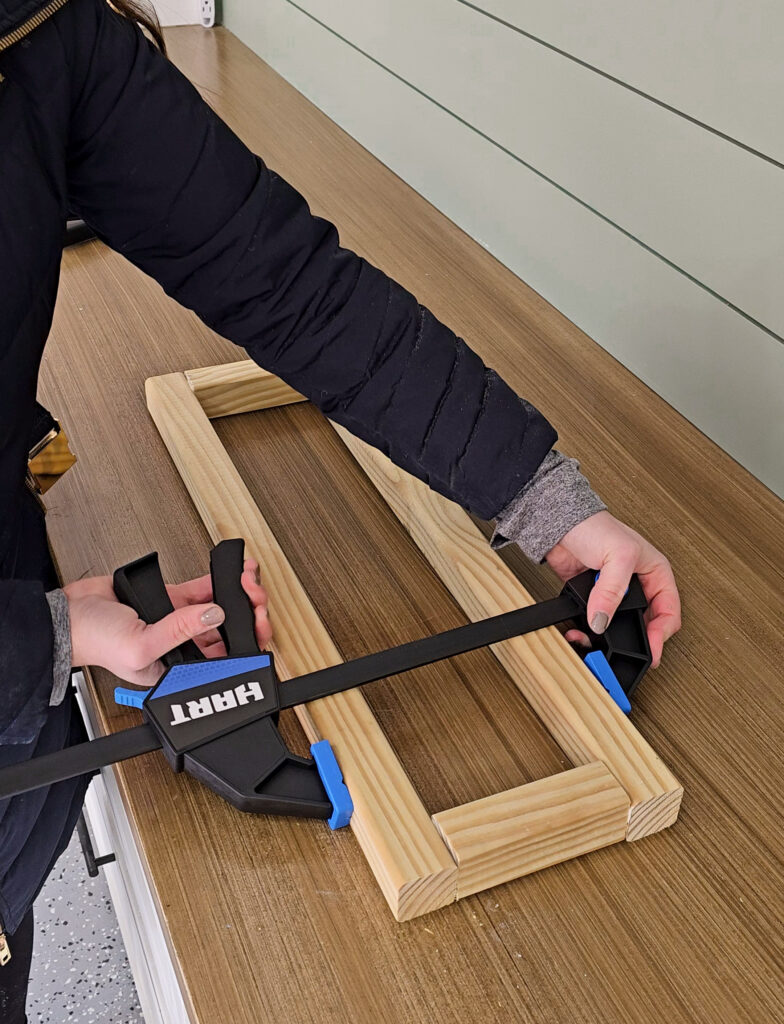
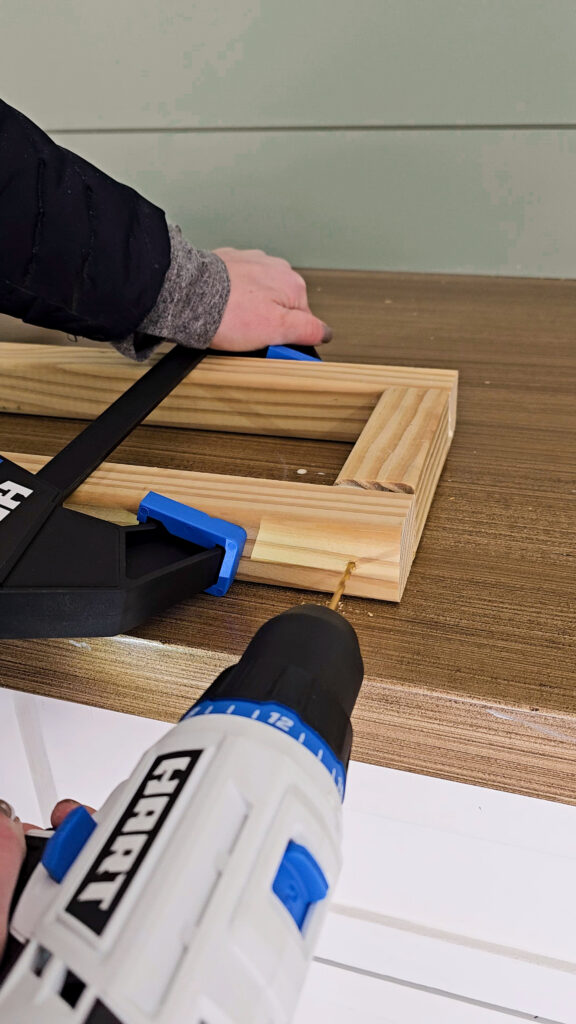
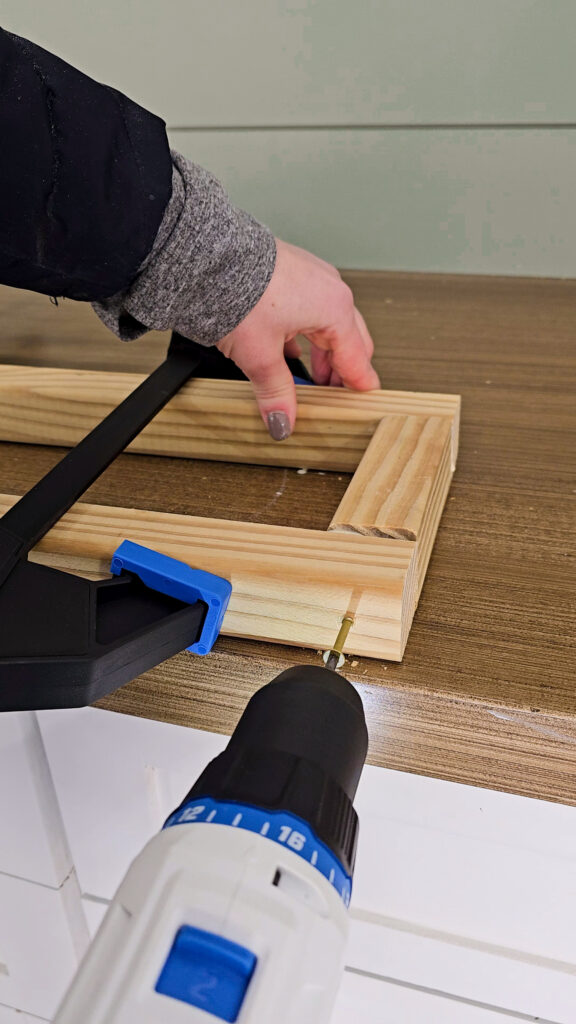
Once your 2 side frames for each step are made, you will add in your 4 center support boards to attach each corner.
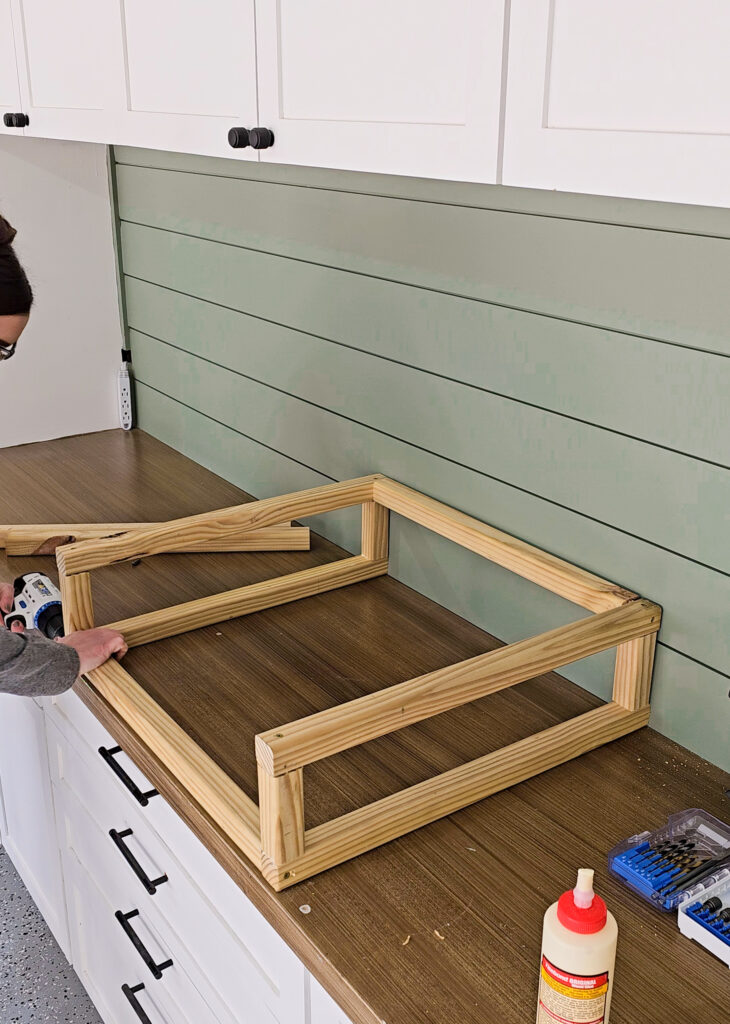
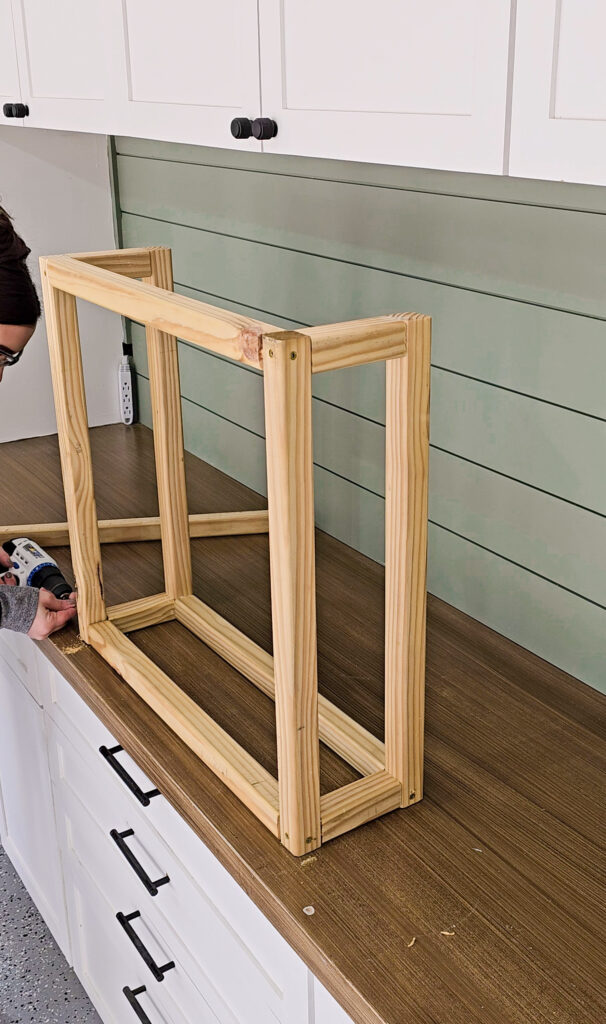
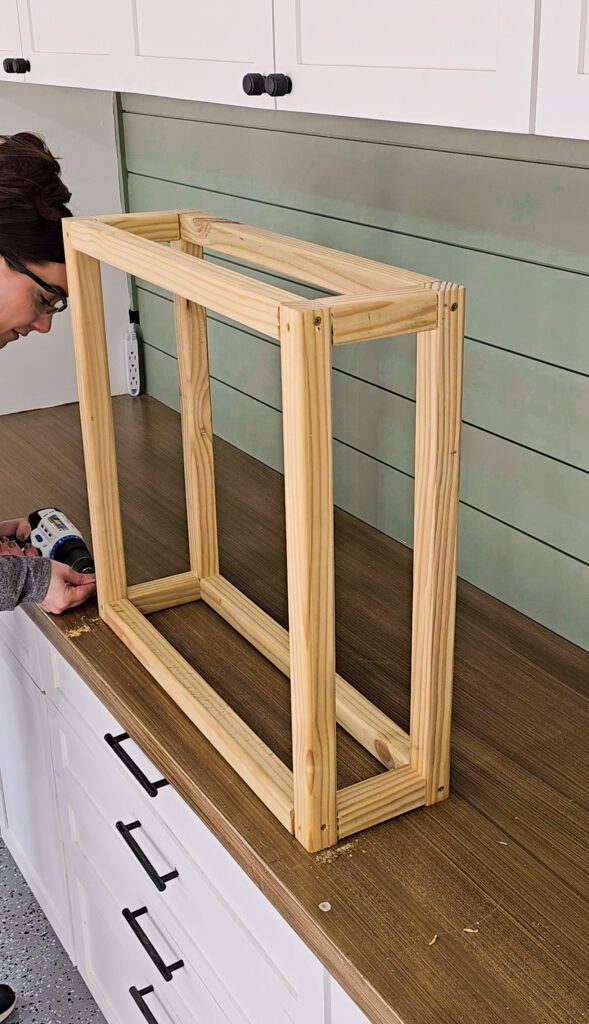
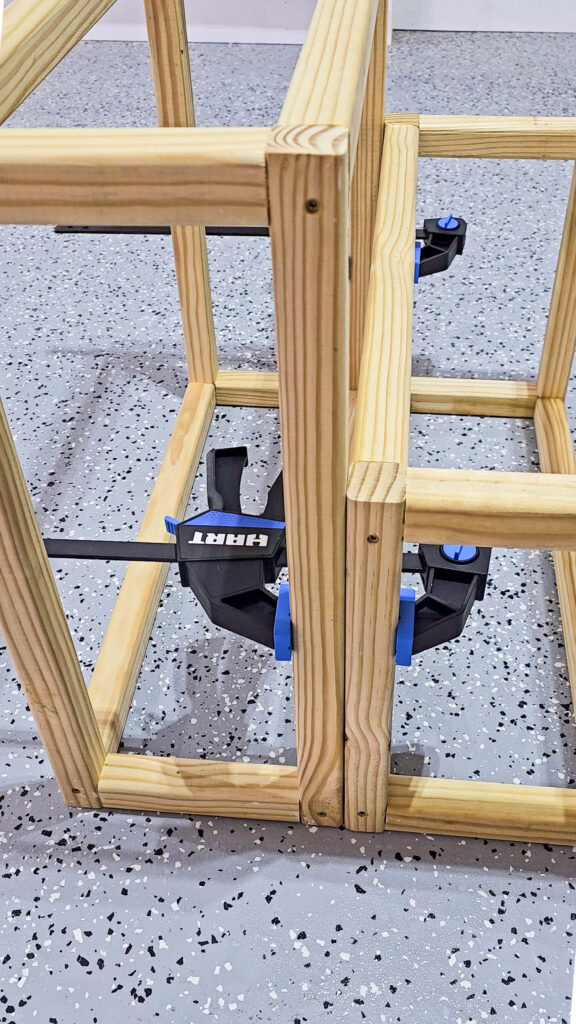
Attach step frames together
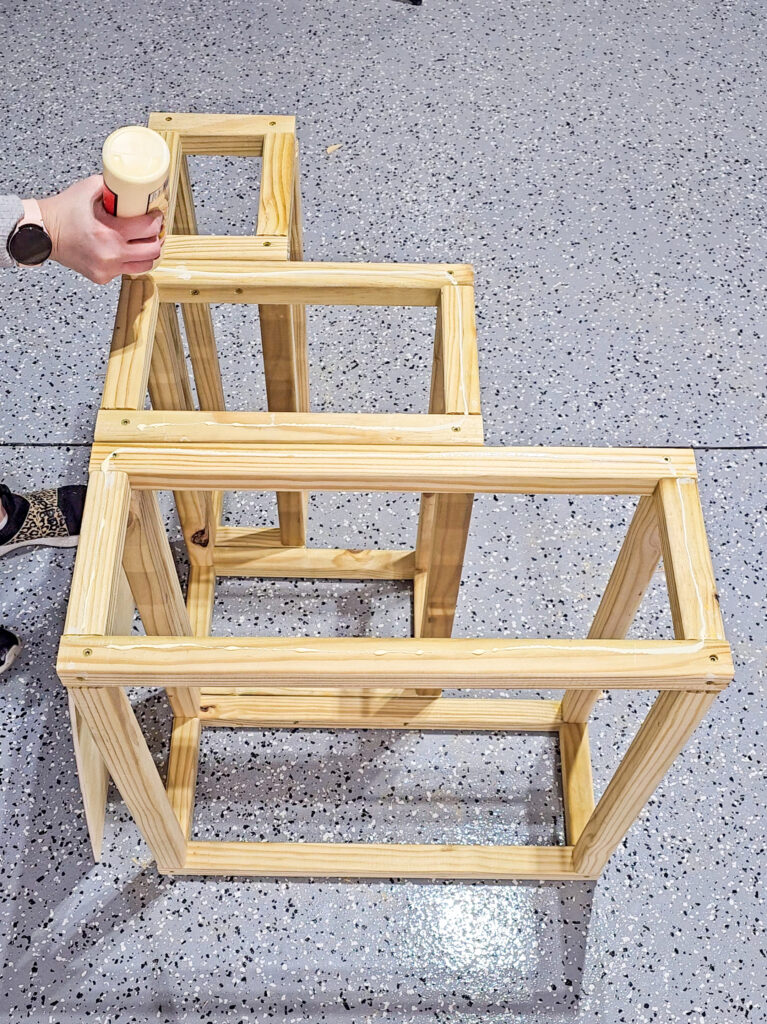
Once all your step frames are built, it is time to attach all 3 of them together. I used wood glue and clamps to get them lined up and ready for screws. Once they were ready, I screwed them together. Now we have the frame of our steps all built! After this it’s just making them pretty and functional.
Cut 1/4″ plywood to fit the sides and back of your steps
Now it’s time to cover up the step frames so it looks like one big step. I used a jigsaw to cut down 1/4″ plywood to the exact size I needed. To make cutting out the steps easy, I laid my steps on top of the 1/4″ sheet of plywood and traced out my edges to trim.
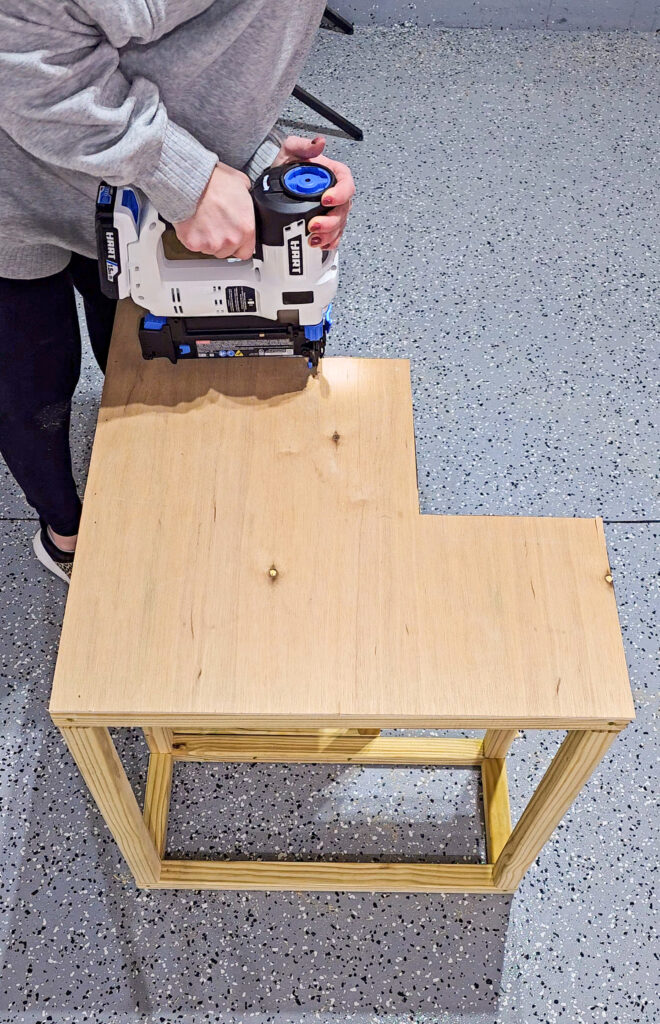
Add 1/4″ plywood to sides of steps
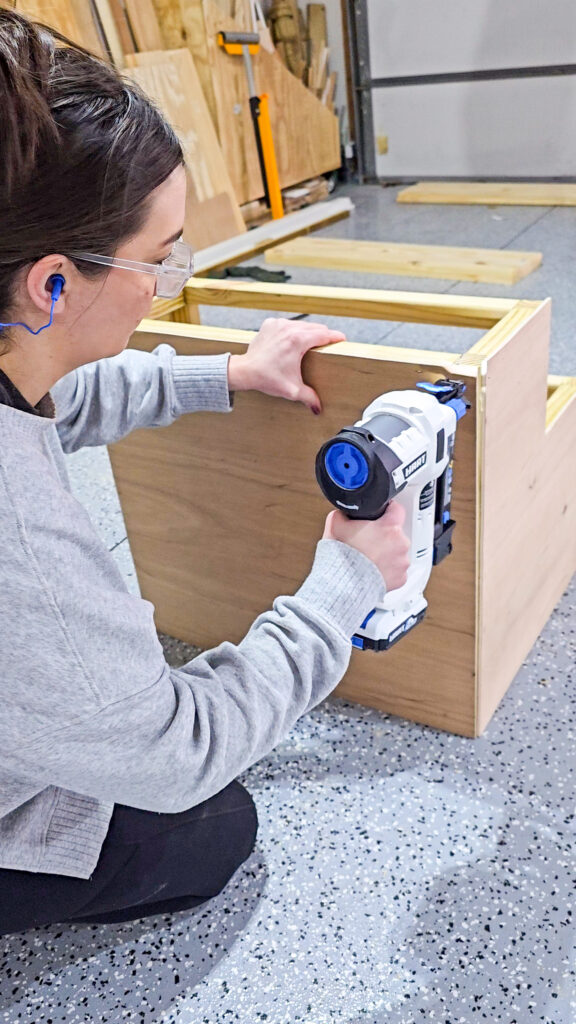
Once my plywood is cut, I used a nail gun and wood glue to apply the 1/4″ plywood to the steps. I used 3/4″ nails which is plenty to hold these boards in place.
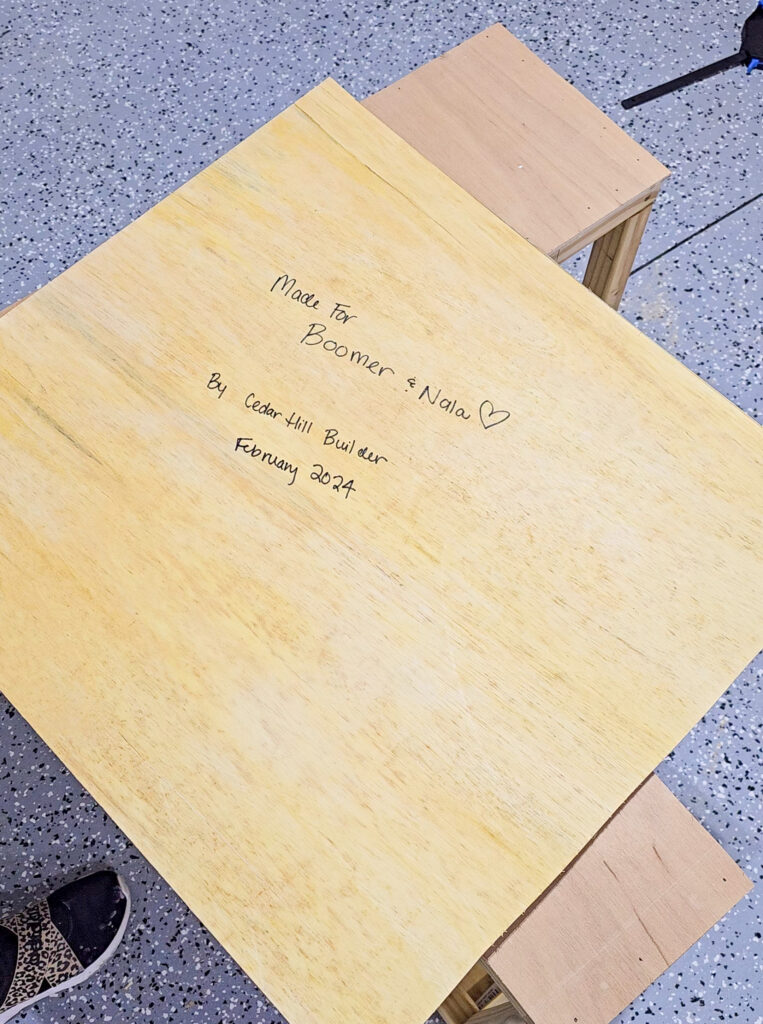
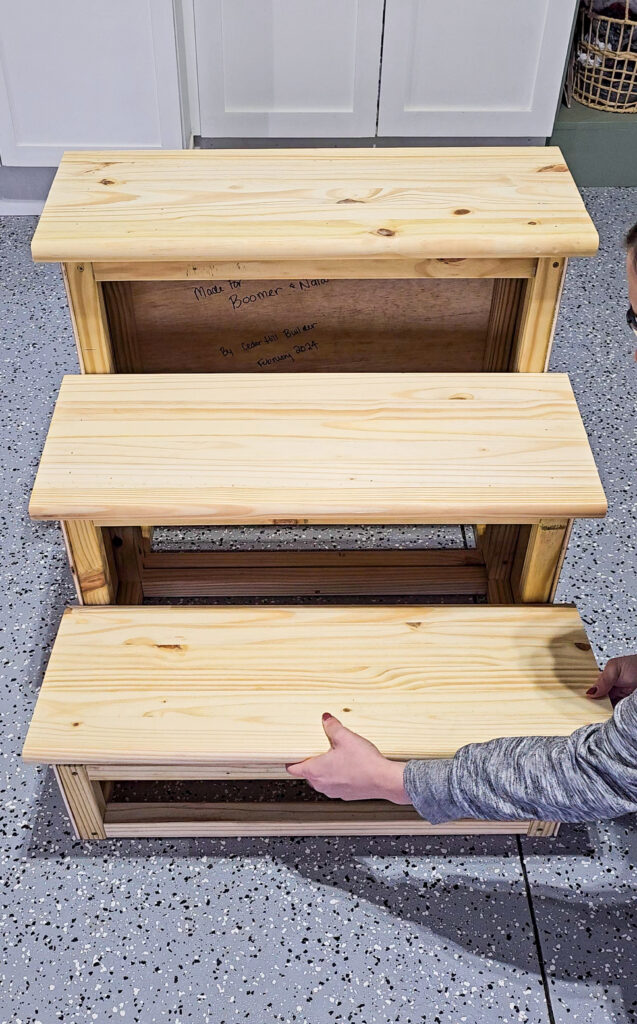
You also want to add in a piece of plywood to the back of your step. I added a special note to mine!
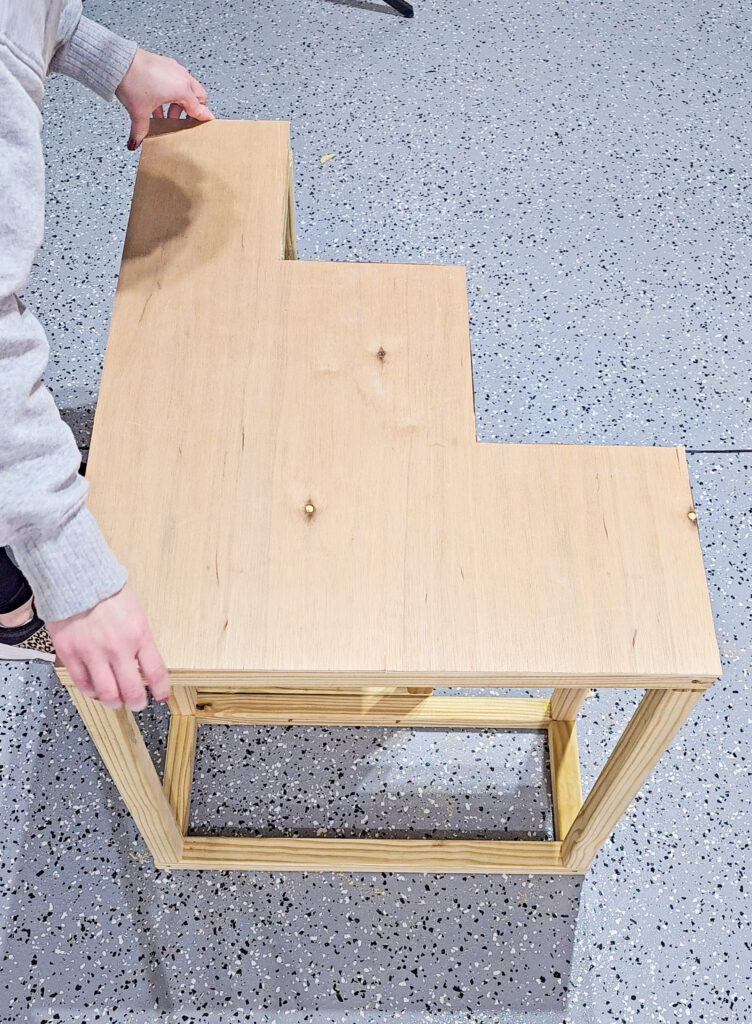
Cut stair treads to correct width
I bought premade stair treads and am so glad I did! They come with a rounded lip on the front already and you only need to cut them to the correct width. I wanted my treads to hang over my edges by 1″ on the front and on both sides (not the back). I cut each tread 28 1/4″ wide.
Add in stair treads
Once the stair treads are cut, I used wood glue and my nail gun to apply each stair tread to the tops of the steps. I created a 1-inch overhang on both sides and on the front of the stair tread.
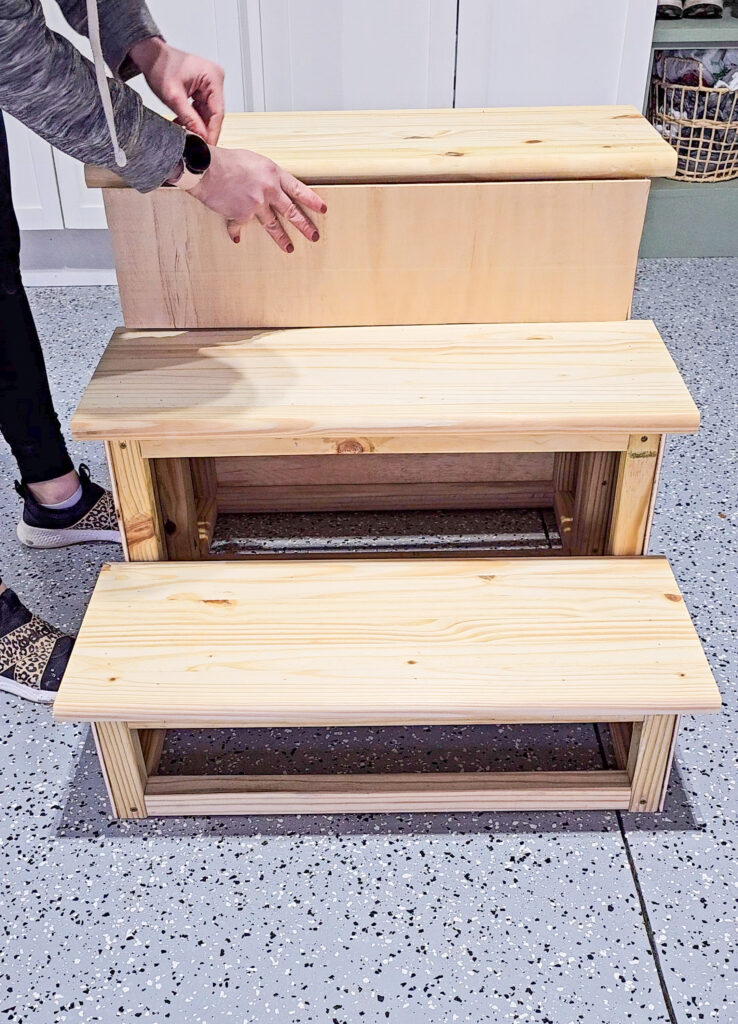
Add in stair risers
Now we can add in the last piece of wood. We want to add a riser to each step to cover up the last opening. I just cut 1/4″ plywood down to the size I needed for each step. Once they were cut, I used wood glue and my nail gun to add them to my steps.
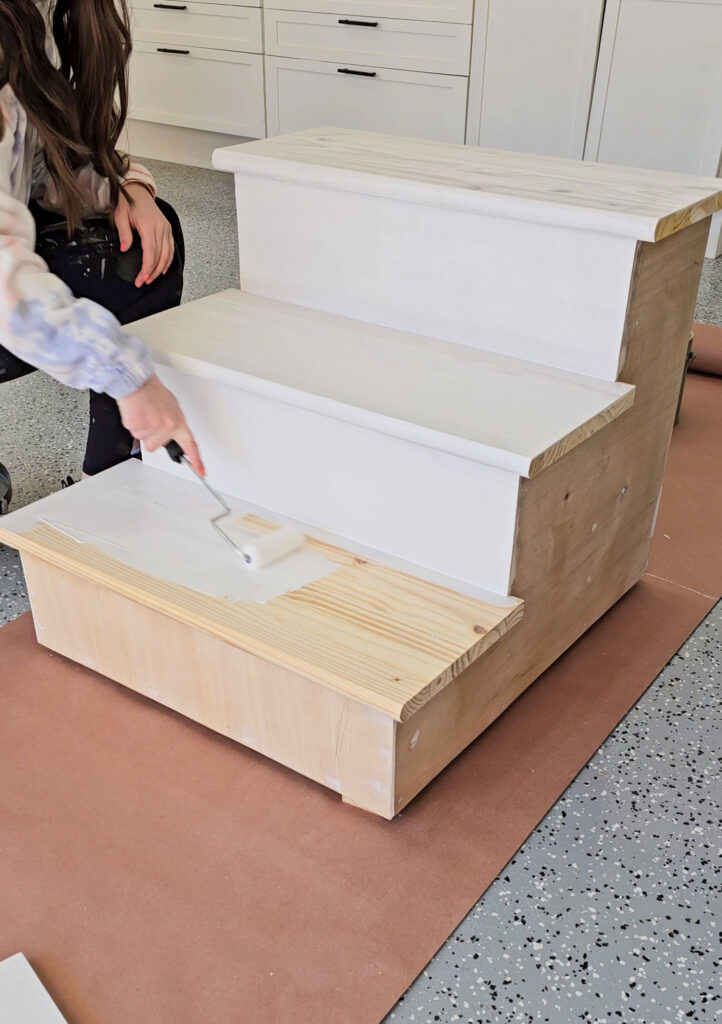
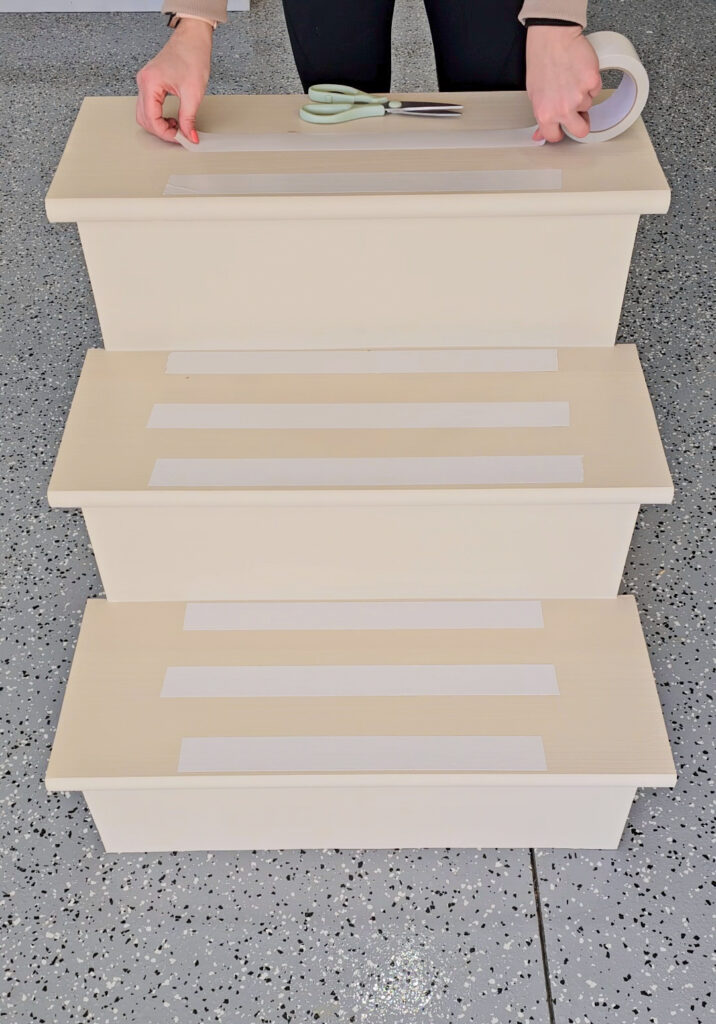
Fill in all nail holes and seams
Use wood filler to fill in each nail hole. There are going to be alot! I then used caulk along all my seams, like inbetween my stair treads and risers to give it all a seamless finish.
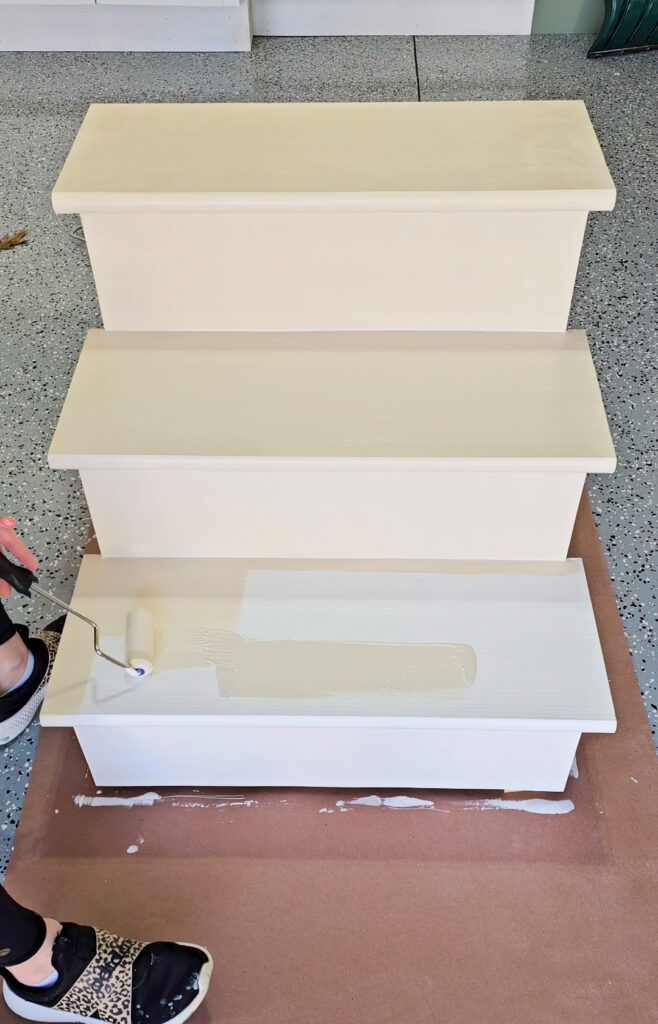
Paint or stain steps
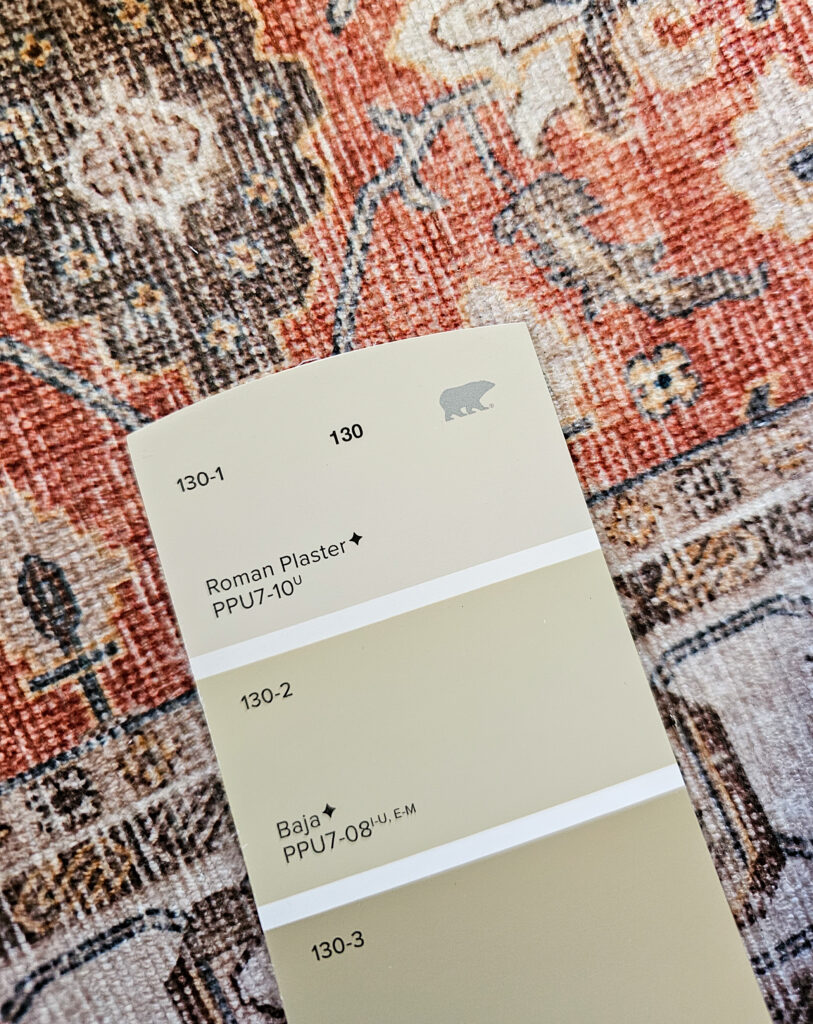
I decided to paint my steps. First I added in Primer and then I used the tan color “Roman Plaster” by Behr (PPU7-10). This is a beautiful tan color and matched my rug perfectly!
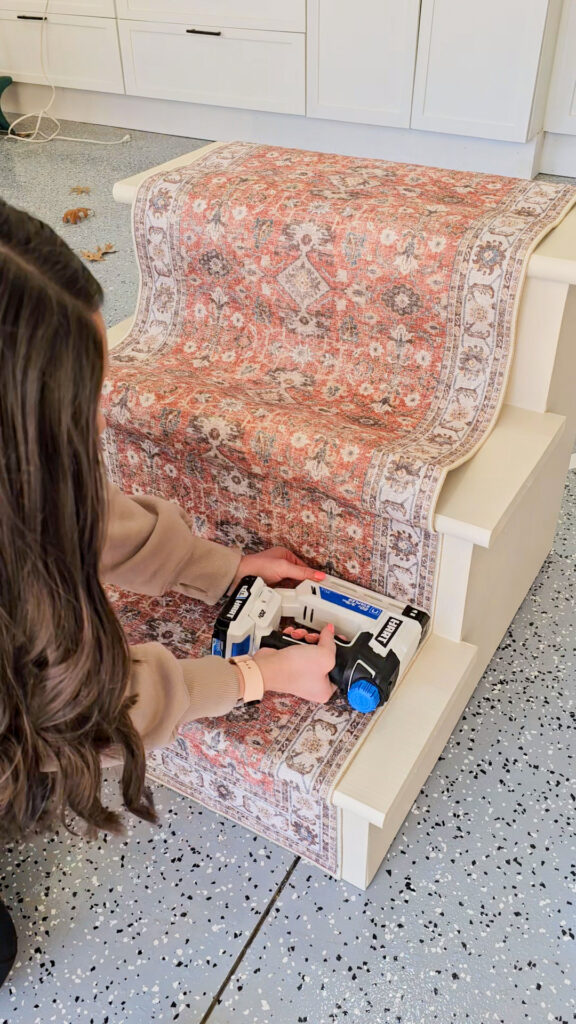
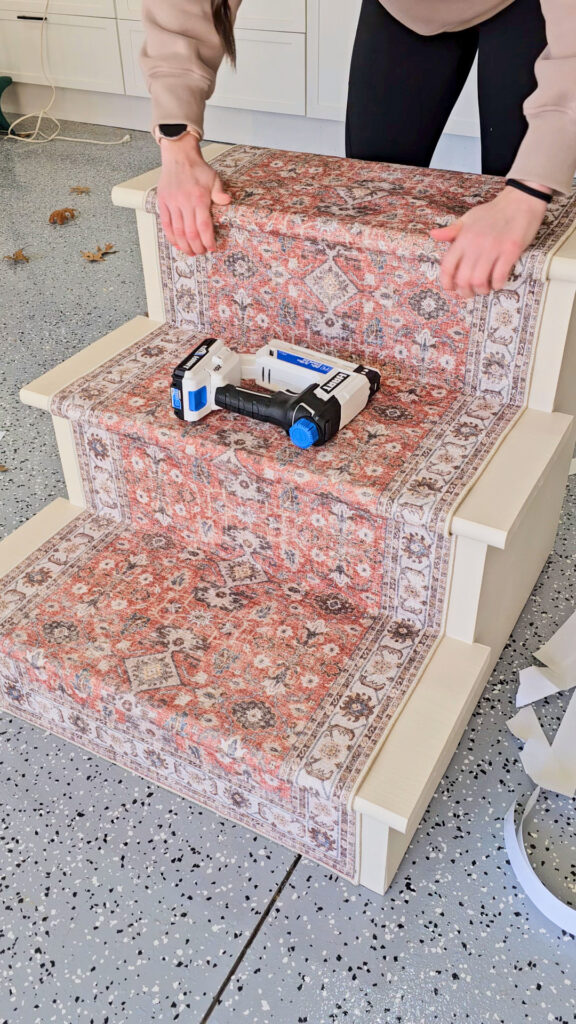
Add in runner (optional)
Because my dogs are getting older and I worry about their traction, I wanted to add a runner to these steps to give them traction. You don’t have to add this in, you can leave the steps just painted and they will be perfect! I added in a runner using a staple gun and tucked it under each stair tread. To make sure the stair runner is extra sturdy, I also used carpet tape under it.
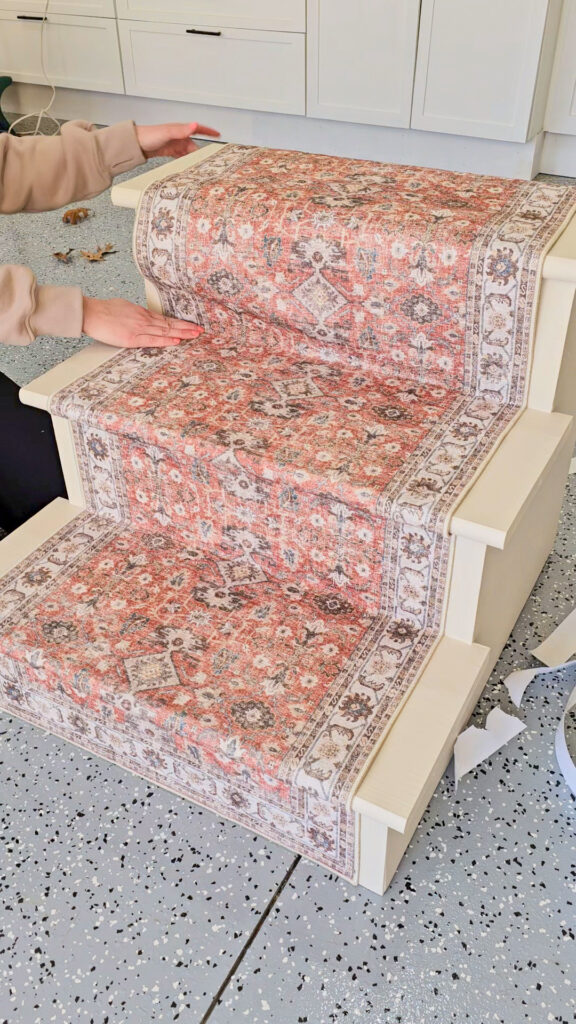
Now these steps are ready for both Boomer & Nala to use! Even though they are both healthy and don’t have issues right now, I want to be sure they know how to use the steps in case we ever get to that point. Plus, I think this will be better for their joints to go up and down the steps rather than jumping up and down from our high bed every night.

Total Cost Breakdown:
- 2×2’s – $30
- 1/4″ Plywood – $29
- Stair Treads – $12 x 3 = $36
- Misc (caulk, wood filler) – $10
- Tan Paint – $15
- Runner – $30
- Total Cost with Runner: $120 without Runner – $150 with a Runner
If you’d like to see more on the Slat Wall in my Primary Bedroom, you can see more here!
Mar 21, 2024