


")
Dining Room Table Makeover
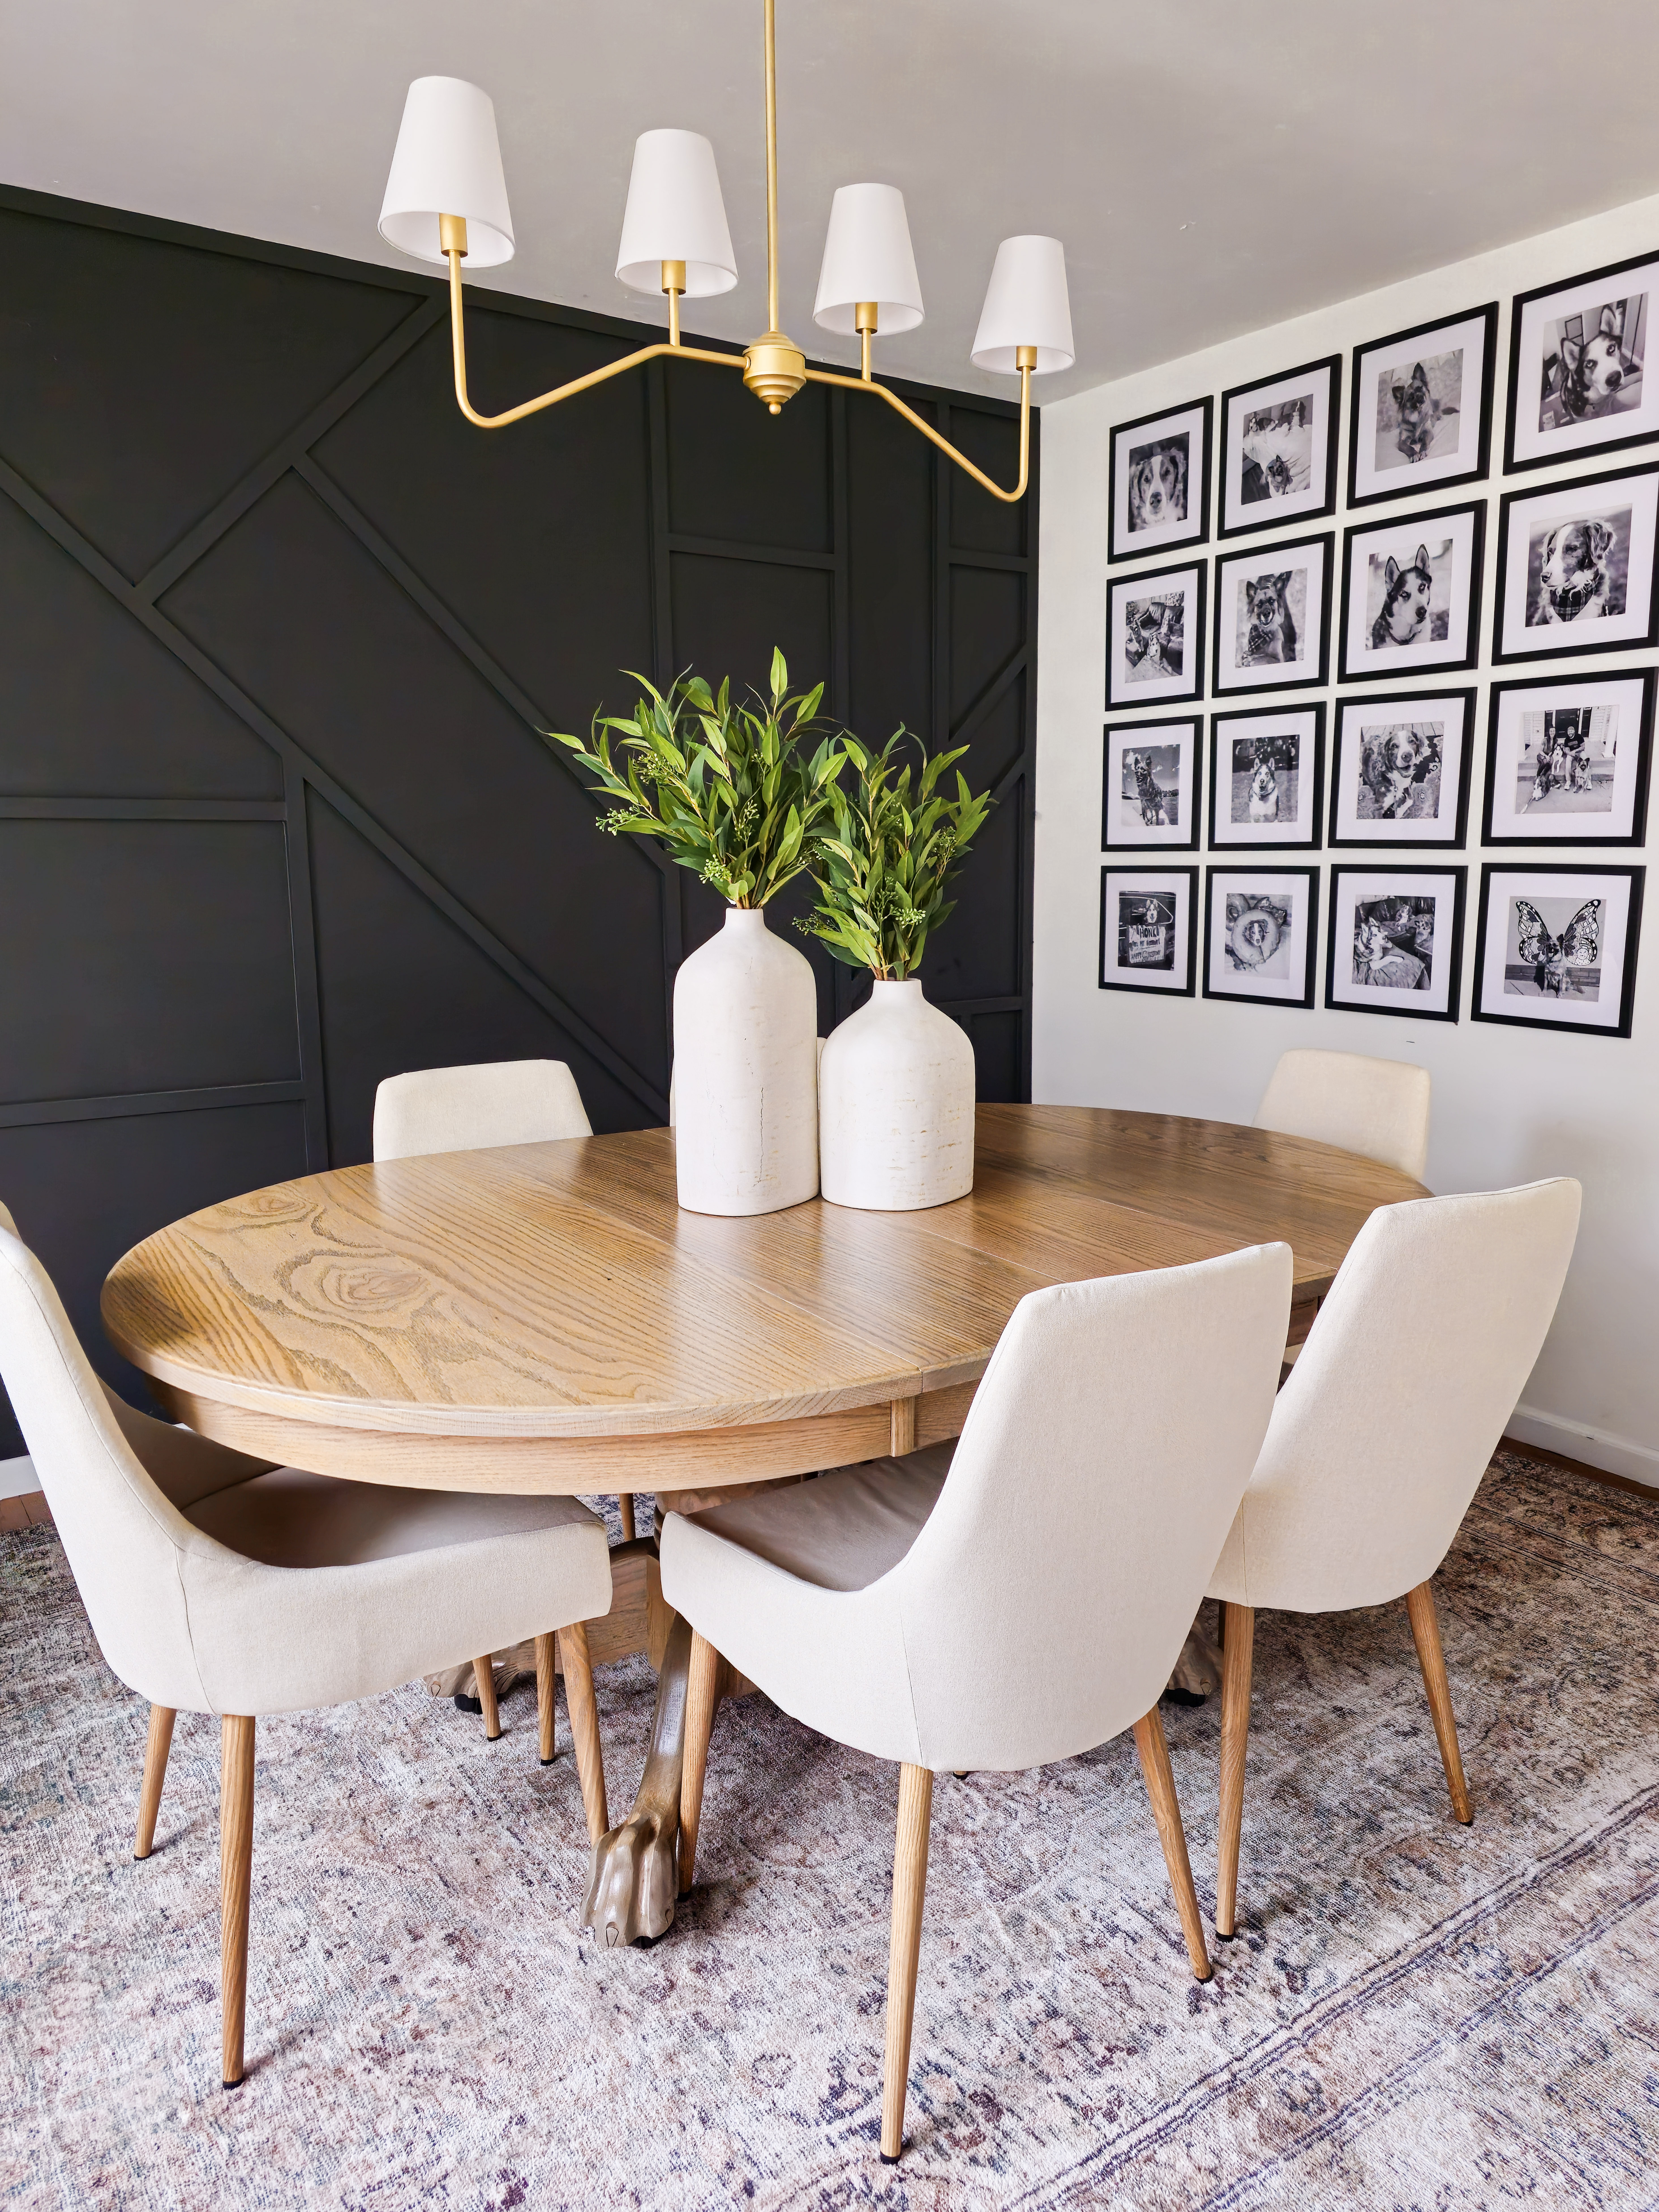
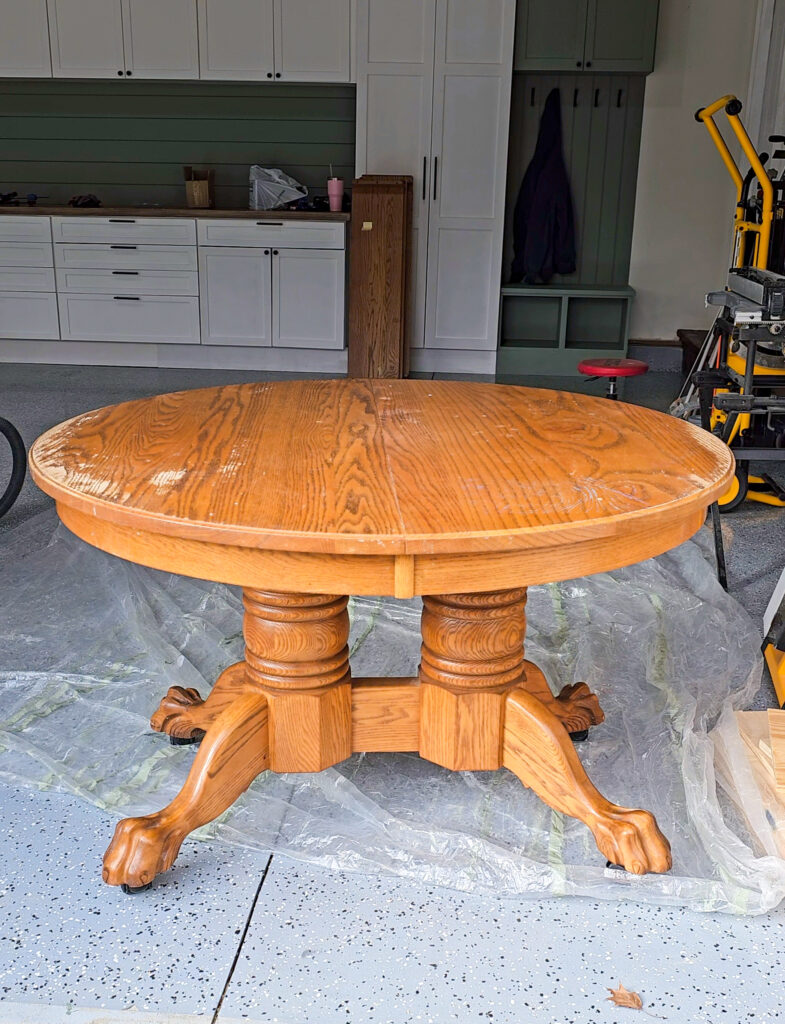
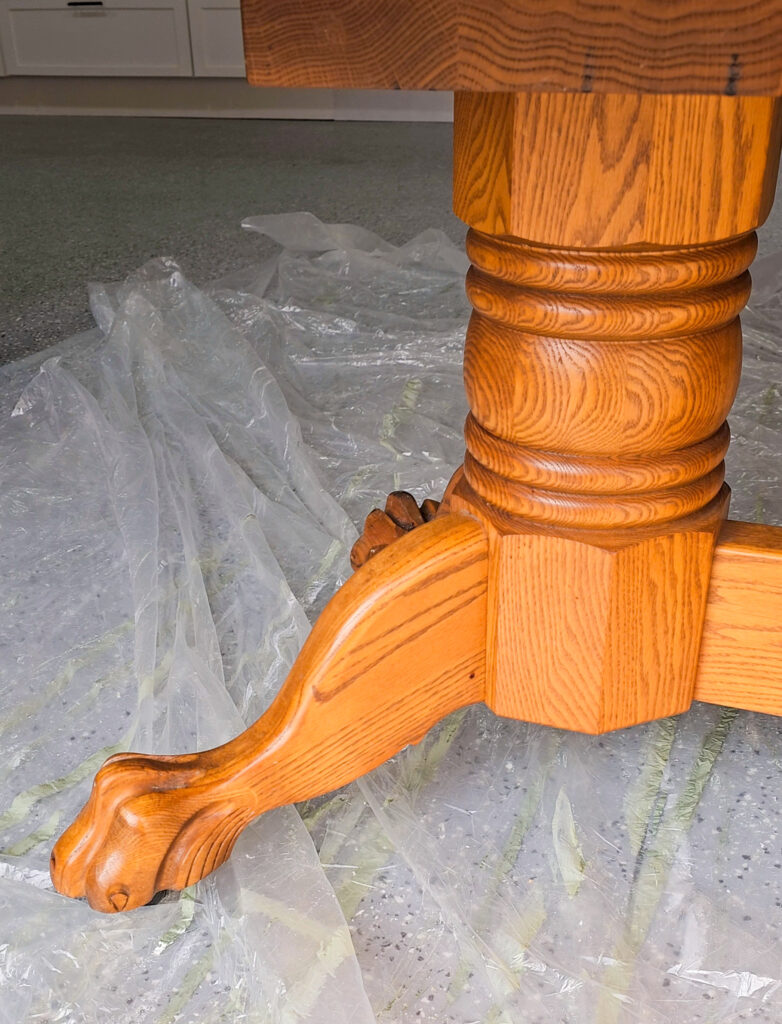
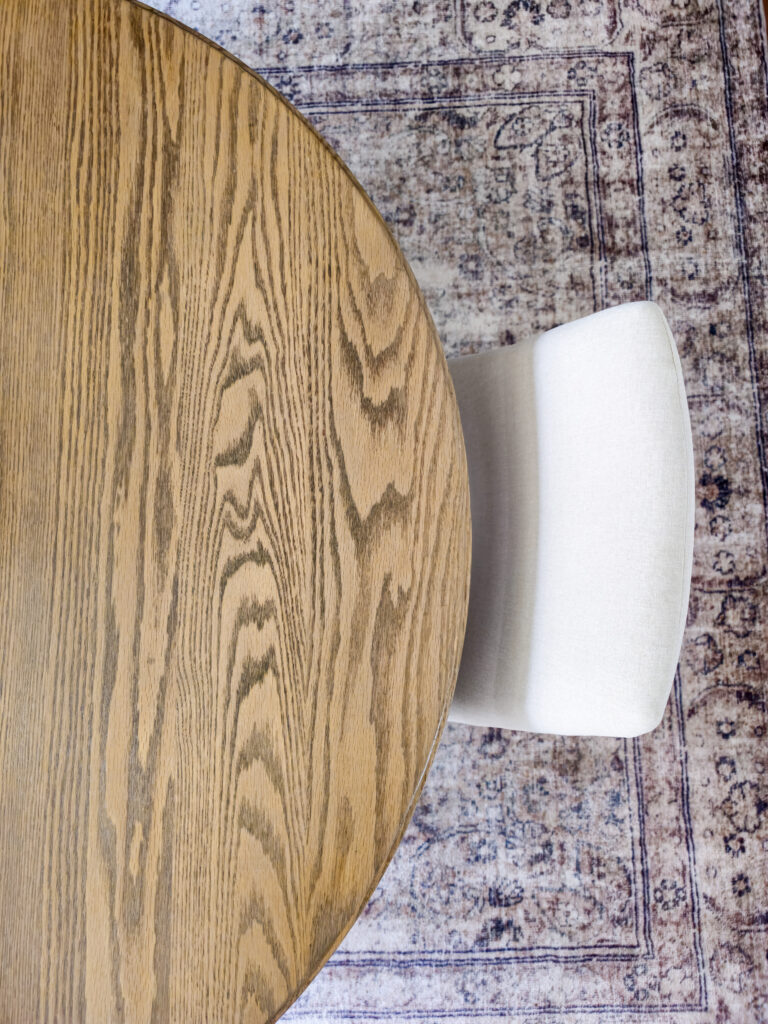
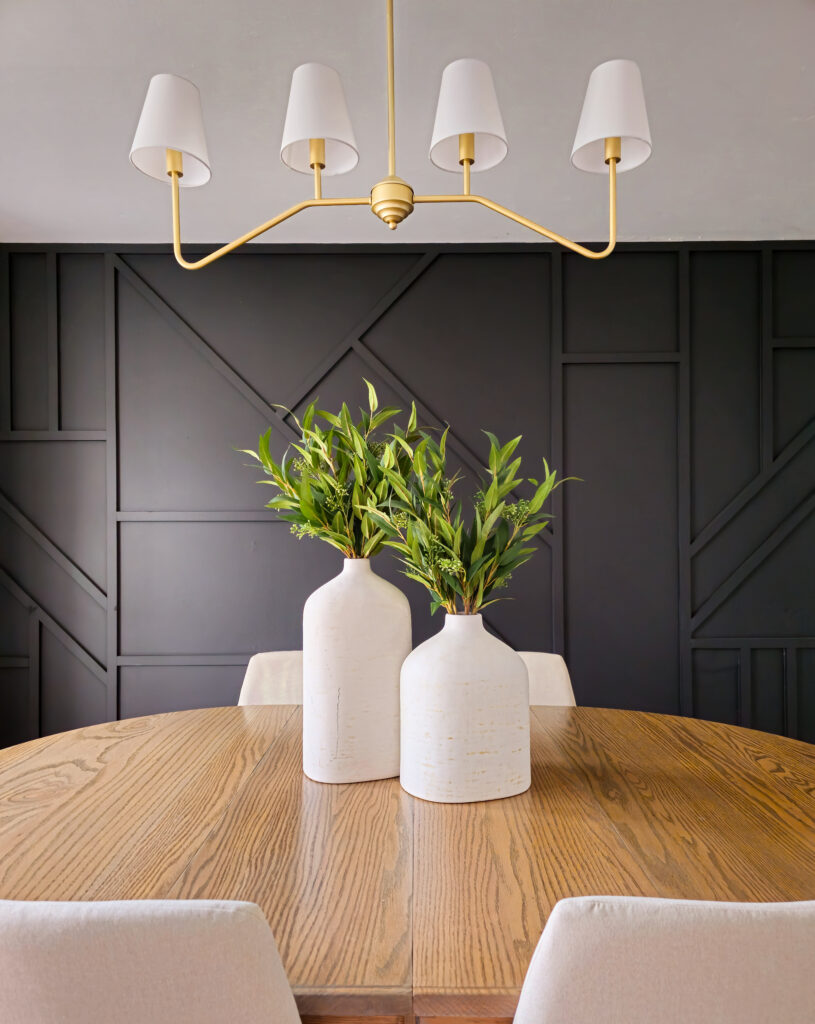
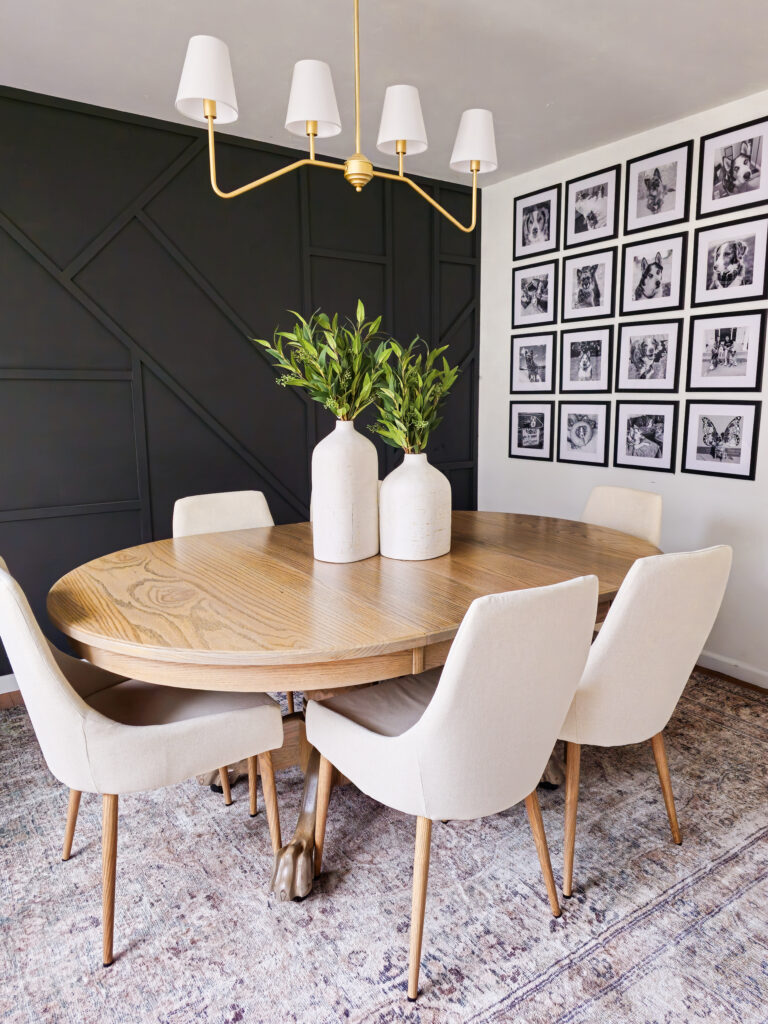
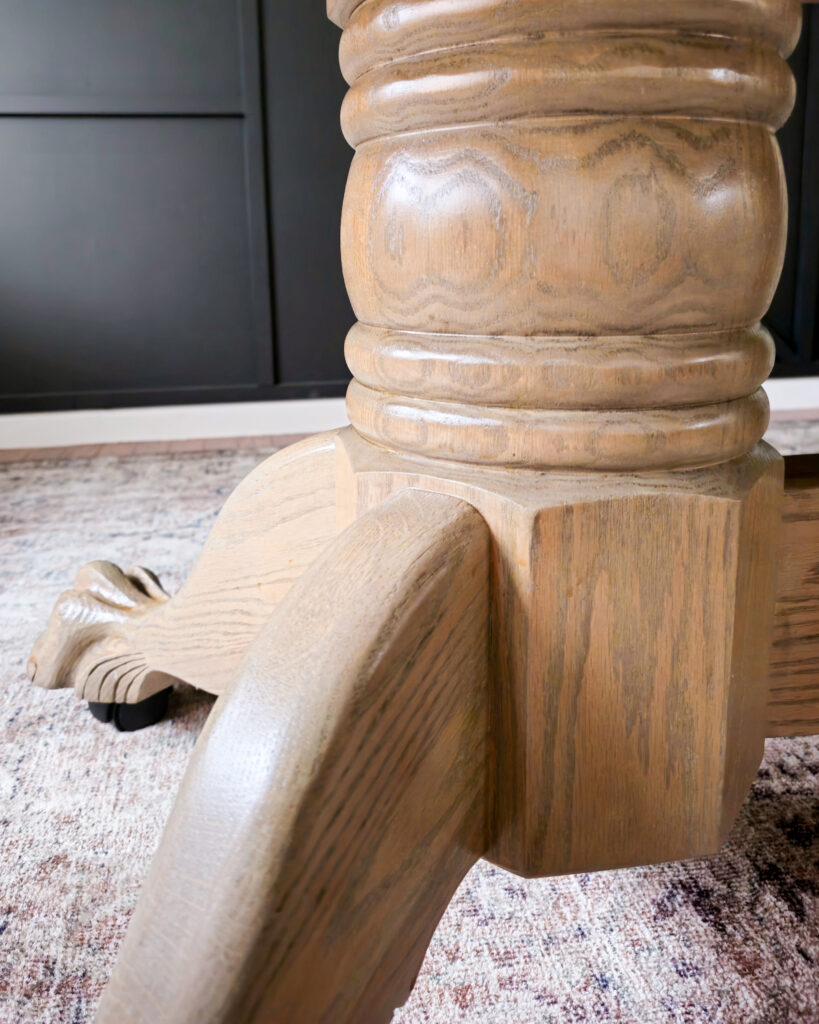
Growing up a part of our family gatherings has always been food. It is the heart of our family. The quickest way to get us all together is a family dinner. Somehow over the years my mom even made it a Sunday tradition. But growing up, my grandparents were always getting us together. This table sat in their house for as long as I can remember, probably my entire life. When I lost both my grandparents within a year of each other and my family offered me the chance to take their table and make it my own, I knew I wanted the opportunity to bring new life into this table. Plus, tables just aren’t built the same! This beautiful claw footed table is SOLID wood. I did end up buying new chairs to make it more modern, but I love how this turned out! Let me walk you through how I did it.

*I may earn a small commission on any linked items in this article*
Supply List
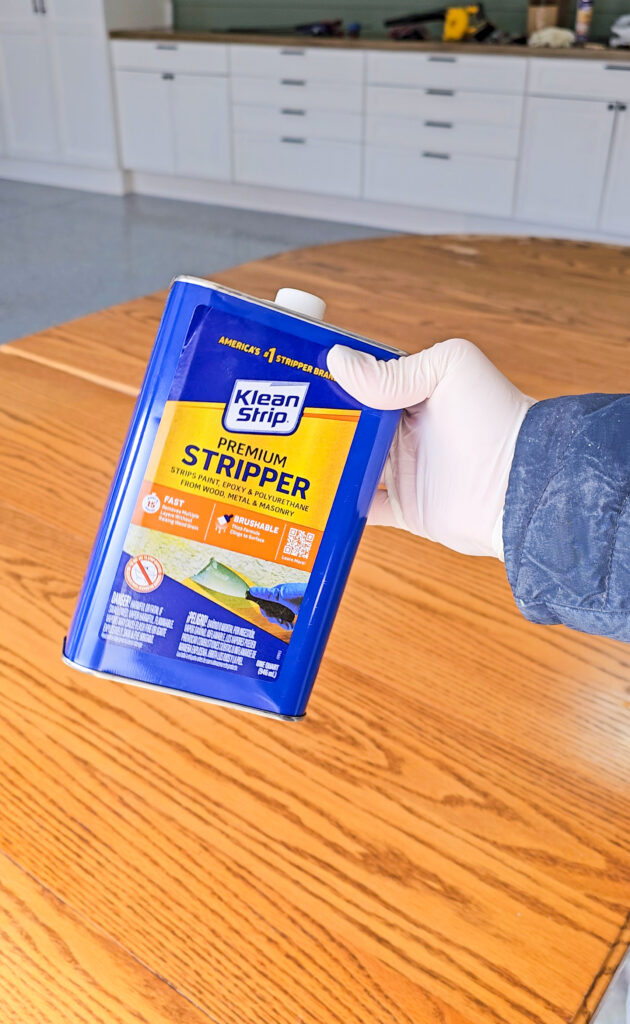
- Stripper
- Scraper
- Wire Brush
- Sander
- Sanding Pads
- Tack Clothes
- Denatured Alcohol
- Paint for Tan Wash
- Stain – Minwax Weathered Oak
- Polycrylic
- Paint Sprayer (optional)
- Spray Tent (optional)
- Roller & Tray (if not spraying)
- Shop all my decor here
Step Summary
- Apply Stripper
- Remove Stripper
- Sand remaining finish
- Clean off all dust
- Apply Tan Wash
- Apply Stain
- Apply Top Coat
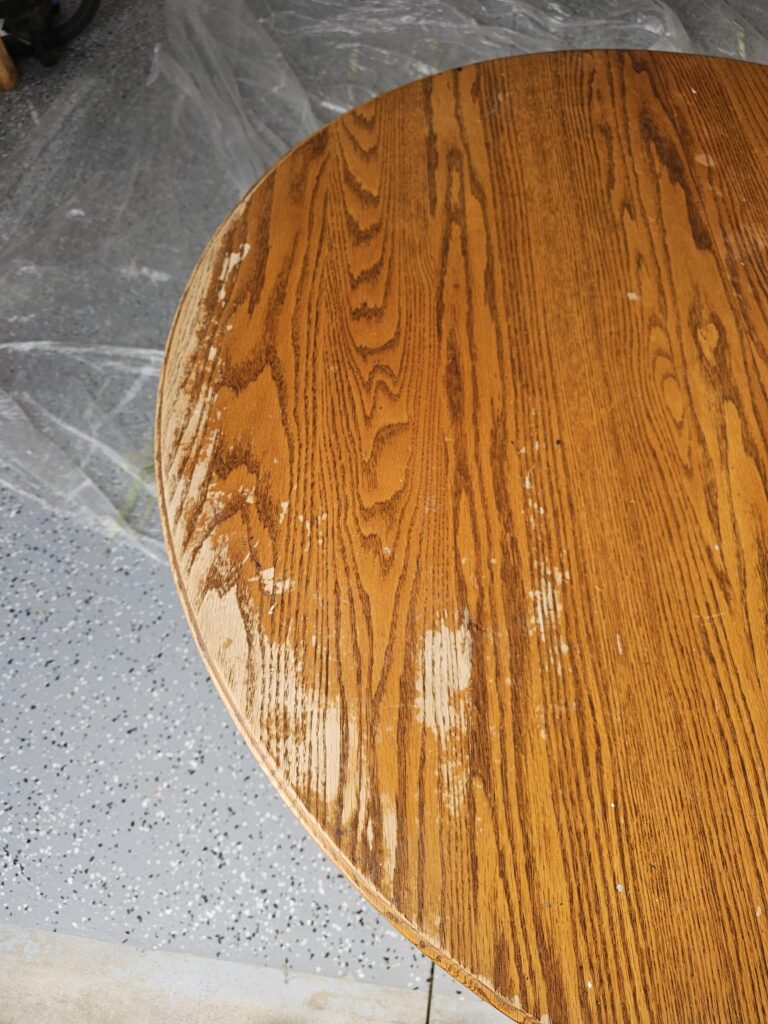
Before we get started, let me show you some before pictures!
Detailed Steps
First, let’s strip the finish off
You don’t need to strip your table, but I do recommend it. A lot of the professional finishes that are on these tables are THICK. You can drastically cut down your sanding time by using a stripper. I don’t recommend Citristrip, it is supposed to be a lower odor option, but in my opinion it just doesn’t work. Use this stripper and it will take off layers of stain and varnish quickly! It does have a strong odor, so wear a respirator mask while you use it and work outdoors if you can. Apply a thick layer of stripper and let it sit for the recommended amount of time. It is important to not let it dry out, so you can cover it with plastic or keep a close eye on it.
Remove Stripper
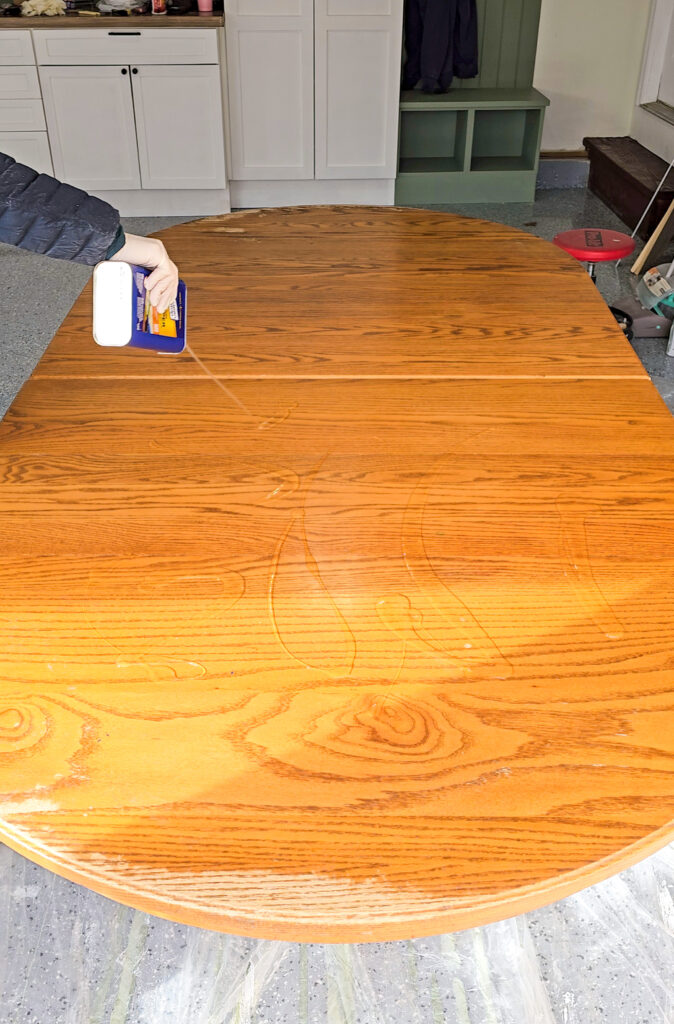
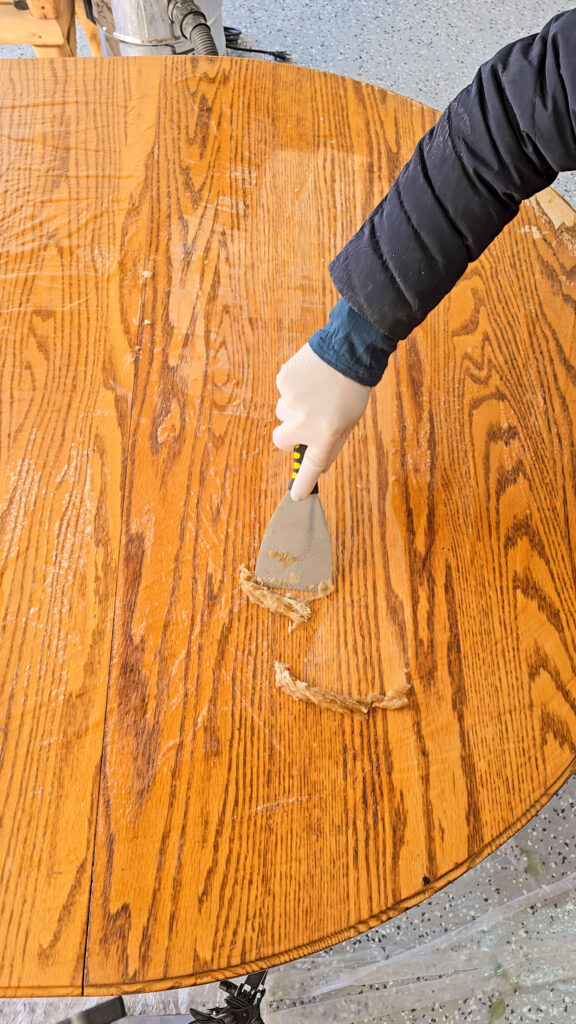
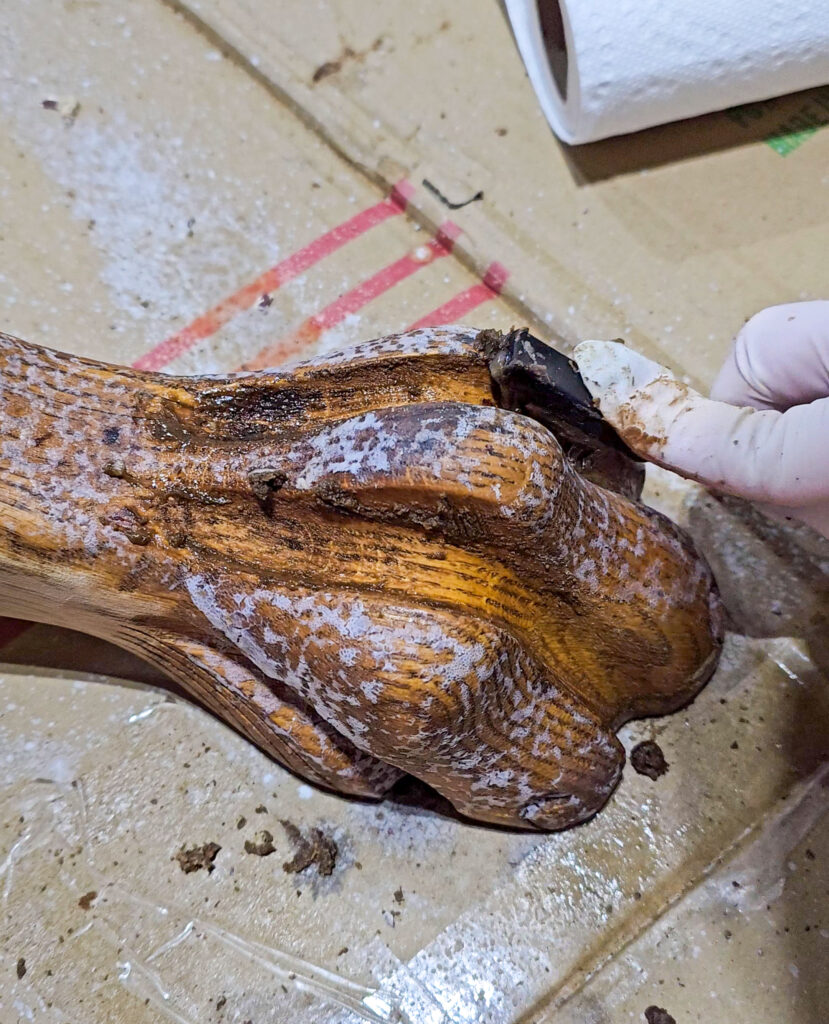
Once the stripper is ready to be removed, you can grab a metal or plastic scrapper and remove the stripper and the layers it takes off with it. Be sure to wear gloves. I usually grab a cardboard box to throw all the gunk into while I’m scrapping. Some areas I did a 2nd coat of stripper if I didn’t feel it got enough off. On the legs of my table, I used a metal wire brush to remove the stripper and finish in all the little cracks and crevices. This is a tedious task, but the wire brush helps!
Sand off remaining finish
Once your stripper has been removed, you can wipe everything down with denatured alcohol to prepare it to be sanded. Don’t be like me, wear gloves. This will dry out your hands for days! When I sand down wood, I usually start with 120 grit. Make sure to work fast and don’t leave your sander in one spot too long. Then I move to a 180 grit and finally a 220 grit. This will leave the wood smooth and ready for stain!

Clean off all the dust
Before painting or staining your piece, you will want to get off all the dust. I start with a tack cloth to get all the fine dust off. Then I use a microfiber towel and the denatured alcohol to get off any remaining dust. The alcohol dries super-fast, but before you paint or stain make sure it is fully dry.
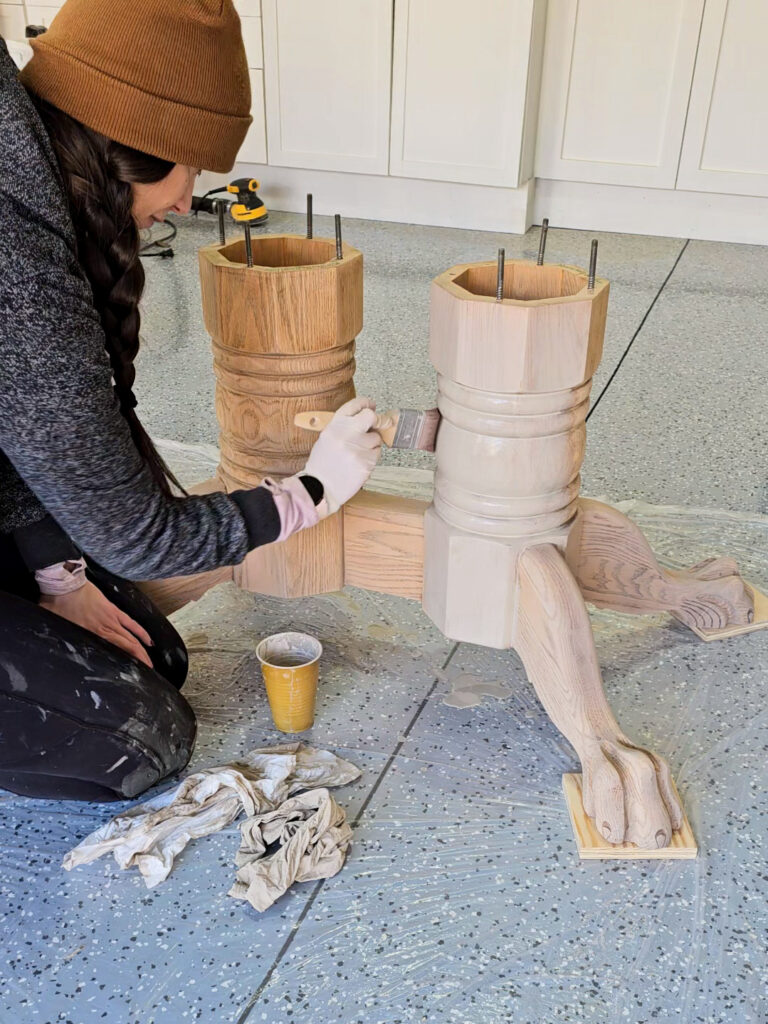
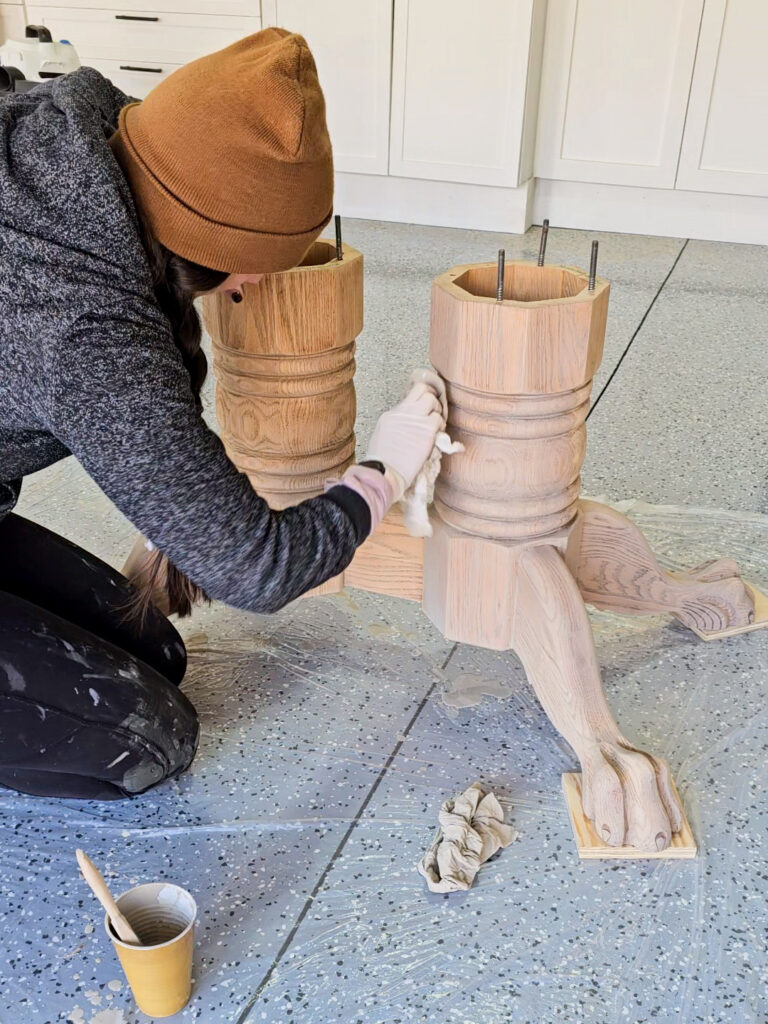
Apply Tan Wash
My table had very yellow undertones in the wood, and I wanted to neutralize the yellow a bit. A whitewash was too harsh for my wood, so I opted for a tan wash instead. You can use any tan wash you have on hand. I used Shittake by Behr. The amount of paint to water ratio is really up to you. I use about 1 part paint to 4 parts water for mine. Use a brush to apply the tan wash over your piece. After letting it sit for a couple minutes, grab a rag and wipe down the wood. You can layer on however many coats of tan wash you’d like. I did 2 coats of tan wash.
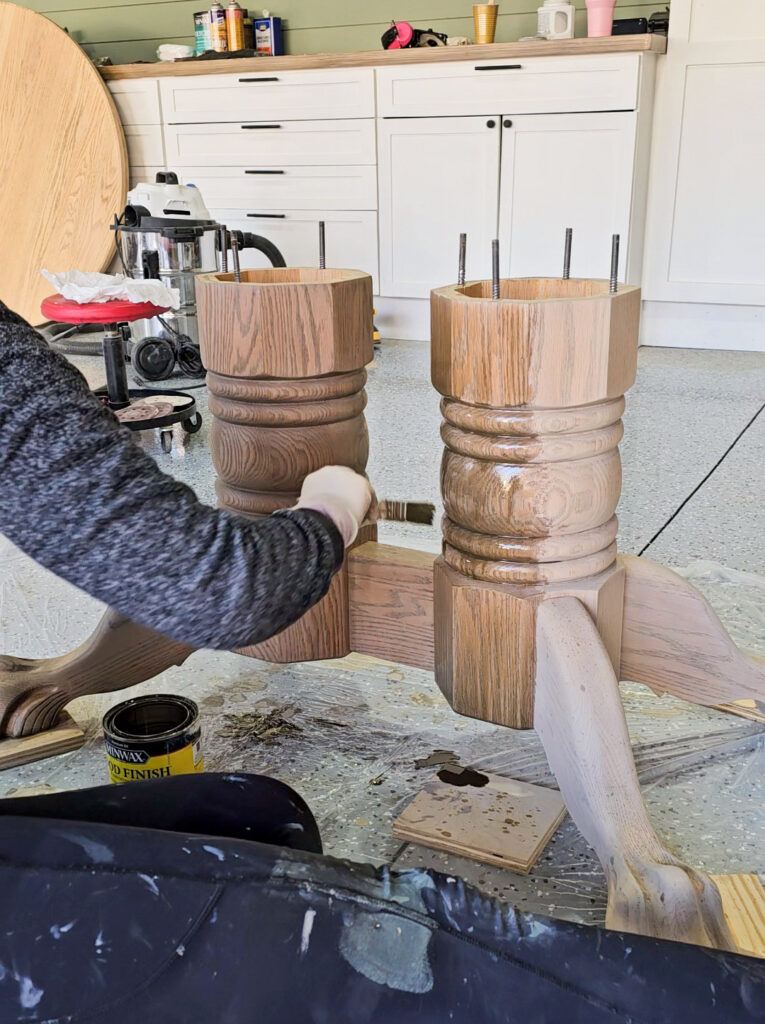
Apply Stain
You don’t need to add a stain, but I wanted to warm my wood up a bit from the tan wash. I used “weathered oak” by Minwax. Apply your stain generously and then wipe off excess using a rag. I did 2 coats of stain on my table.

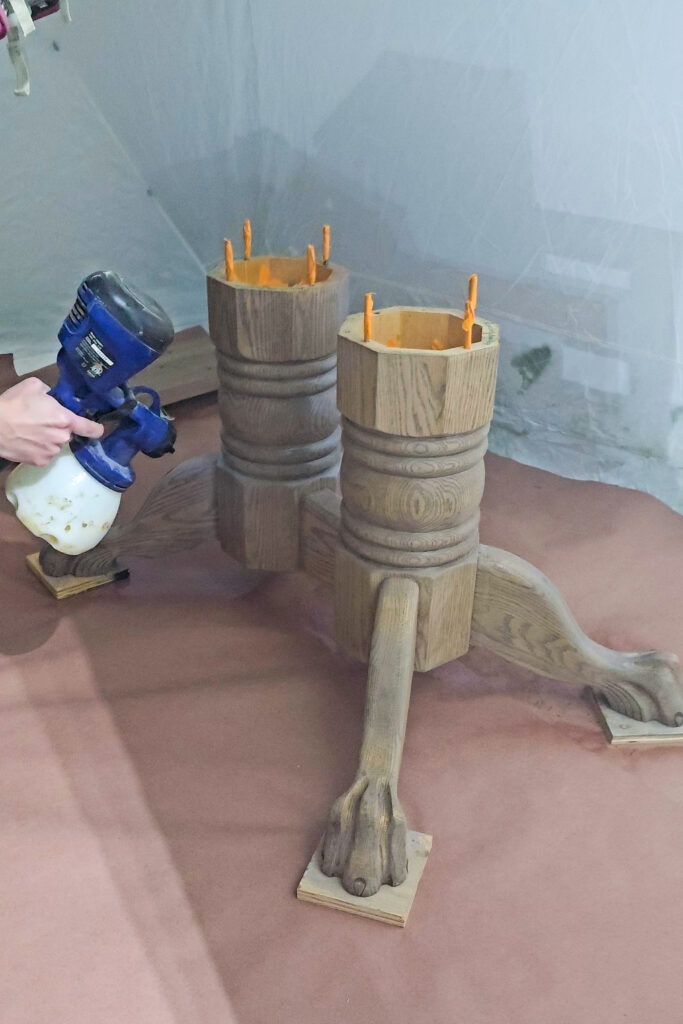
Apply Top Coat
The best way to ensure your furniture is protected is by adding in a top coat. I recommend this polycrylic by Minwax. It doesn’t yellow over time and provides a beautiful smooth finish. I used my paint sprayer to apply the top coat, but you can also use a foam roller brush. In-between each coat of poly, lightly sand with a 220 grit and then wipe off any dust with your tack cloth. I applied 5 coats of polycrylic to my table.
I am in love with how this table turned out. It fits in my space perfectly. These chairs were so affordable from Amazon and have added a modern touch to this table. What do you think?
Head here to see my video on “How to Redo a Dining Room Table”
Shop all my decor by heading to here! My rug, chairs, and light are all available.
Feb 21, 2024


