


")
How to Make This Diamond Accent Wall
This was one of the first accent walls I added to my home! It’s such a fun design that it really feels like you are adding artwork to your space, not just a fun design. Don’t let the diamond intimidate you, this is just squares turned on their sides. Let me show you how you can do this too!

*I may earn a small commission on any linked items in this article*
Supplies
- 1×2’s or 1×1’s boards
- Wood Filler
- Caulk
- Paint
- Paint Brush & Roller
Tools
- Saw
- Nail Gun
- Level – make sure it has a 45 degree marker
- Tape Measure
Steps Summary
- Determine Design
- Cut your boards to correct sizes
- Use nail gun to attach boards to wall
- Use a level with a 45 degree bubble to make sure all your boards are perfect angles
- Fill in all those nail holes & caulk along all edges
- Paint wall any color
Detailed Steps
Determine Design
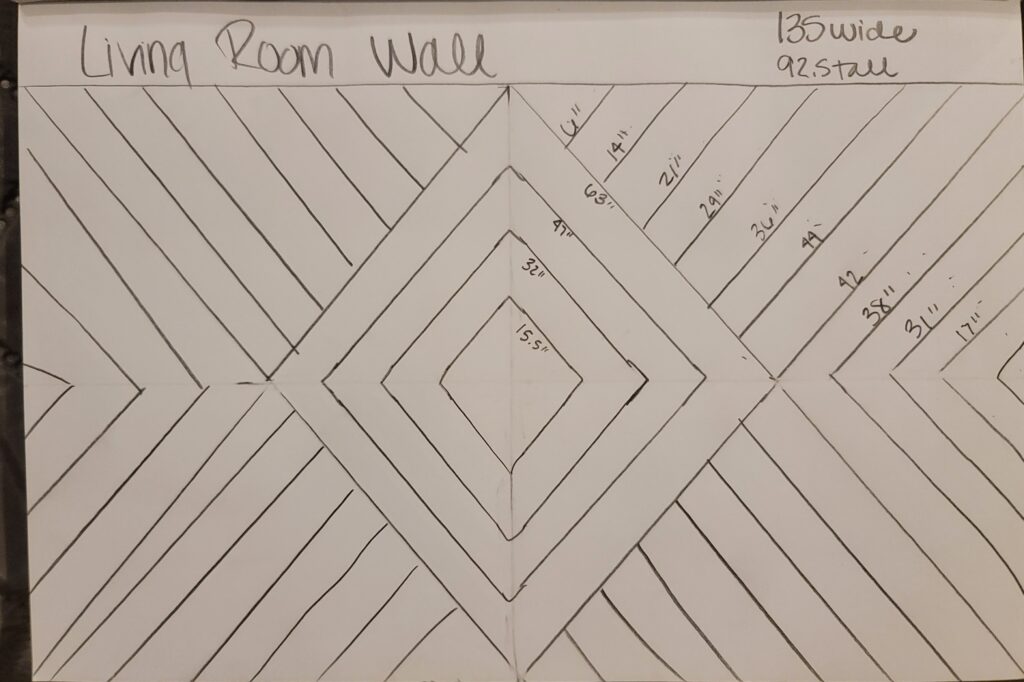
This did take a little planning, but the easiest way to do it was finding the center of your wall and how far apart you want your diamond boards to be apart. Mine are 12” apart. I found it best to draw it all out on the wall with a pencil and level to make sure you like the spacing.
*Note: To ensure you end up with a perfect diamond, I would draw this out on your wall first and work your way in. This will help create that perfect design! I first drew it on paper and then traced it on my wall before making any cuts*
Cut your board to the correct sizes
After adding in the framed edge, I started hanging boards of my big diamond first on the outside and worked my way in. Each cut will be 45 degree to make perfectly square edges. These are just boxes turned sideways.
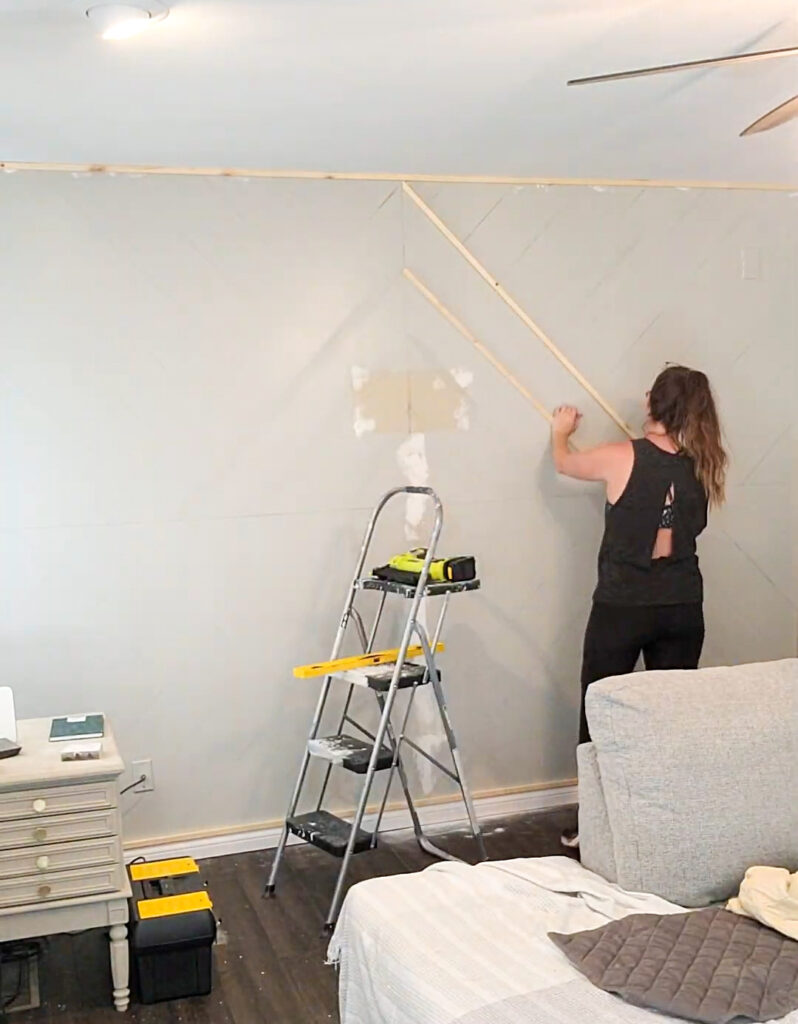
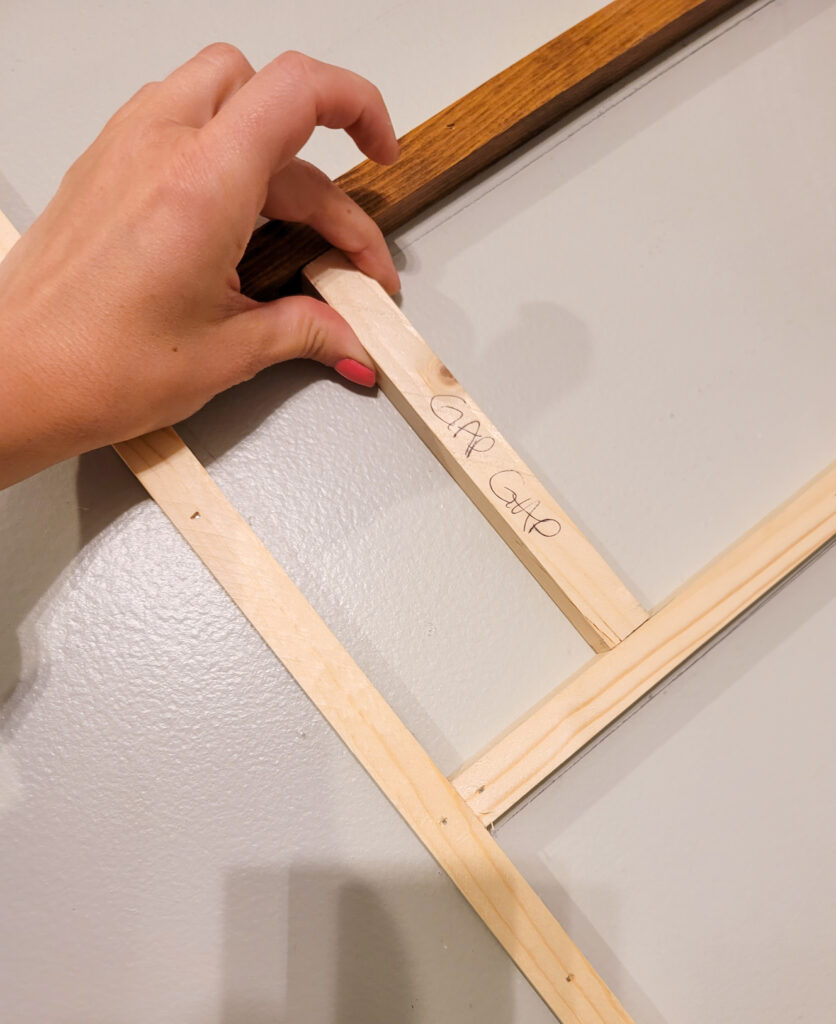
Use nail gun to attach boards to wall
Point your brad nailer in at opposing angles to add extra security for your boards. Sort of like making an “X” into your wall using your nailer. These boards have been up for 3 years now and not one has moved with this method! Also, I cut this handy spacer board to help make all my gaps even!
Use a level with a 45 degree bubble to make sure all your boards are perfect angles
For years I didn’t know why my level had a bubble turned sideways, but it’s to make a perfect 45 degree! Not all levels have this, so if you are going to invest in one, make sure it does.
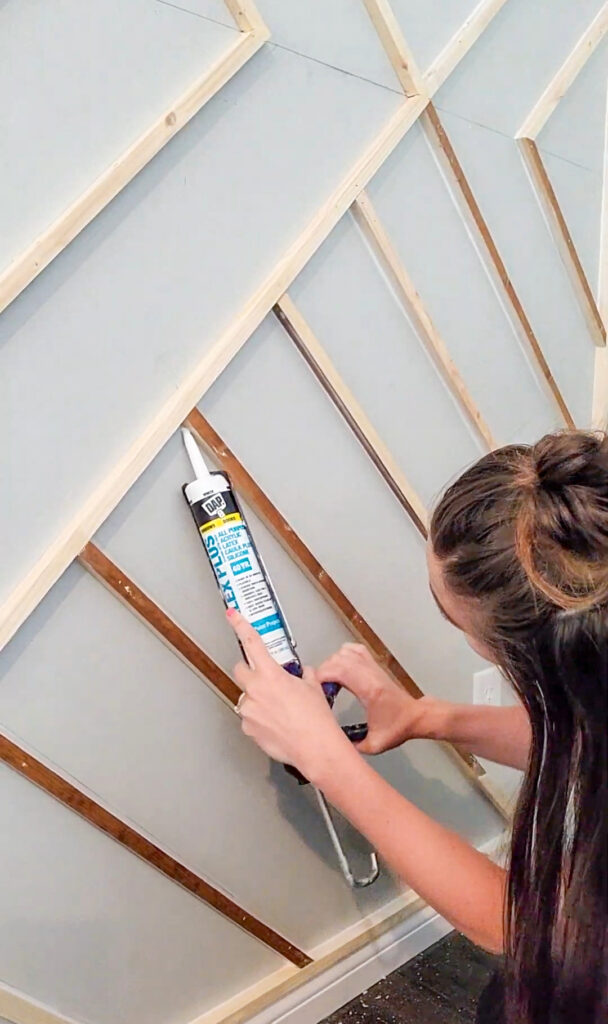
Fill in all those nail holes & caulk along all edges
Trust me, you want to do this! It may be time consuming, but throw on some music or a podcast and get to work filling all those nail holes and caulking along all the edges. This gives your project a professional finished look!
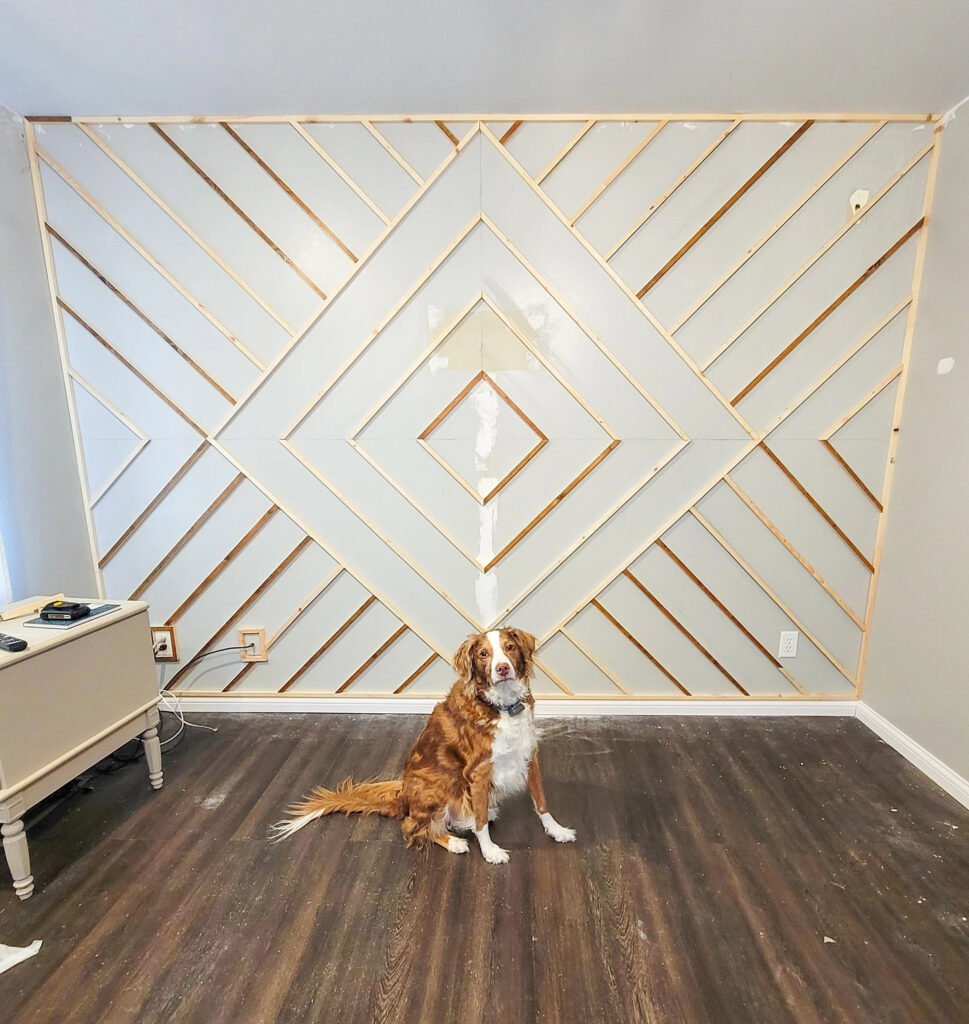
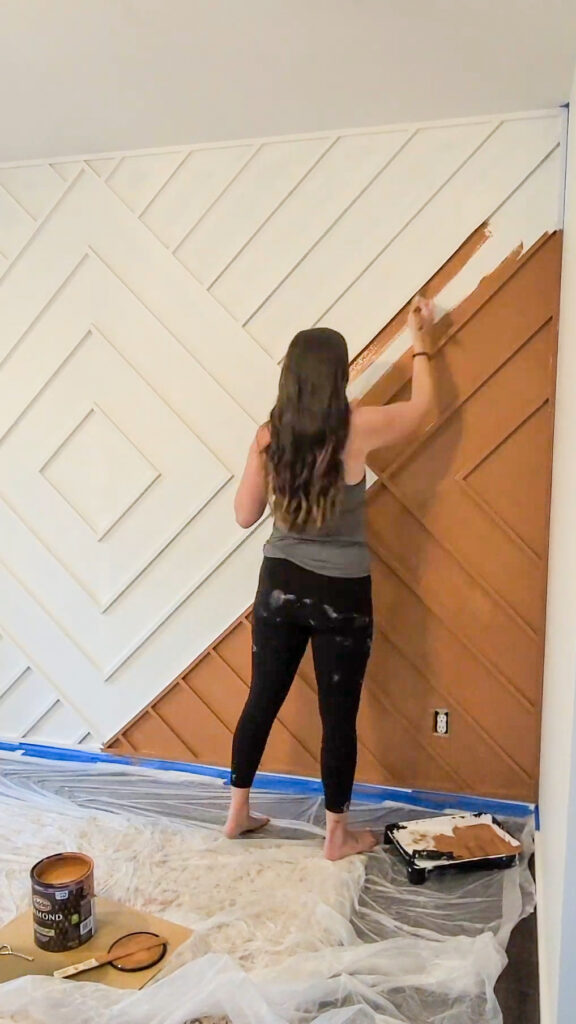
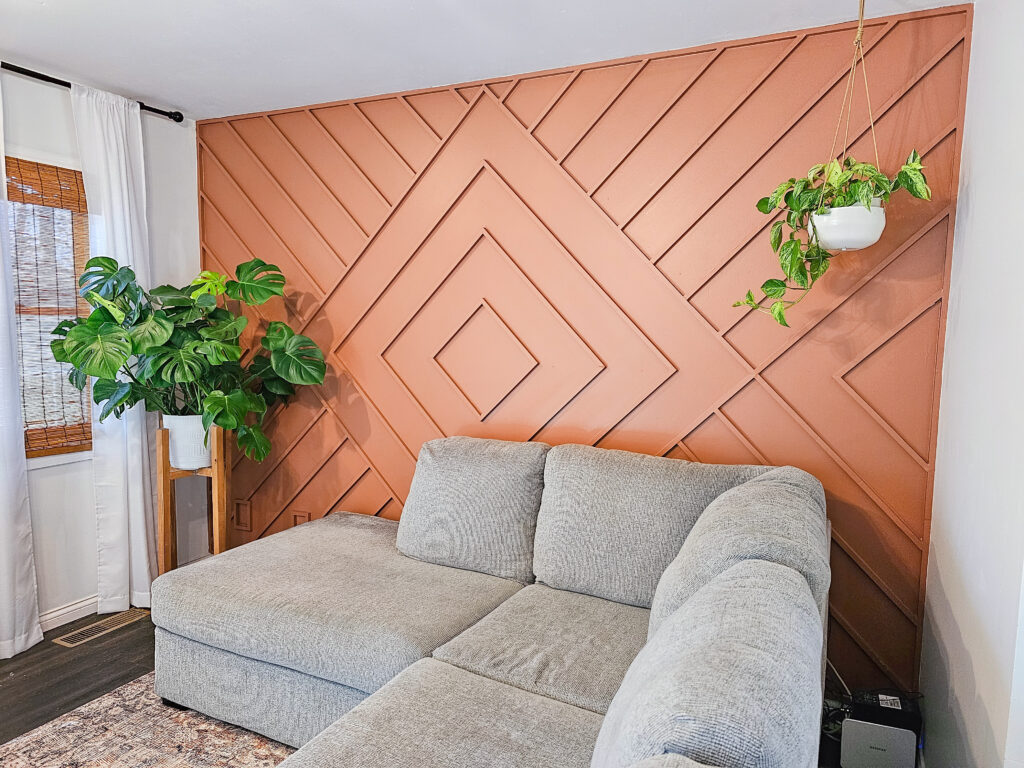
Paint your wall any color you’d like!
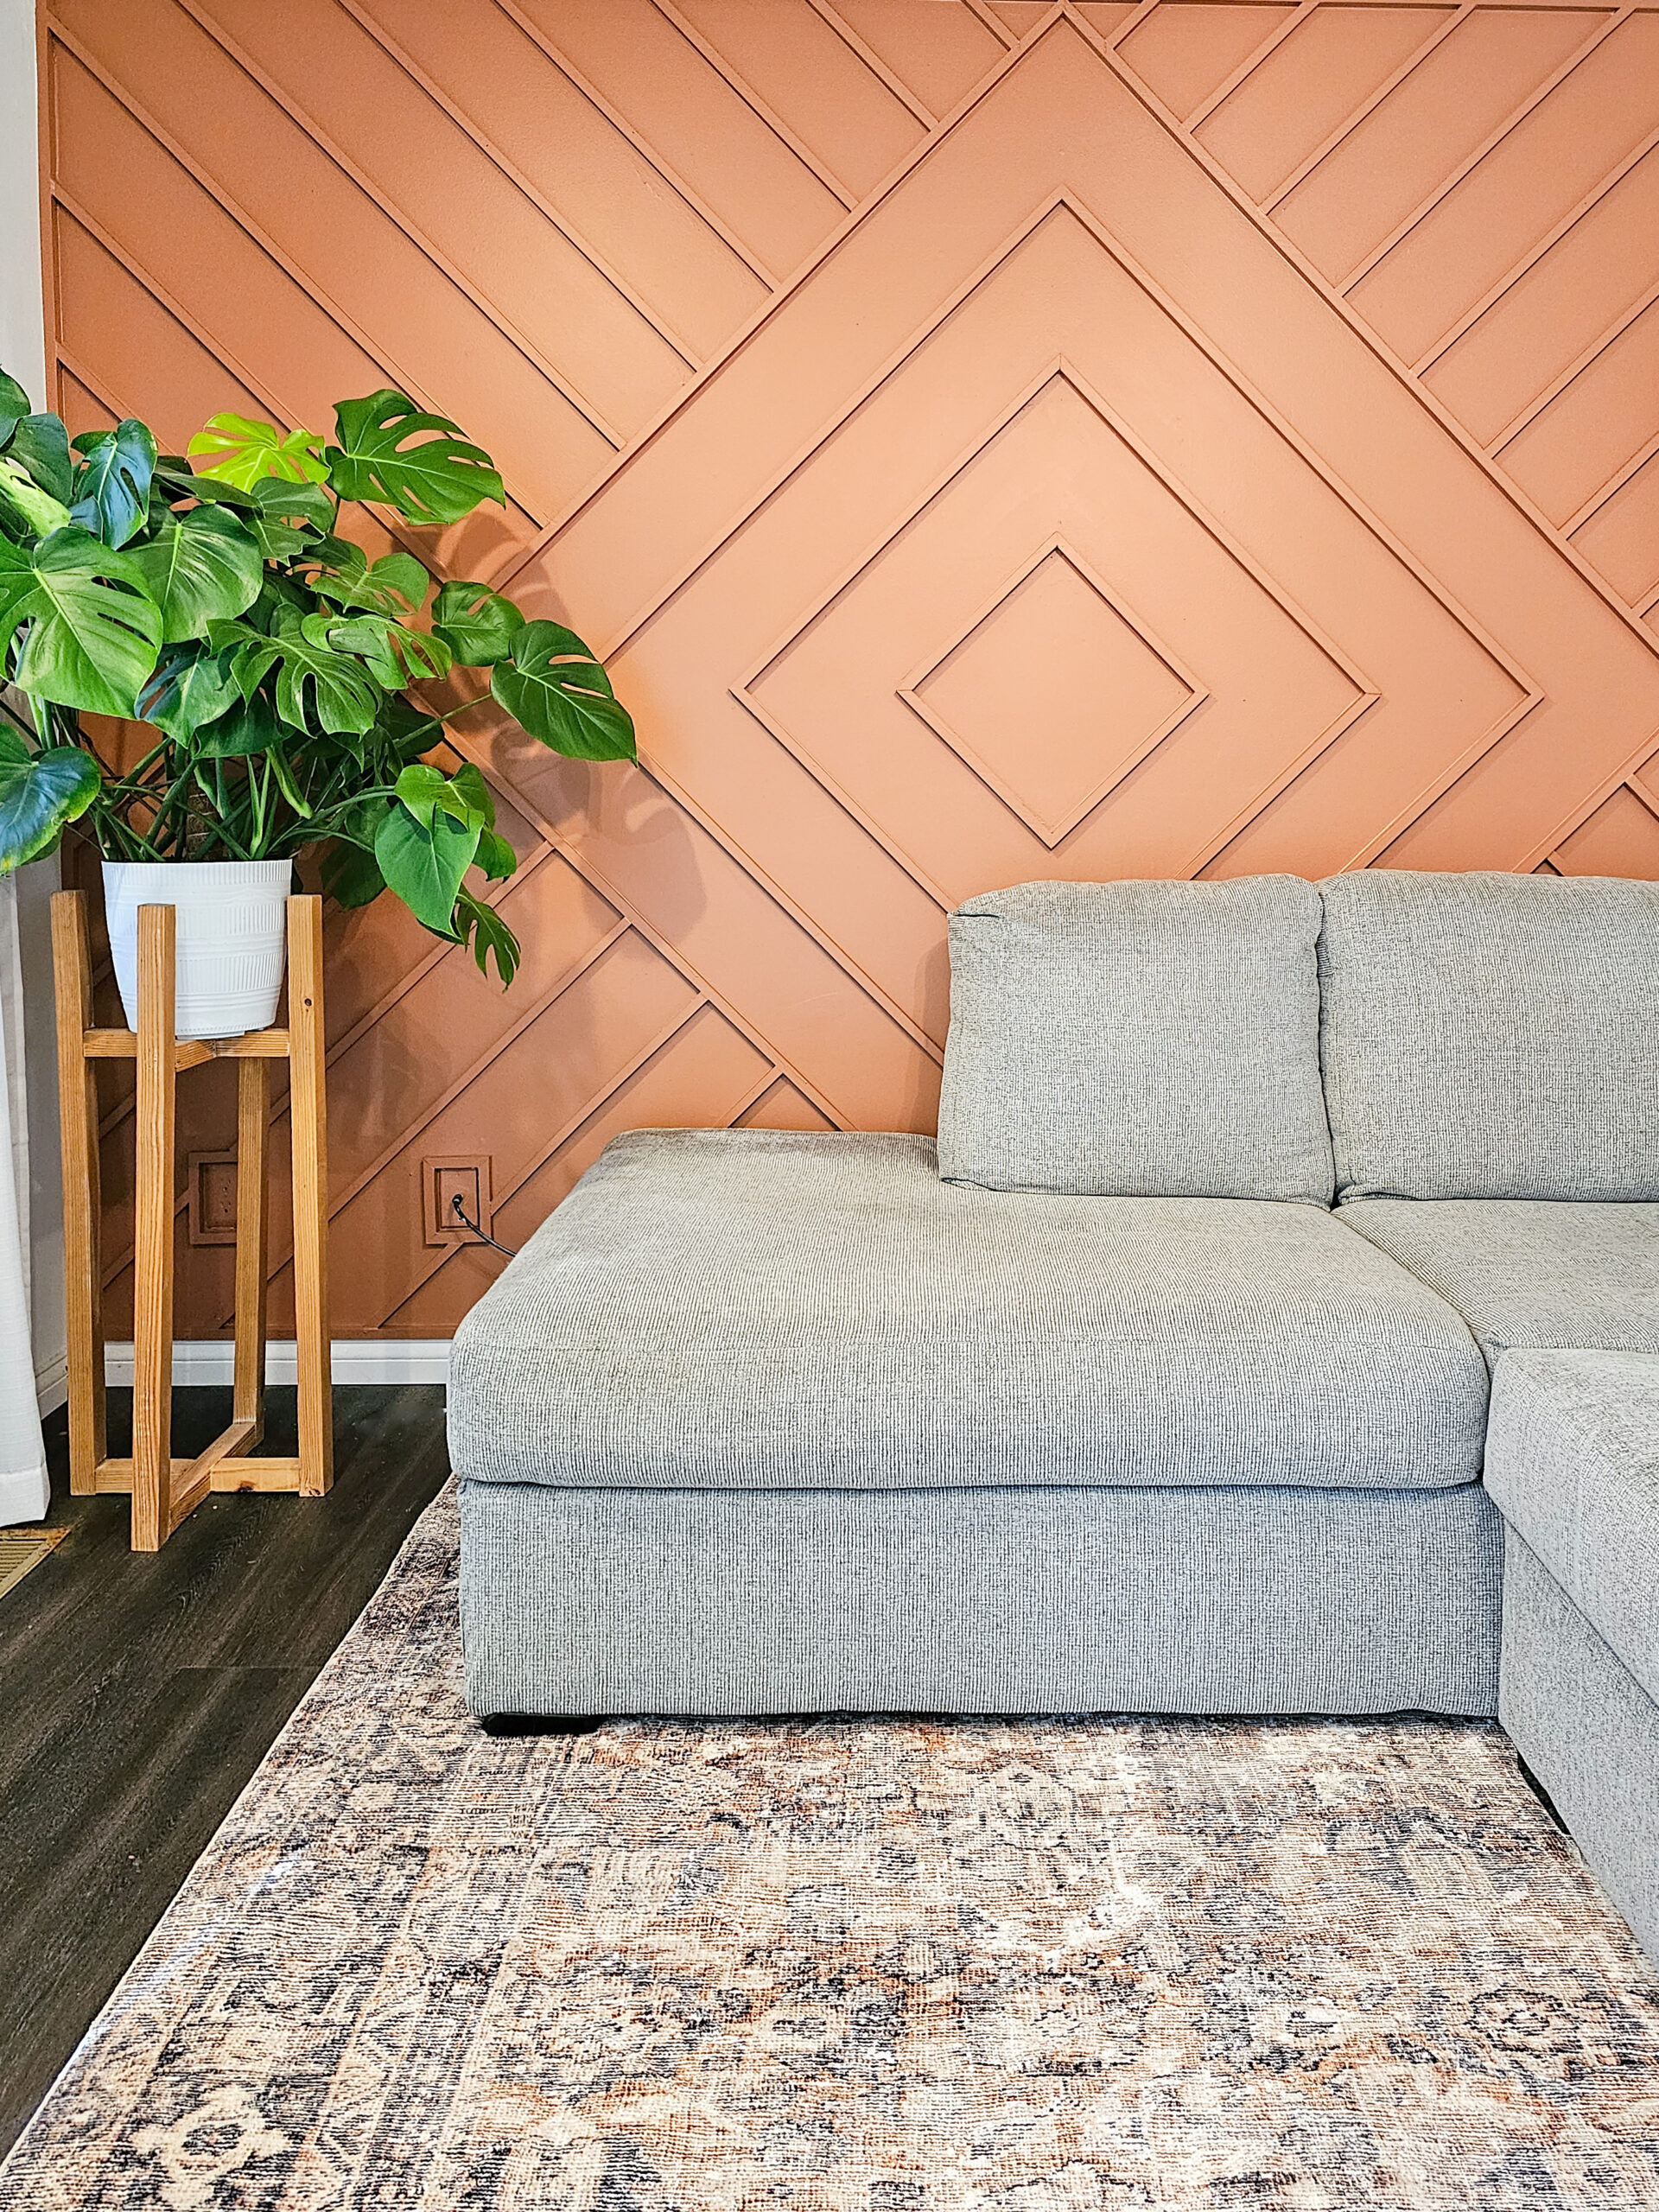
I had no idea what color to paint this wall… for a year! I left it just white with primer and eventually added in this color Nutmeg by Glidden Paint! It is a perfect burnt orange color and completely transformed our space.
Stand back and admire your new artwork in your home!
If you are looking for more accent wall ideas, be sure to check out my post “5 Easy Projects using 1×2’s” for even more easy DIY accent walls!
Watch a video on “How to Make a Diamond Accent Wall” by heading to my Instagram here!
Jan 28, 2024