")
How to Make Circle Floating Shelves

Floating shelves are great to add function to any space, but this is a fun way to add dimension as well! Let me show you how to make this an easy DIY project for beginners with minimal tools!
*I may earn a small commission on any linked items in this article*
Supplies
Tools
- Saw – this is what I use, but any saw will work
- Pocket Hole Jig
- Power Drill
- Level
- Tape Measure
Detailed Steps
Determine width of circle
This is really up to you! But I wanted each of my floating shelves to line up with at least 2 studs. So I marked where my studs were at on the wall and determined my width from there.
Draw your circle
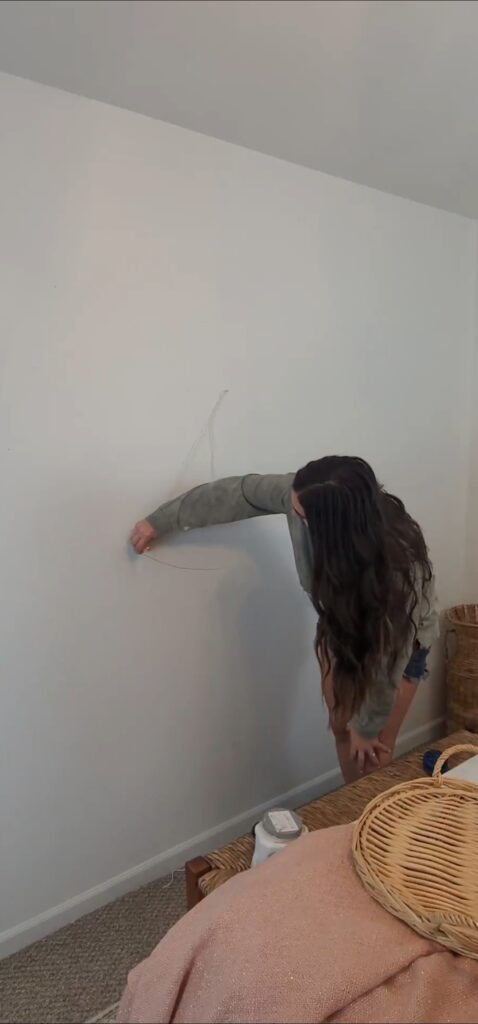
I put a small nail in the center of where my circle will be and taped a pencil to the end of string. The string is exactly half of the width of my circle. Then with one end of the string attached to the nail and your pencil on the other side, draw out your circle.
Mark off your sections and add in paint
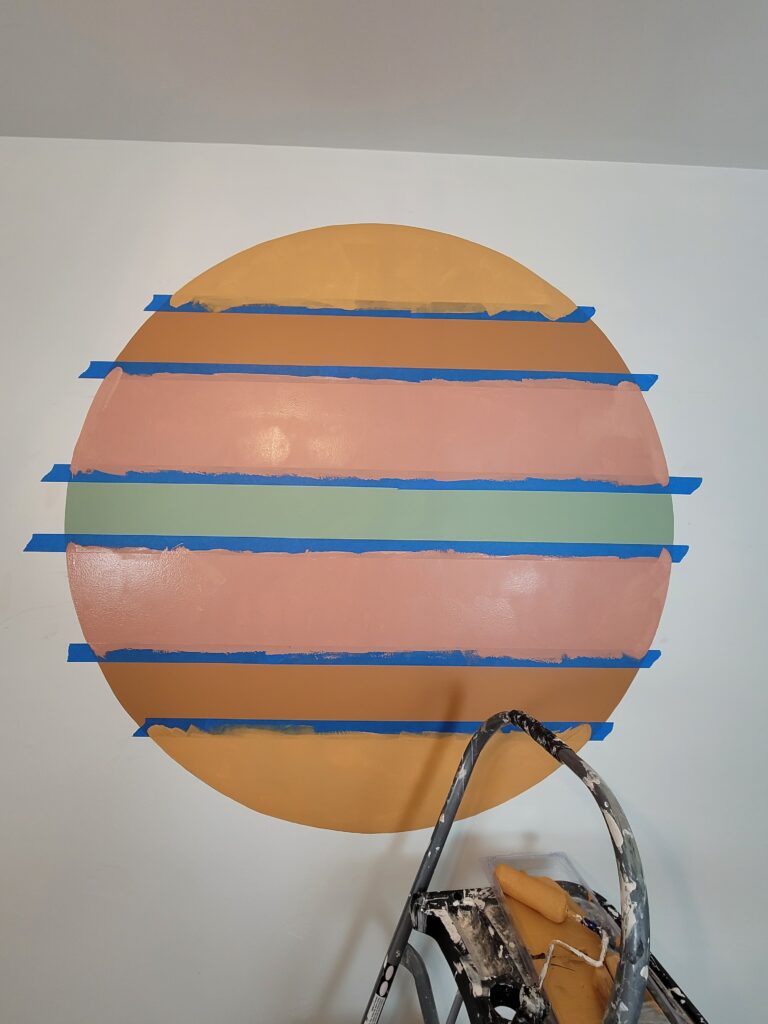
Decide what colors you want to use and where they will fall in your circle. I evenly spaced mine apart. Make sure to use painters tape for perfectly straight lines. I wanted my shelves to give a sunset vibe on a beach!
Cut Boards to Correct Width
I used 1×4 boards for my floating shelves. If you are wanting to add bigger decor, I’d recommend a deeper board. Use a saw to cut your boards to the correct width of your circle. Each board length will depend on where it falls in your circle.
Make Pocket Holes that line up with your studs
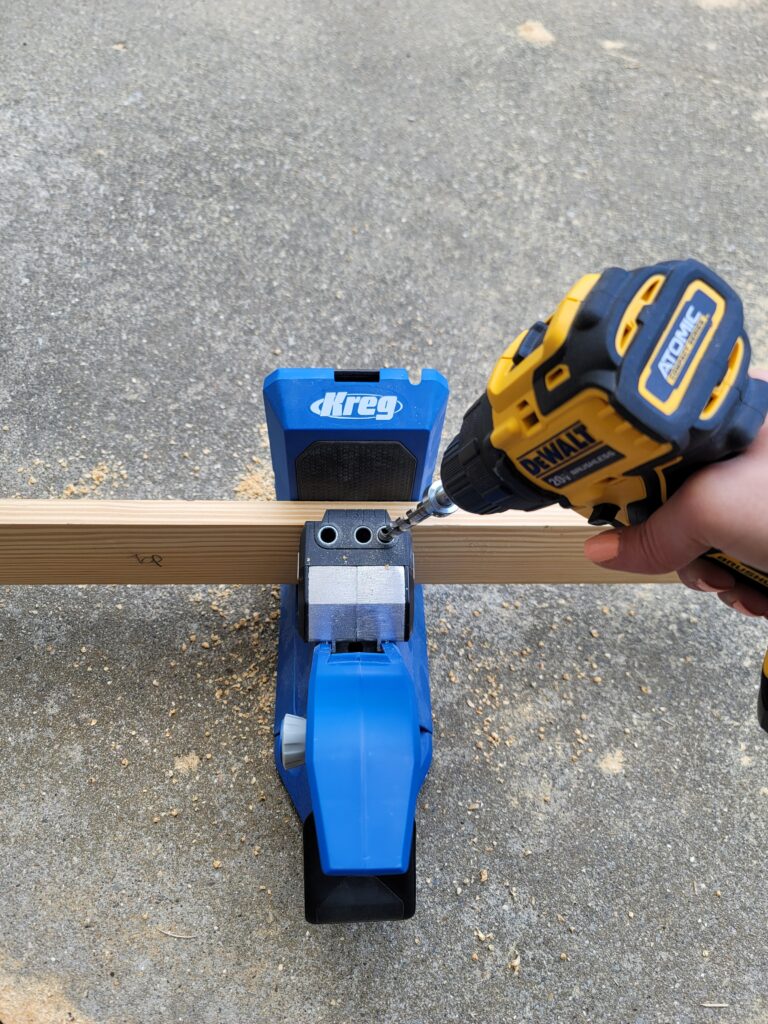
Once you have your shelves cut to the correct width, you can mark where your studs will align up on that board. You will need to make your circle wide enough, so each shelf hit at least 2 studs. Once you know where the studs are, make pocket holes using your Pocket Hole Jig in that exact spot on the bottom of your shelf boards.
Attach Shelves to Wall
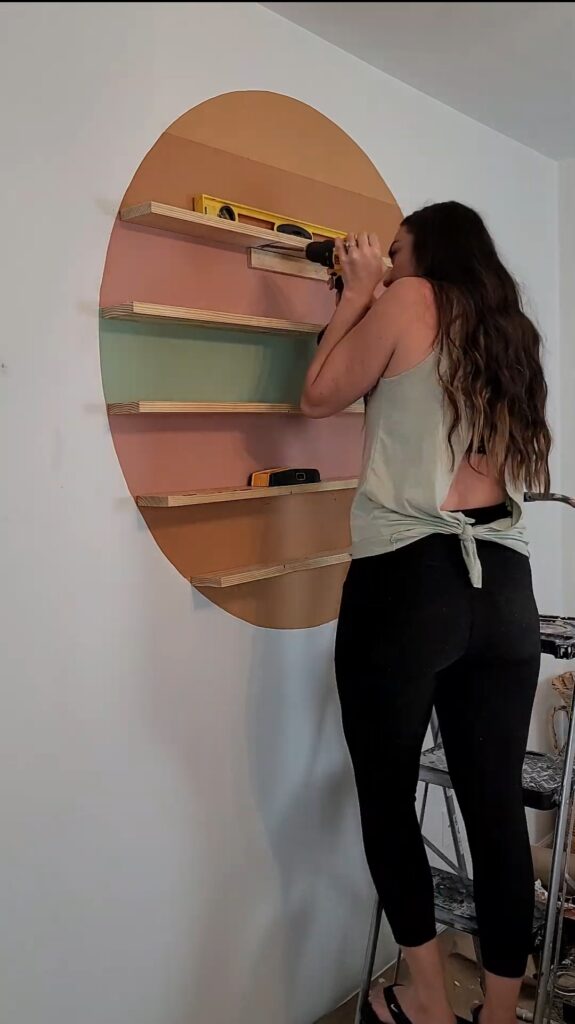
Use a level to make sure your boards are straight and grab your power drill. Using pocket screws (2” long at least), drill them into the studs. Your boards should feel secure when you are done. To give myself an extra hand, I nailed in a small board temporarily to hold my shelf up while I drilled into the studs.
Fill pocket holes with filler and touchup paint
To give your floating shelves a seamless look, fill in all pocket holes with filler. You can also use wood plugs, but filler is fine too. This is a pain since you are working on the underside, but it will give your shelves a better look! Once they are filled and sanded down, touchup any paint spots.
Now add in your decor and your shelves are done!
See Video Tutorial on my Instagram here!

Jan 7, 2024